How to Add Tasks to the Calendar of WP Project Manager
WP Project Manager has a calendar feature for your projects. You can view an interactive calendar view of your projects and tasks. To view the calendar, navigate to WP Admin Dashboard → Project Manager → Calendar.

If you log in as an admin, you will only see the projects and tasks assigned to you. However, you can filter the tasks by projects or users if needed.
If you want to view any of the other users' tasks, select the project and then choose the user. Click on the Filter button to see that user's task.
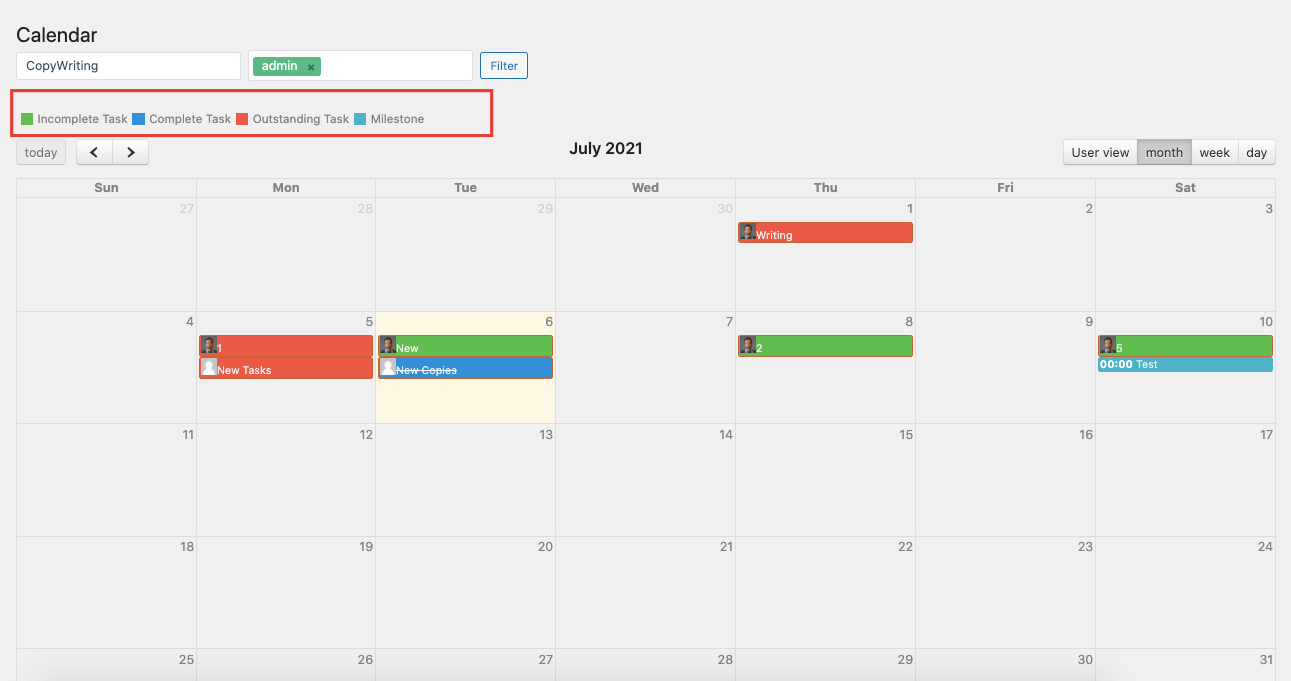
Calendar Color Annotation
This area shows you the explanation of the differently colored taskbars. With the colored taskbars, you can quickly get to know whether a task is incomplete, complete, or outstanding. You can also see if there is any milestone with the help of color.
Taskbars
You will see different bars that indicate the status and duration of the tasks. These are called taskbars. The longer the task duration, the more stretched the bar for that task.
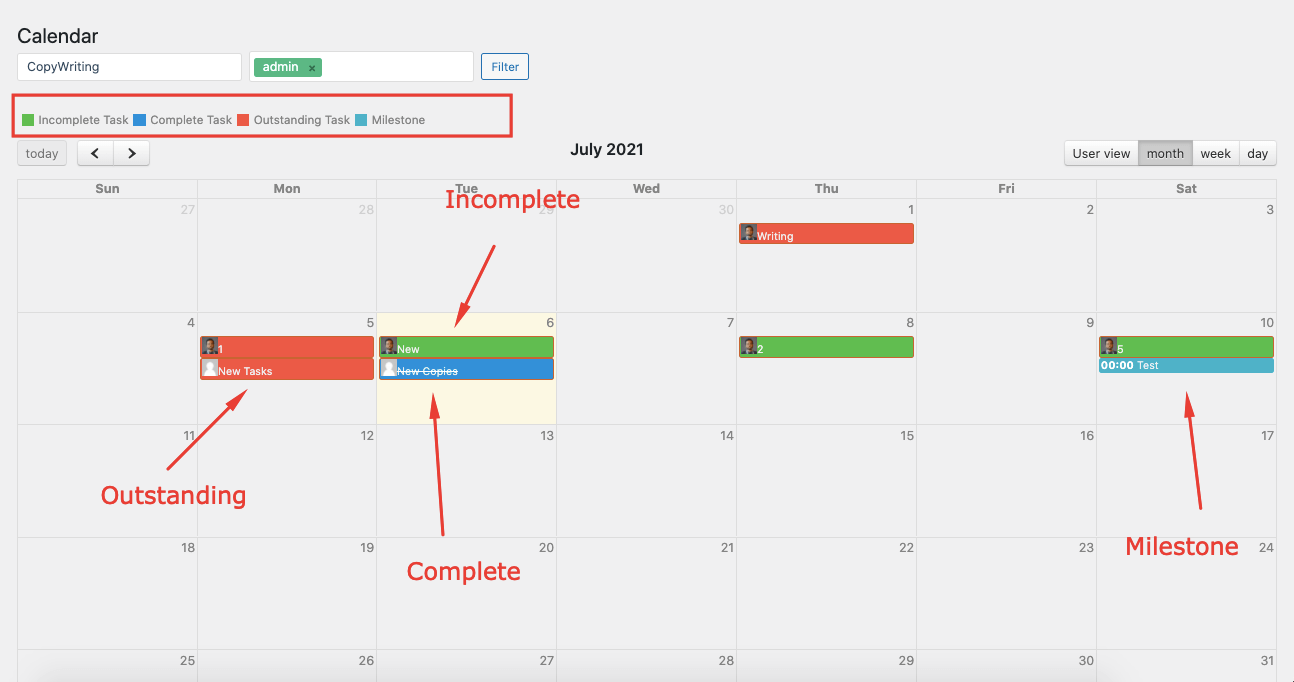
The Red bars represent the due tasks or outstanding tasks or the tasks that have a starting date but do not have a due date.
The Green bars represent the ongoing tasks or the tasks your team members are working on.
The Blue bars represent the completed tasks.
The light Blue bars represent the milestones you set for the project.
Filtering the Calendar
When you navigate to the calendar, it will show all the tasks for all the projects and users you create. But you may wish to see only the tasks for a particular project and user.
Luckily, you can filter the tasks shown on the calendar using three methods:
- One is selecting a project
- Another is selecting a user.
- The other is by selecting both a project and a user.
Filter by Project
Choose a project from the dropdown list and hit the Filter button in order to see the tasks for your desired project.
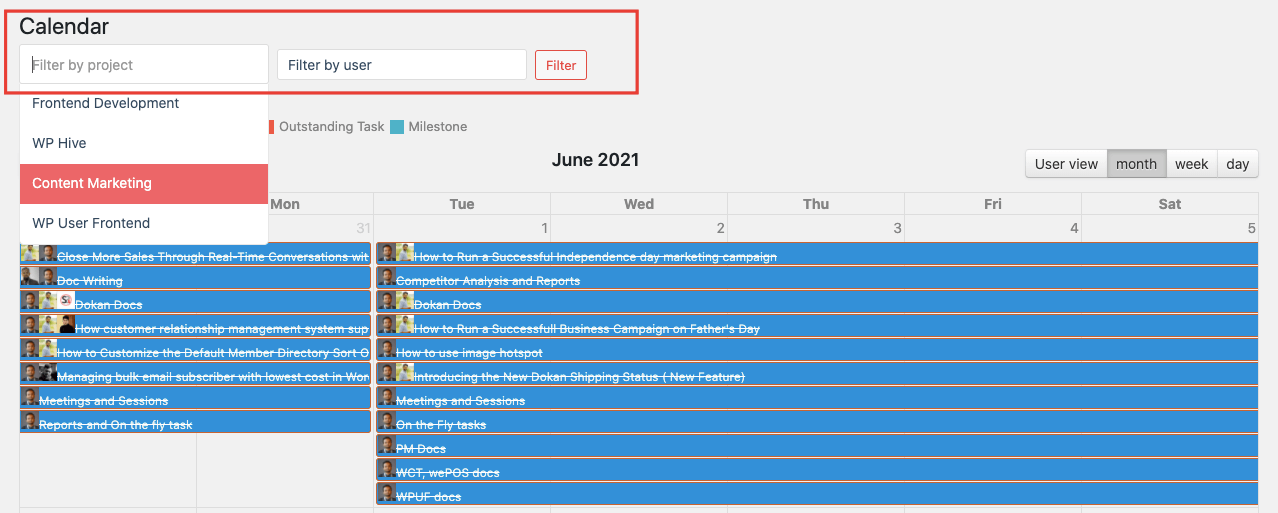
You can also choose the monthly, weekly, and daily options to see the tasks.
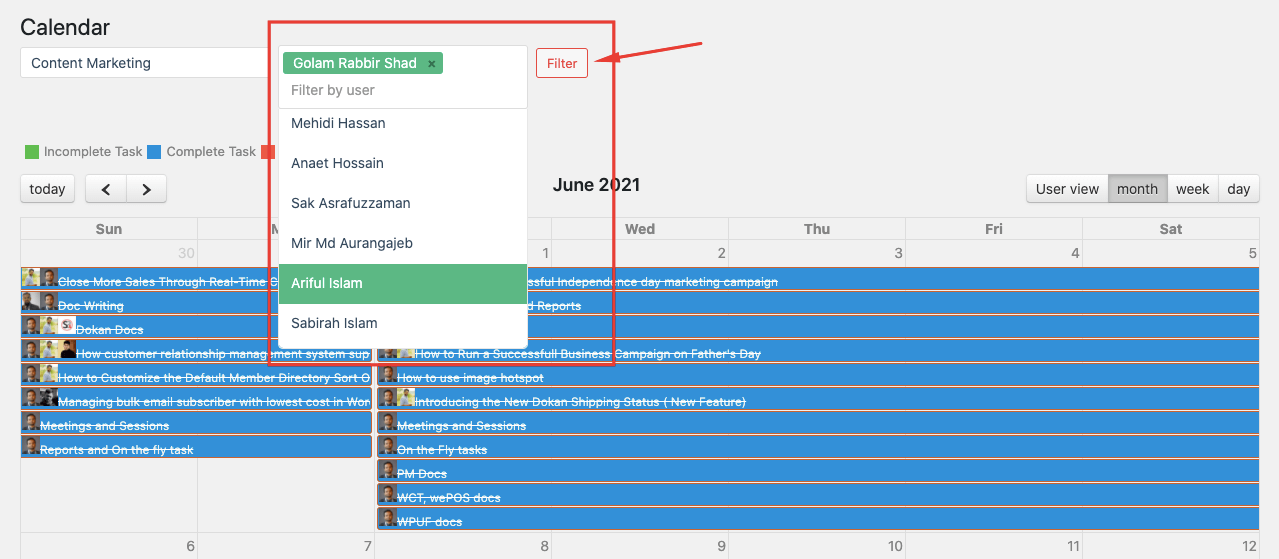
Filter by User
Choose users from the dropdown and hit the filter button to see the tasks of those users only:
Filter by Both (Project and User)
You can also specify projects and users together and filter the tasks accordingly:
Users, Monthly, Weekly, and Daily View
You can get 4 types of views in the calendar. They are:
- Users View
- Monthly View
- Weekly View
- Daily View
Users View
See all the tasks from the users' perspective by selecting the User View tab.
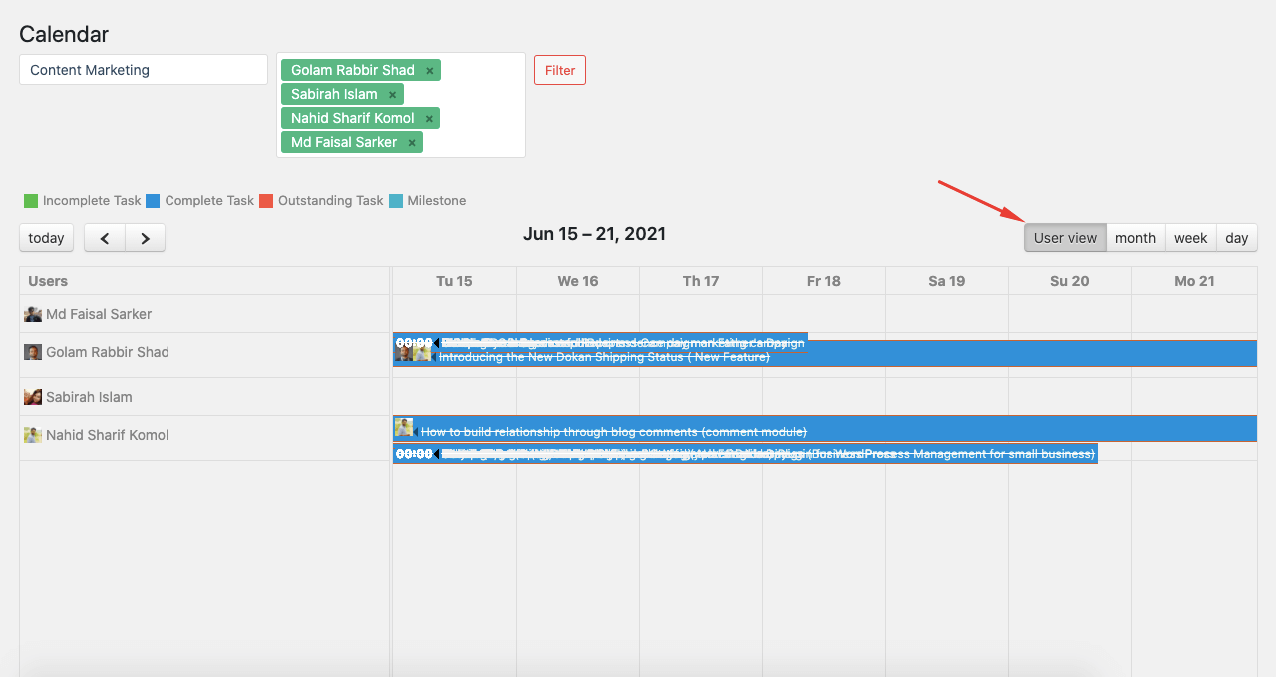
However, you can also choose certain users and projects to filter tasks and get a user view.

Note :
- The user view will only show tasks for one week.
- You can easily navigate between dates in this view using these two icons (<,>).
Assigning Tasks in User View by Dragging and Dropping
You can also assign tasks from one user to another user by simply dragging and dropping a task in the calendar.
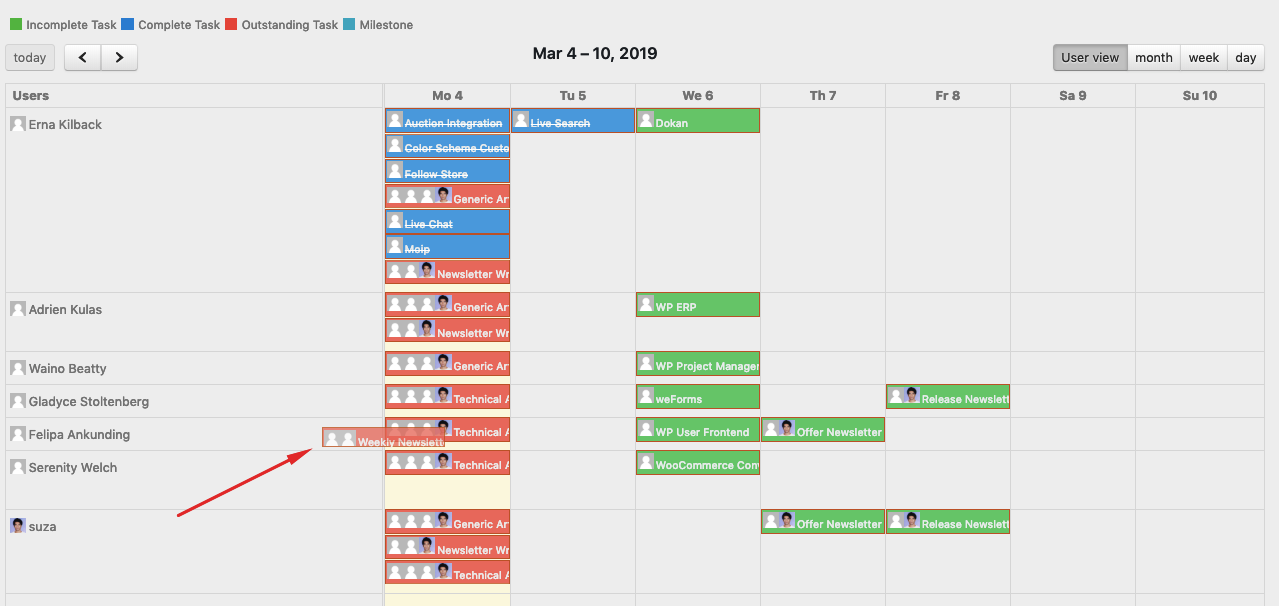
For example, you have two users. One is Felipa and the other is Gladyce. Now, if you move a task of Felipa to Gladyce by dragging and dropping then Felipa will no longer remain assigned to that task. Rather Gladyce will be assigned to that task.
Another thing is when you are dragging and dropping a task to a different date the date will also be changed accordingly.
Monthly View (Default View)
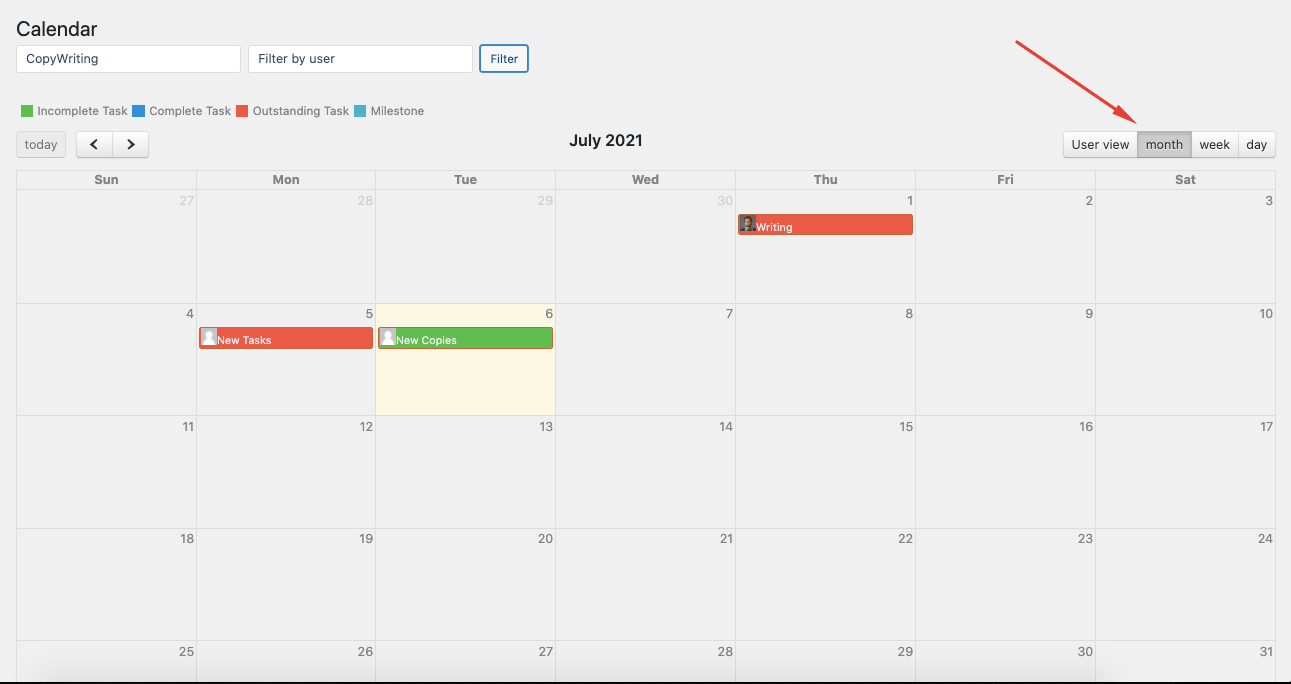
Selecting this option will only show you the tasks on a monthly basis. Use the left single arrow and the right single arrow to navigate to the previous and next months.
Weekly View
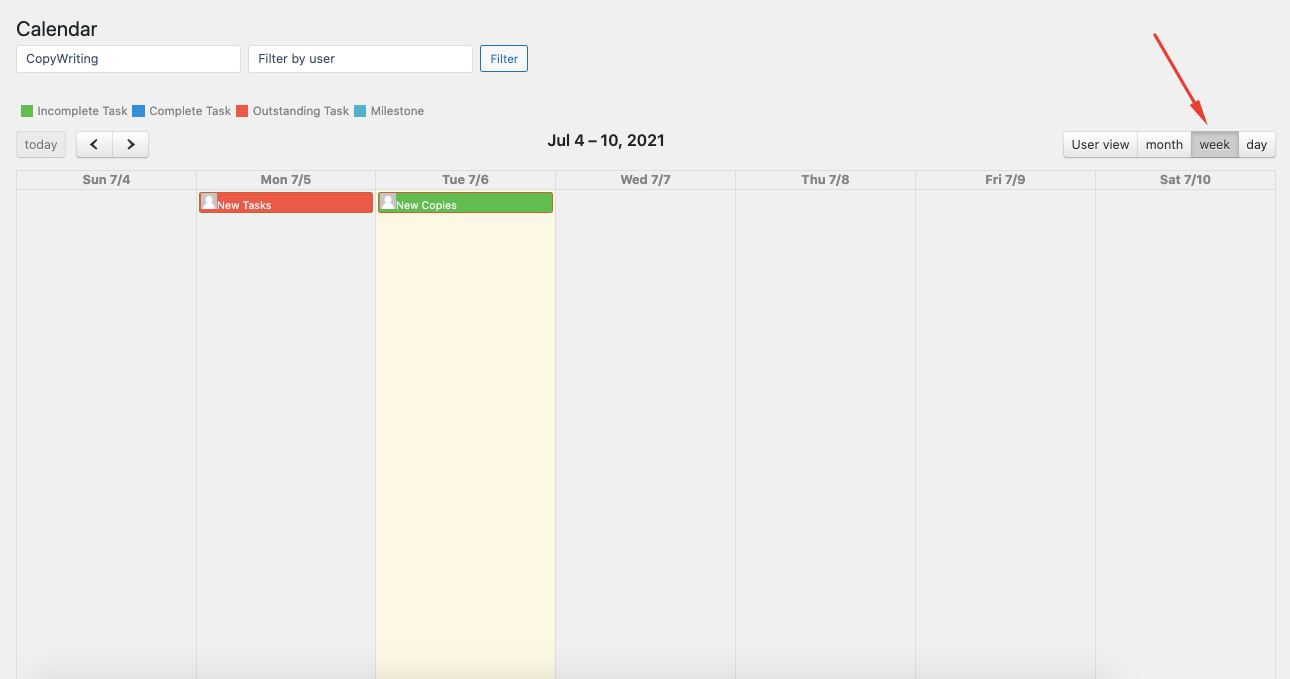
Selecting this option will only view the tasks on a weekly basis. Use the left single arrow and the right single arrow to navigate to the previous and next weeks.
Daily View
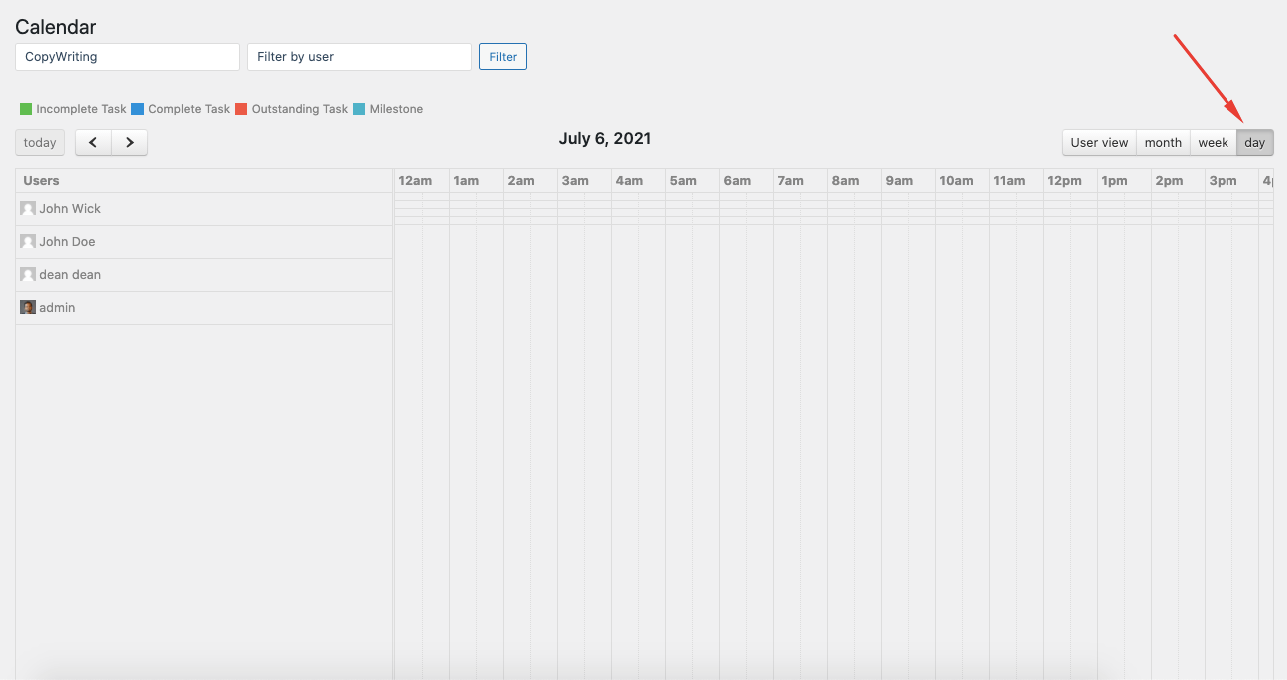
Selecting this option will show you the tasks on a daily basis. The daily view counts and shows tasks from 12 a.m. to 11 p.m. of a day, so it is a 24-hour calendar view. Use the left single arrow and the right single arrow to navigate to the previous and next days.
Note
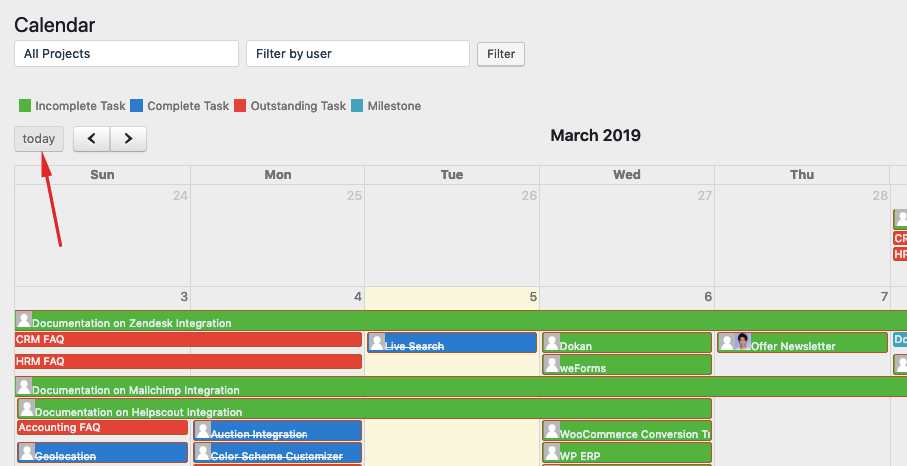
- you can use the ‘today‘ button to quickly navigate to the tasks for the current day you are working on. The button remains deactivated if you are already on the day you are working.
Drag and Drop Tasks
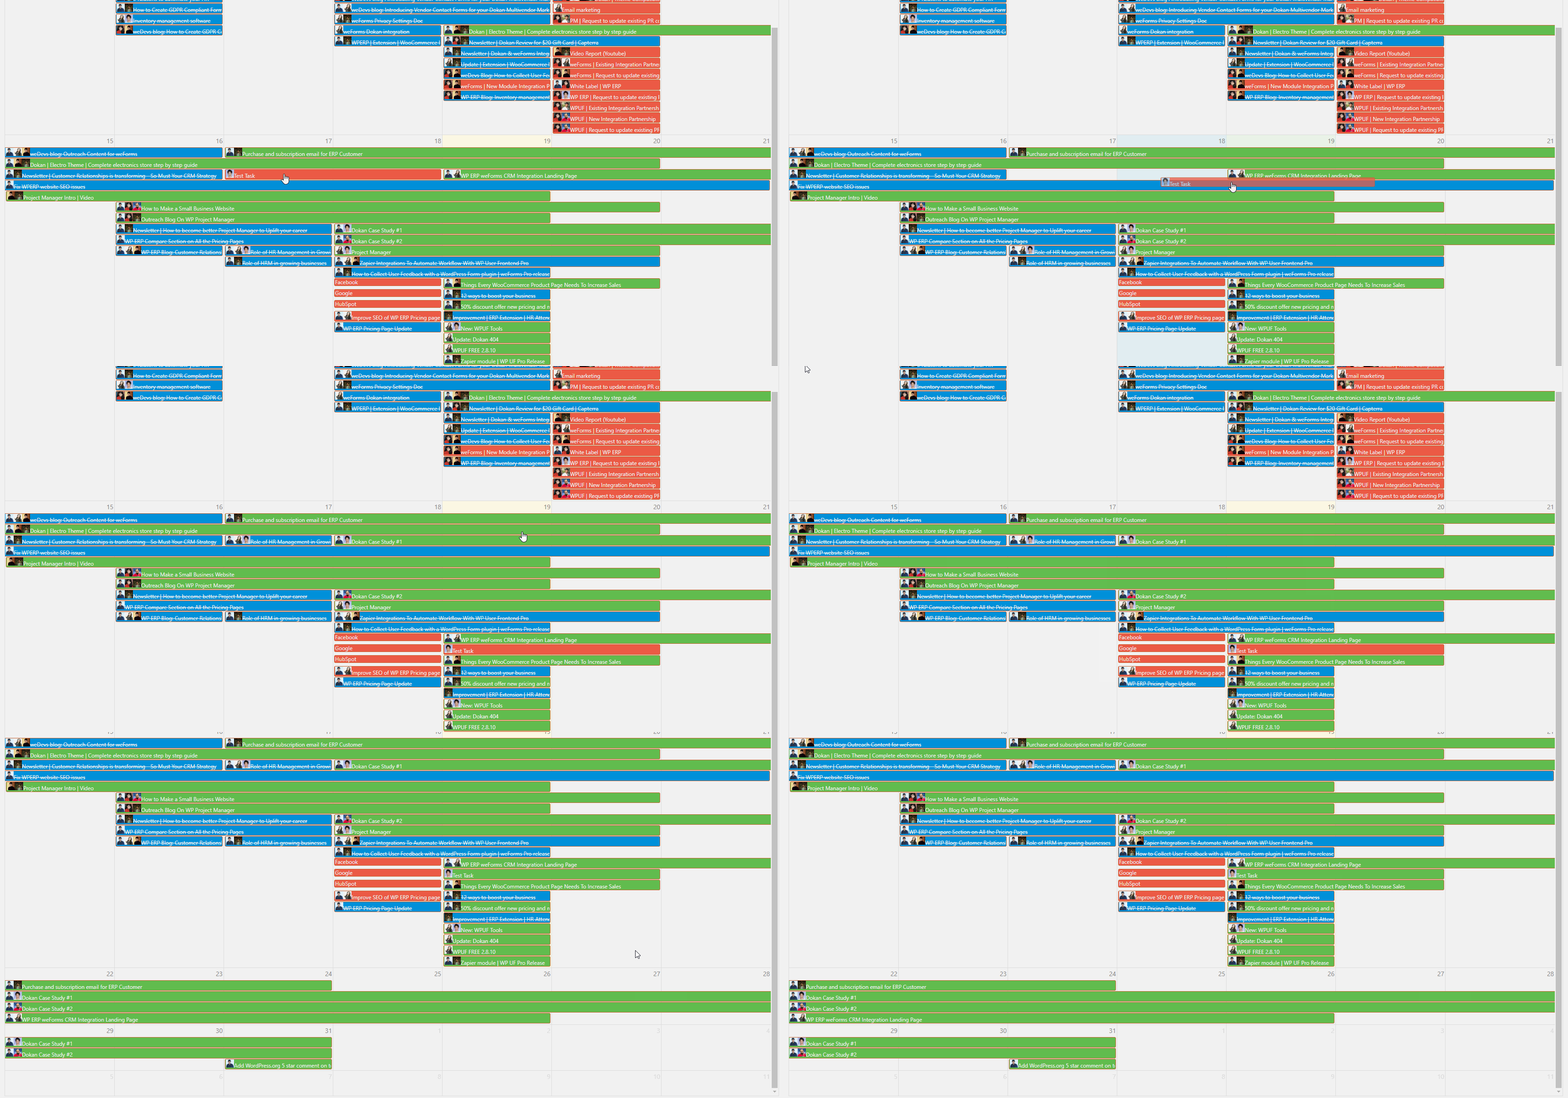
The dynamic and interactive drag-and-drop functionality will provide you with a seamless experience. For example, on 19th August, you see that the following “test task” has a start date of 17th August and the due date is 18th August. Thus on 19th August, the task will be due and so it will be red.
If you drag the task and drop it on the next day it will automatically become an outstanding task and the color will also be changed. If the color does not change then consider reloading the page and the color will change on its own.
Creating Tasks
You can also create tasks very easily in the calendar. This works in all view (User view, Monthly view, Weekly view, and Daily view) options.
To do so, select a blank area or the date on which you want to create a task. After that, you will get a pop-up to add tasks. You can select a project, specify a task list, give a project name, add users, set a deadline, give a label, and so on.
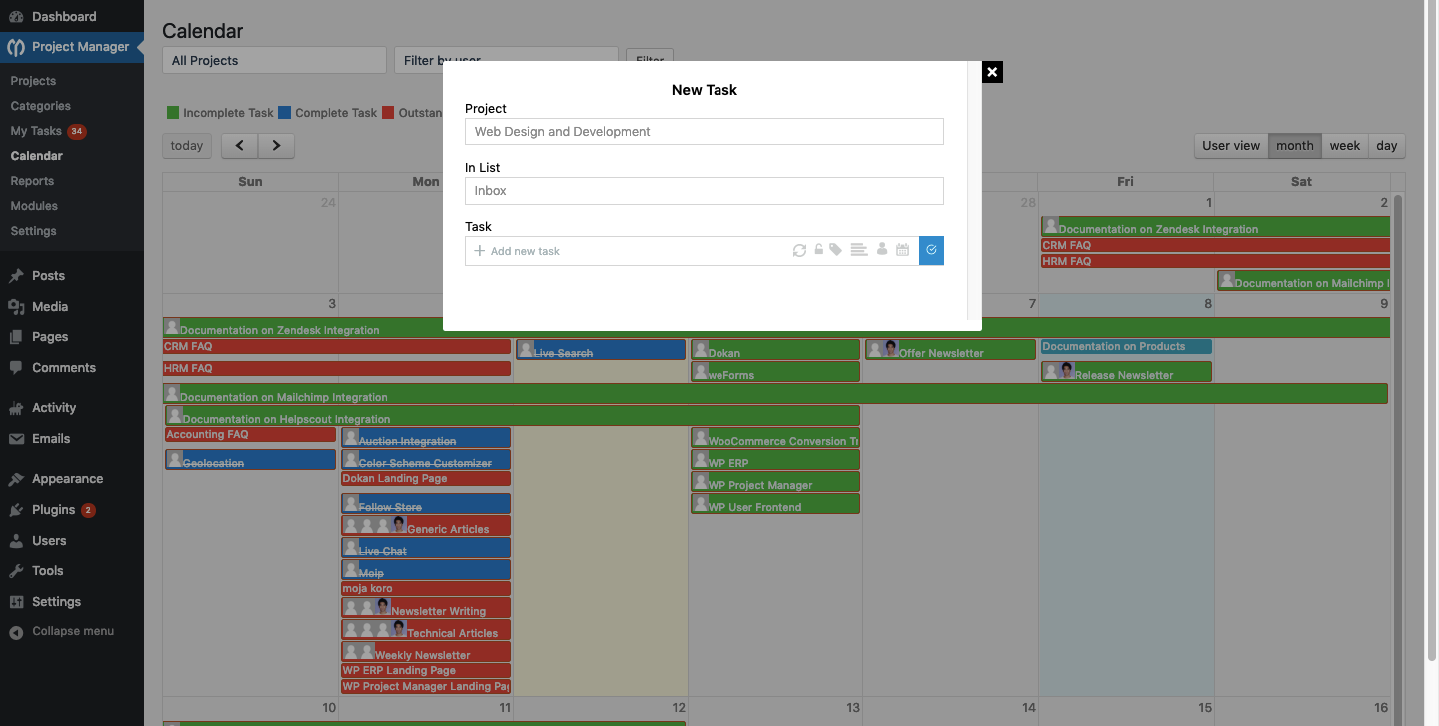
Note: If you are yet to know how to create a task, read this tutorial (Adding task to the task list).
Edit Tasks and Create Subtasks
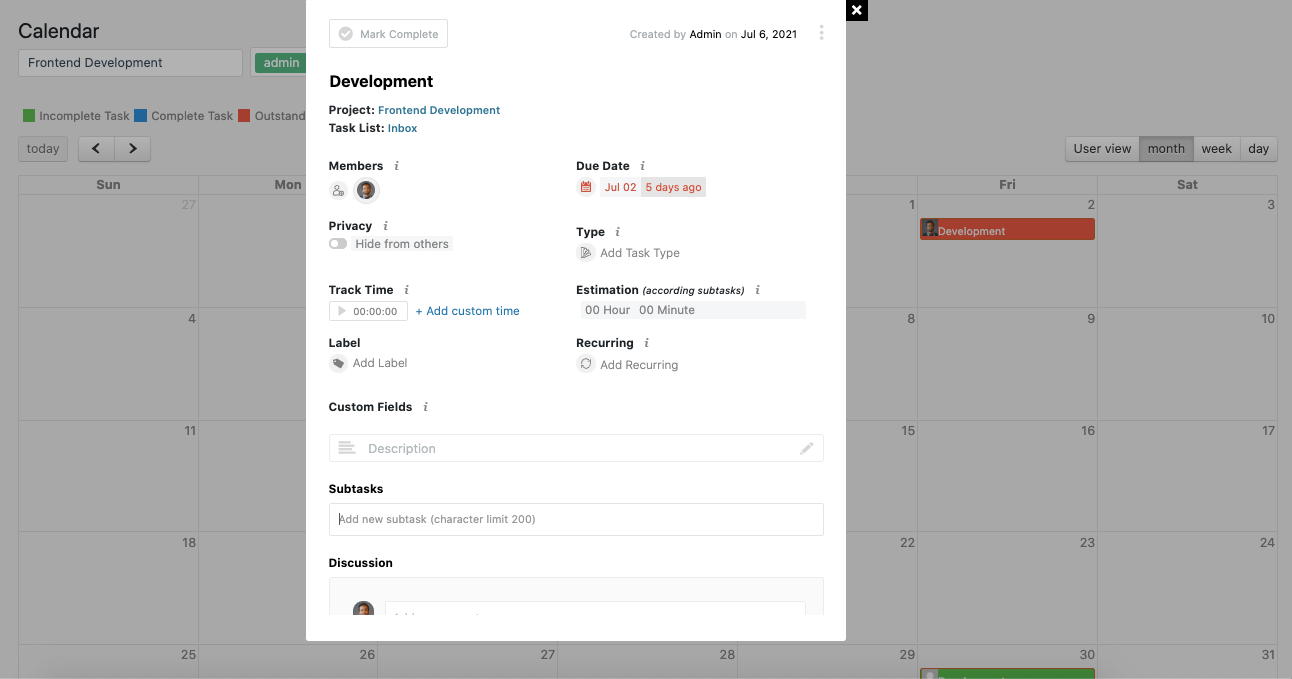
If you click on any taskbar a window will pop up on the screen to edit tasks and add subtasks. Assume that we click on the following taskbar:
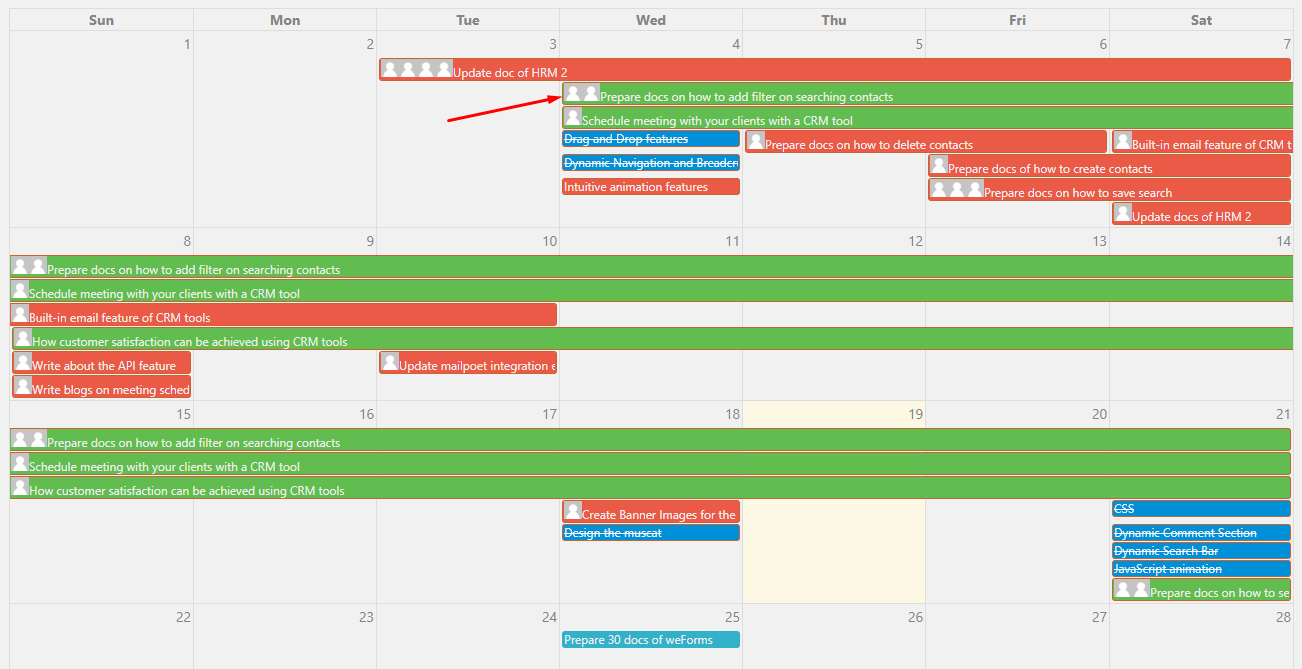
A pop window for editing the task will appear immediately. From here, you can edit the task name, change the start date and the due date, etc. You can even create subtasks and add time logs from therein.
If you want to know how to create a subtask then go through this tutorial.
That's all about Project Manager Calendar.