

How to Generate a Gemini API Key Without a Credit Card in 2026
If you want to use Google’s Gemini AI, you need a Gemini API Key.
It’s like a password that lets your apps talk to the AI models.
Getting a key is easy. You can start for free and test the AI without paying anything.
In this guide, you will learn how to generate your Gemini API Key step by step. You will also see how to use it safely and avoid common mistakes.
So, let's get started!
What Is a Gemini API Key?
A Gemini API Key is a unique secret code that allows your application to access Google’s Gemini AI models. Every request you send to Gemini must include this key. Google uses it to identify your project, apply usage limits, and control access.
With a valid key, you can:
- Generate text
- Analyze content
- Use multimodal Gemini features
The free tier gives limited but practical access, which is enough for learning, testing, and small projects.
How to Generate Gemini API Key in Google AI Studio – 5 Easy Steps for Beginners

Generating a Gemini API Key is simple. You can do it in a few clicks. Follow these steps to get your key quickly.
- Sign in to Google AI Studio
- Navigate to the API Keys section
- Create a new project or select an existing one
- Click “Create API Key”
- Copy your API key and save it securely
Once you have your key, you can start using Gemini AI in your apps or experiments right away. Keep it safe and don’t share it publicly.
Now, let's get into the details!
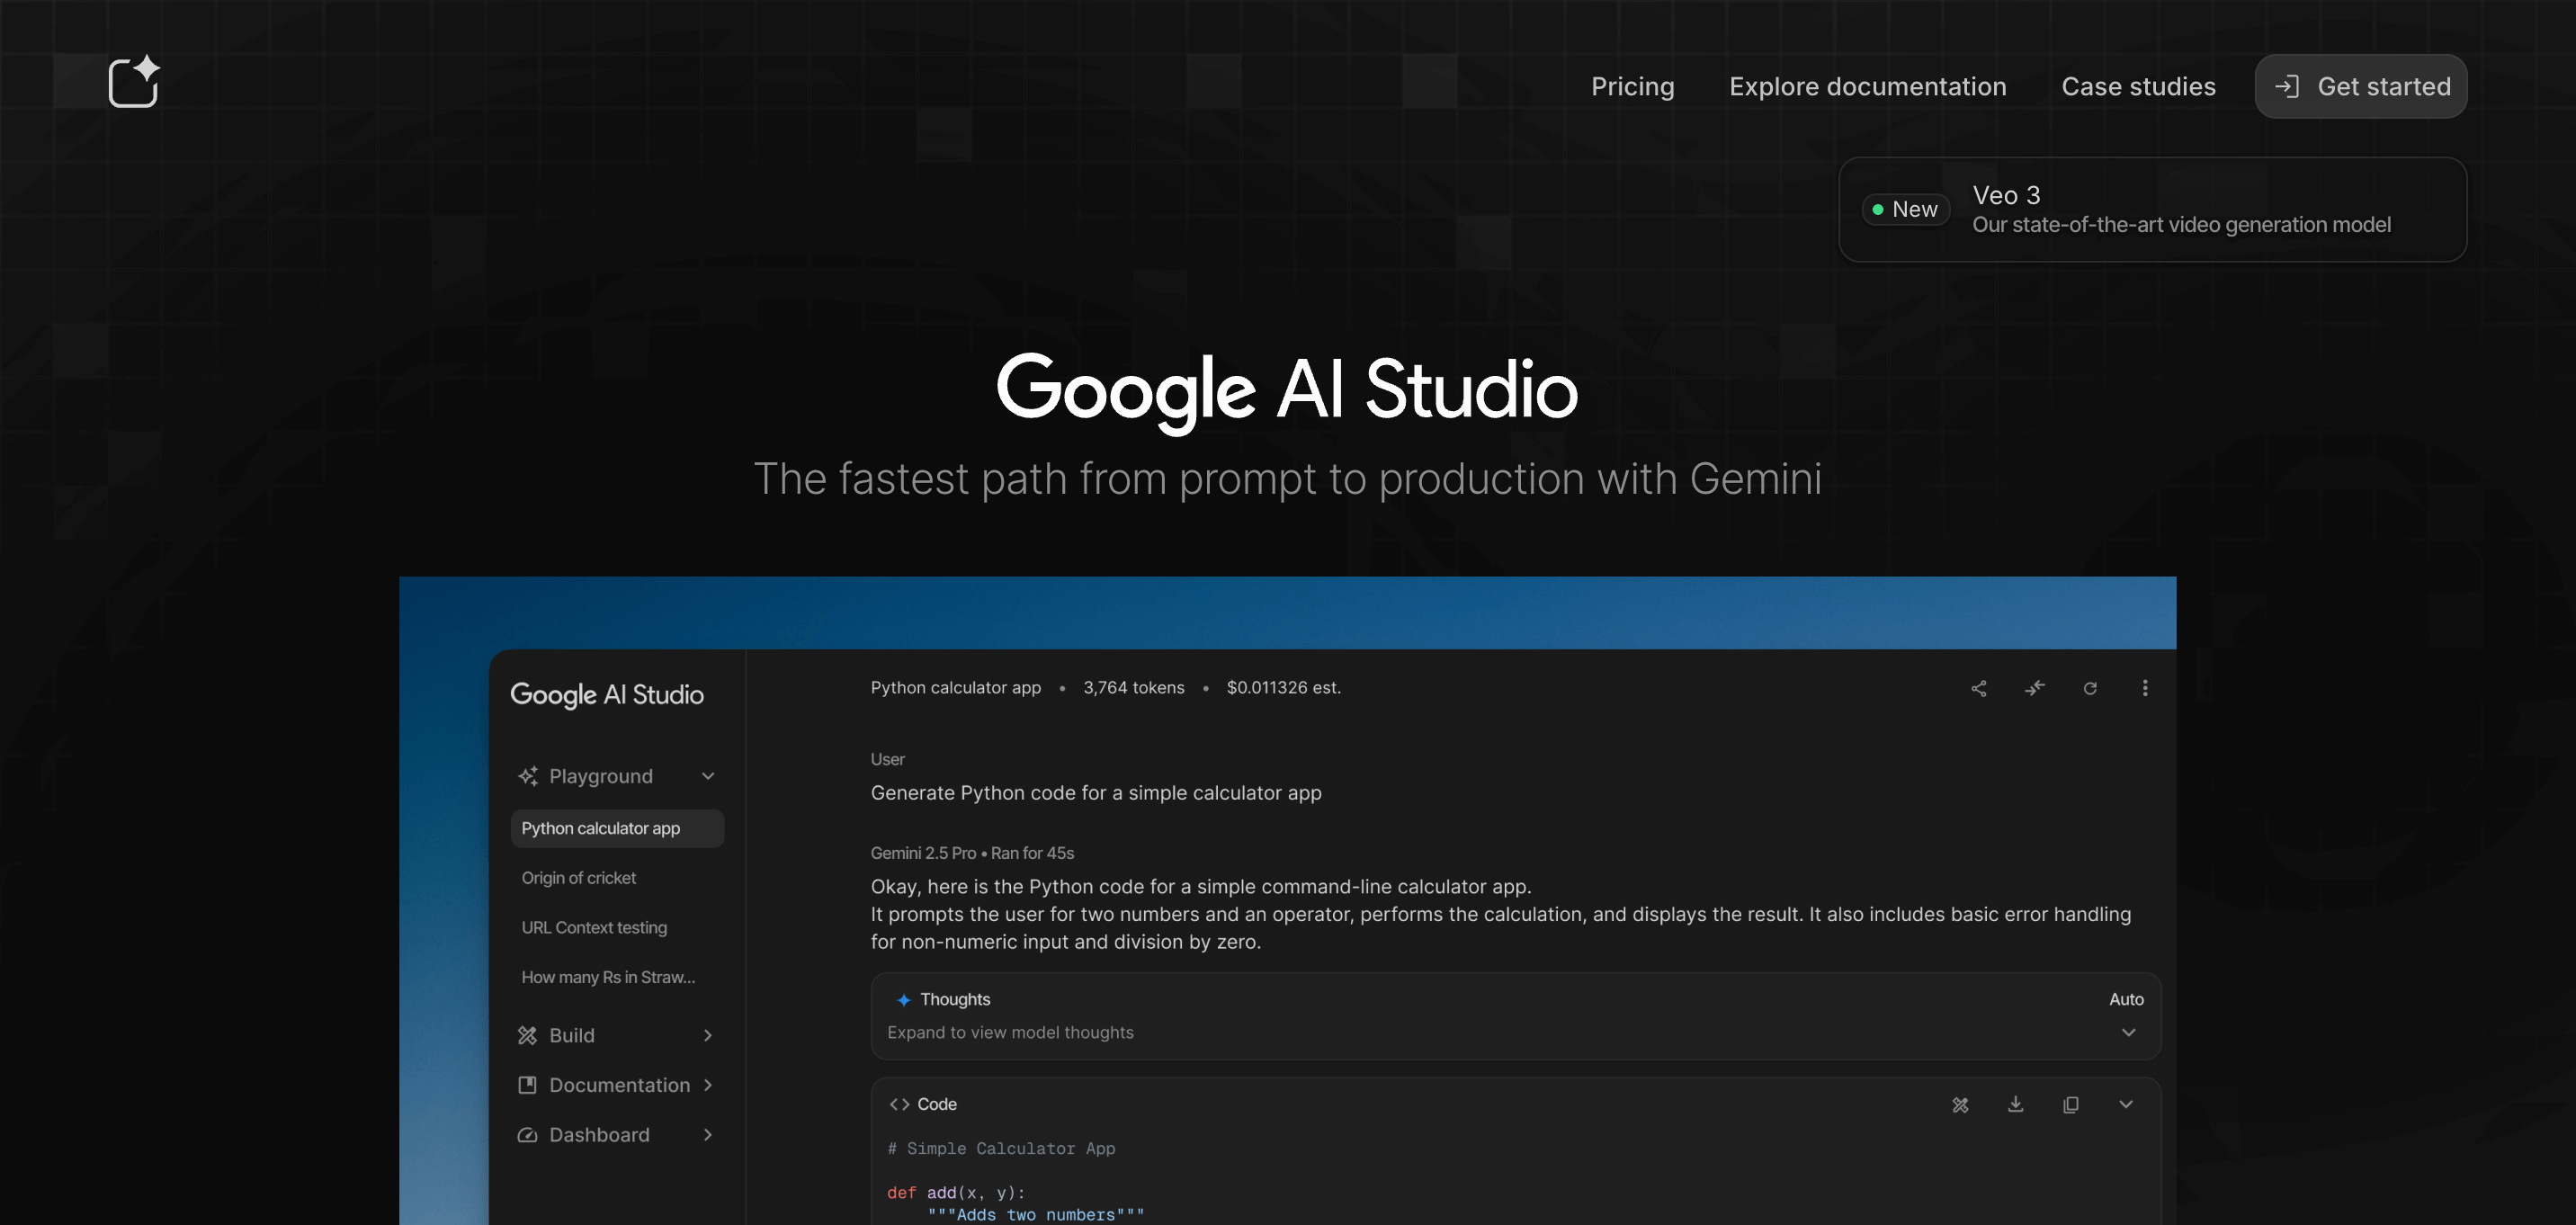
1. Sign in to Google AI Studio
The first step is to open Google AI Studio. Use your Google account to sign in. If you don’t have one, you will need to create it.
If this is your first time visiting Google AI Studio, a pop-up will appear asking you to accept the Terms of Service for Generative AI. This is a mandatory, quick legal step. Read them over and click “Accept” or “Continue” to proceed to the main dashboard.
Click on the Get started option to log in or sign up.
Once you are signed in, you will see the main dashboard. This is where you manage projects and API keys. Being logged in with your account is necessary. Google uses it to link your API key to you.
2. Navigate to the API Keys Section
After signing in, look for the API Keys option in the dashboard. Now click on the ‘Get API Key‘ optio nand you will see any existing keys if you have them.
This is also where you can create new keys. The API Keys section keeps all your keys organized in one place.

3. Create a New Project or Select an Existing One
On the API Key management page, you will see a prominent button that says “Create API Key.”
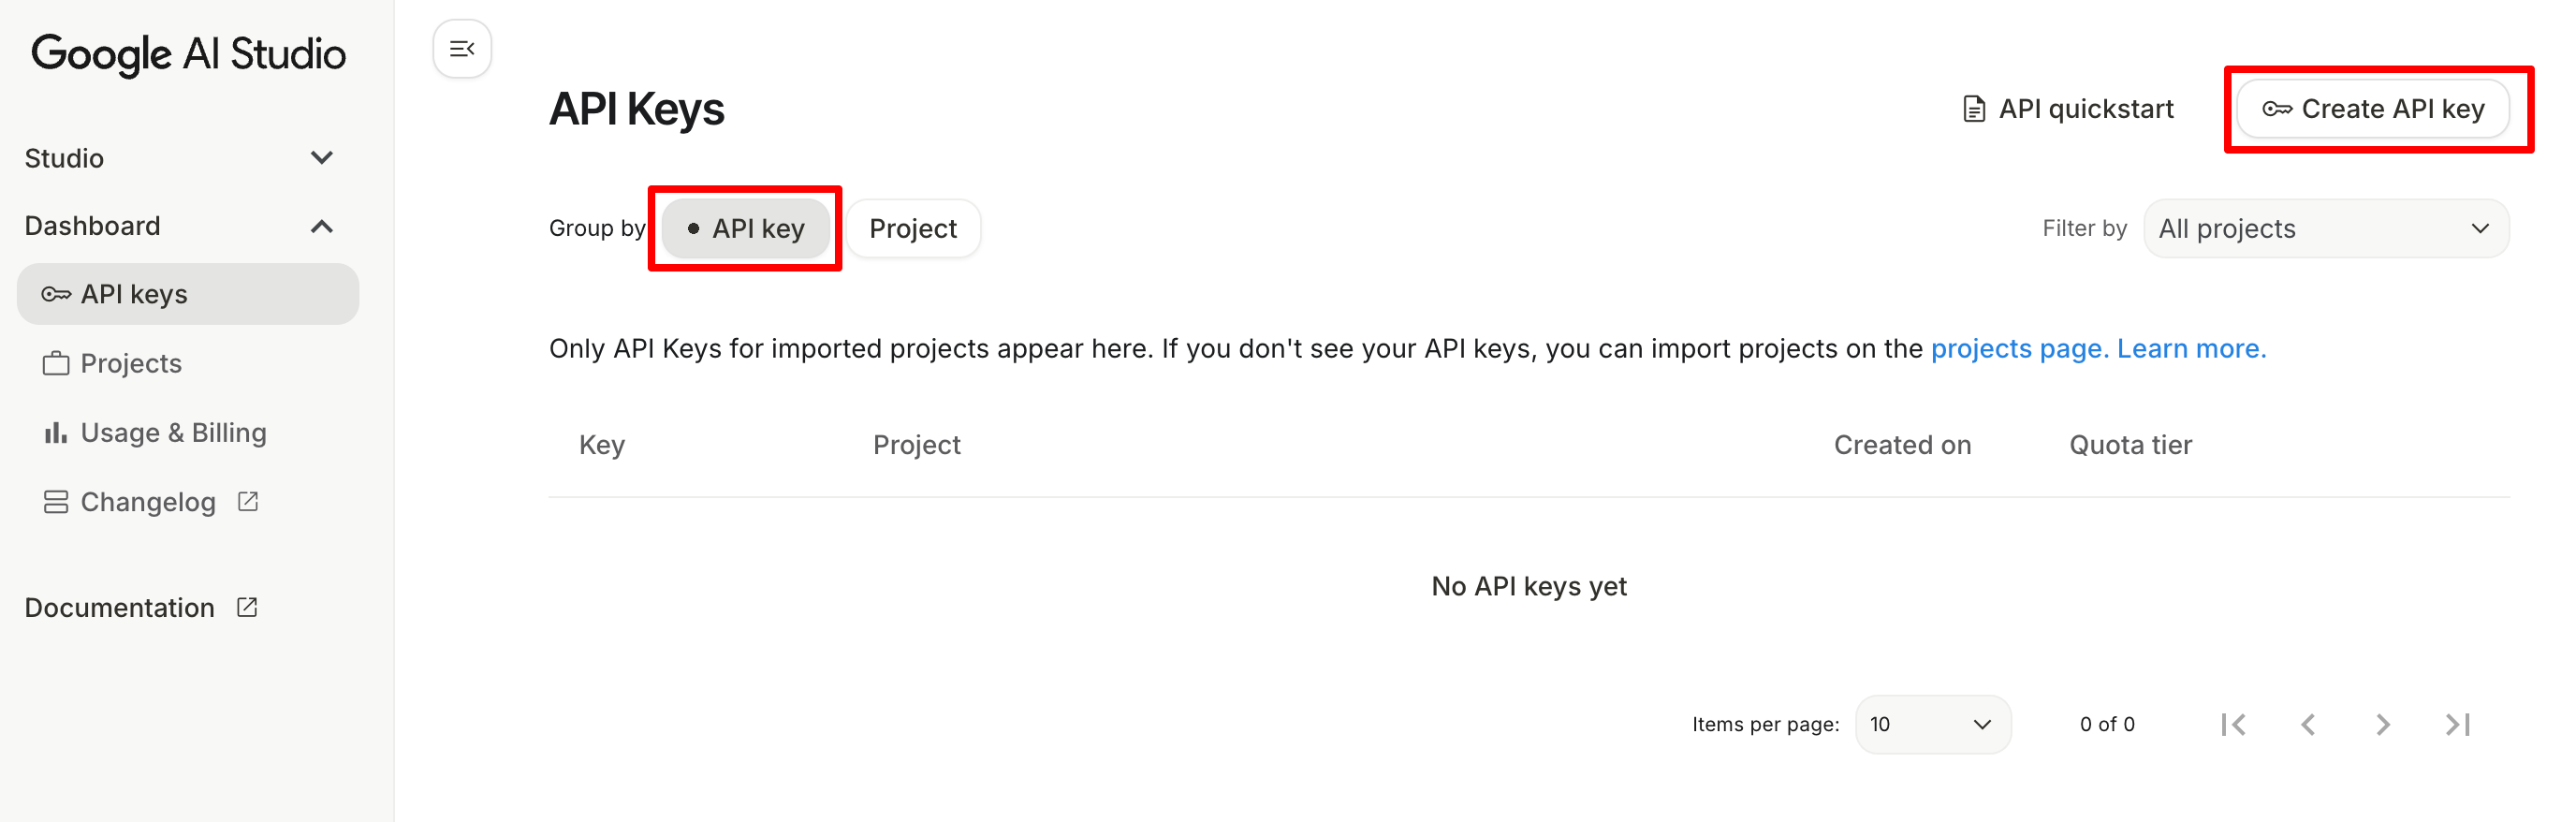
Before you can generate a Gemini API Key, you need a project in Google AI Studio. Click on the ‘Create API Key‘ and you'll have two options:
- Select an existing project if you already have one. This keeps everything in the same place.
- Create a new project if you want to start fresh. Click “New Project” and give it a name that is easy to remember.
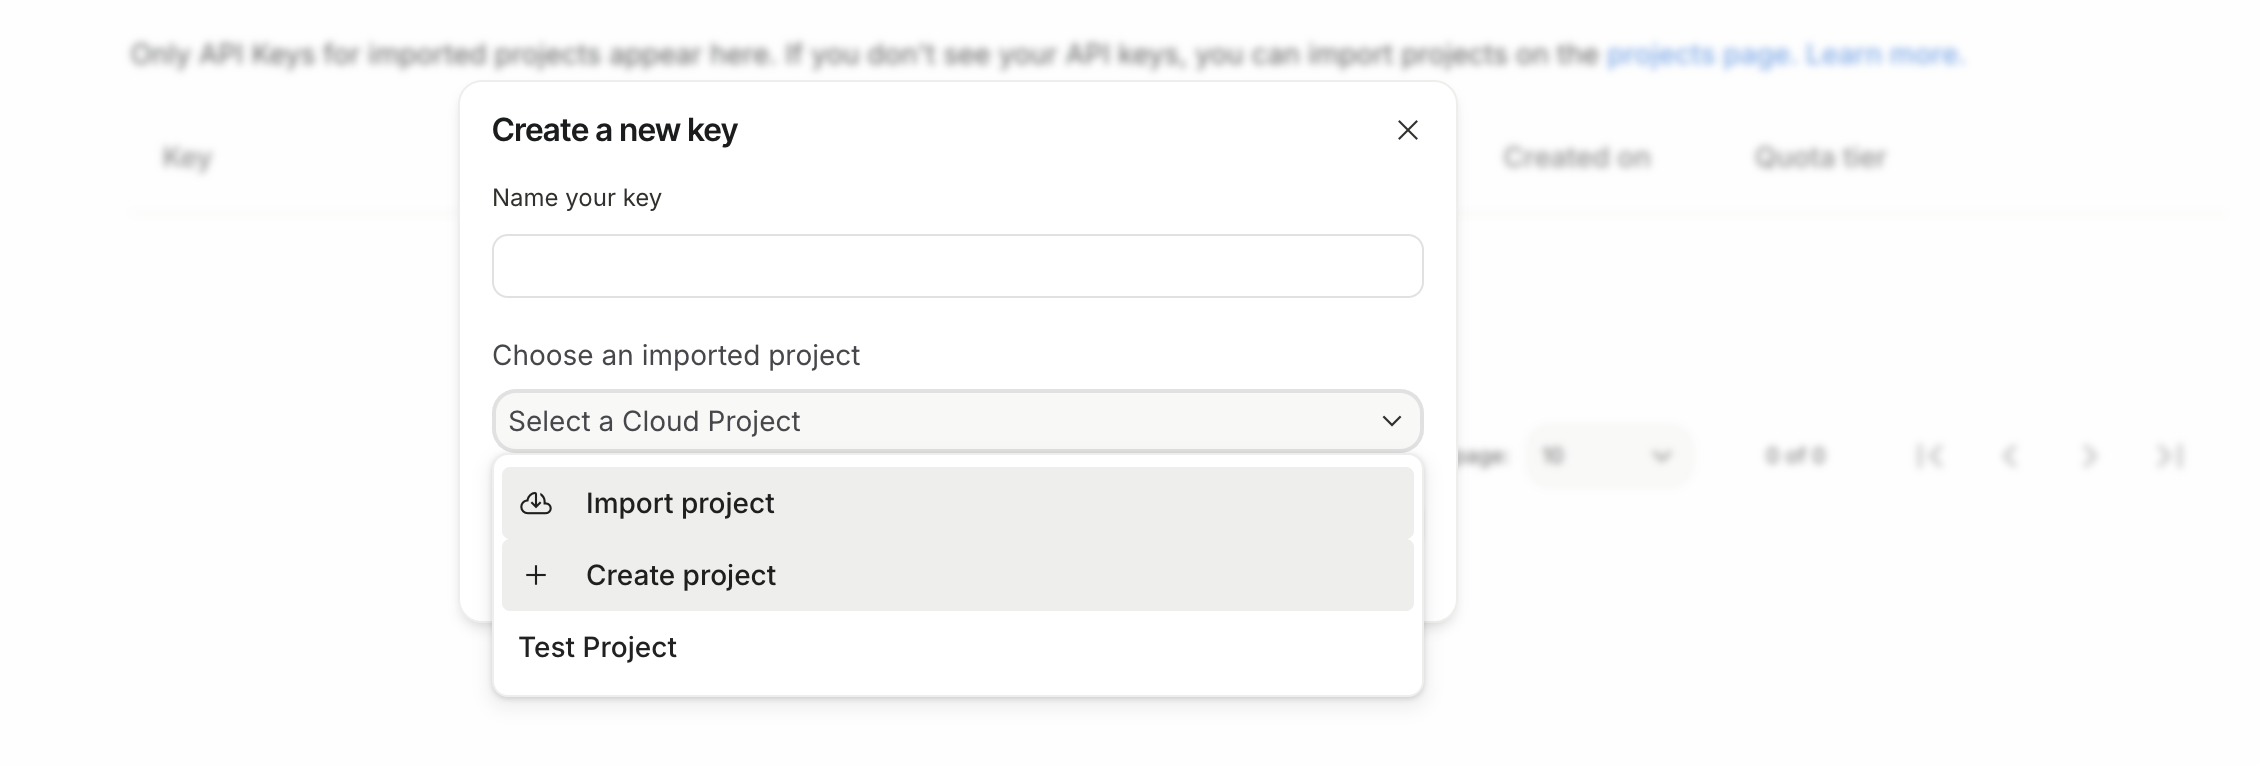
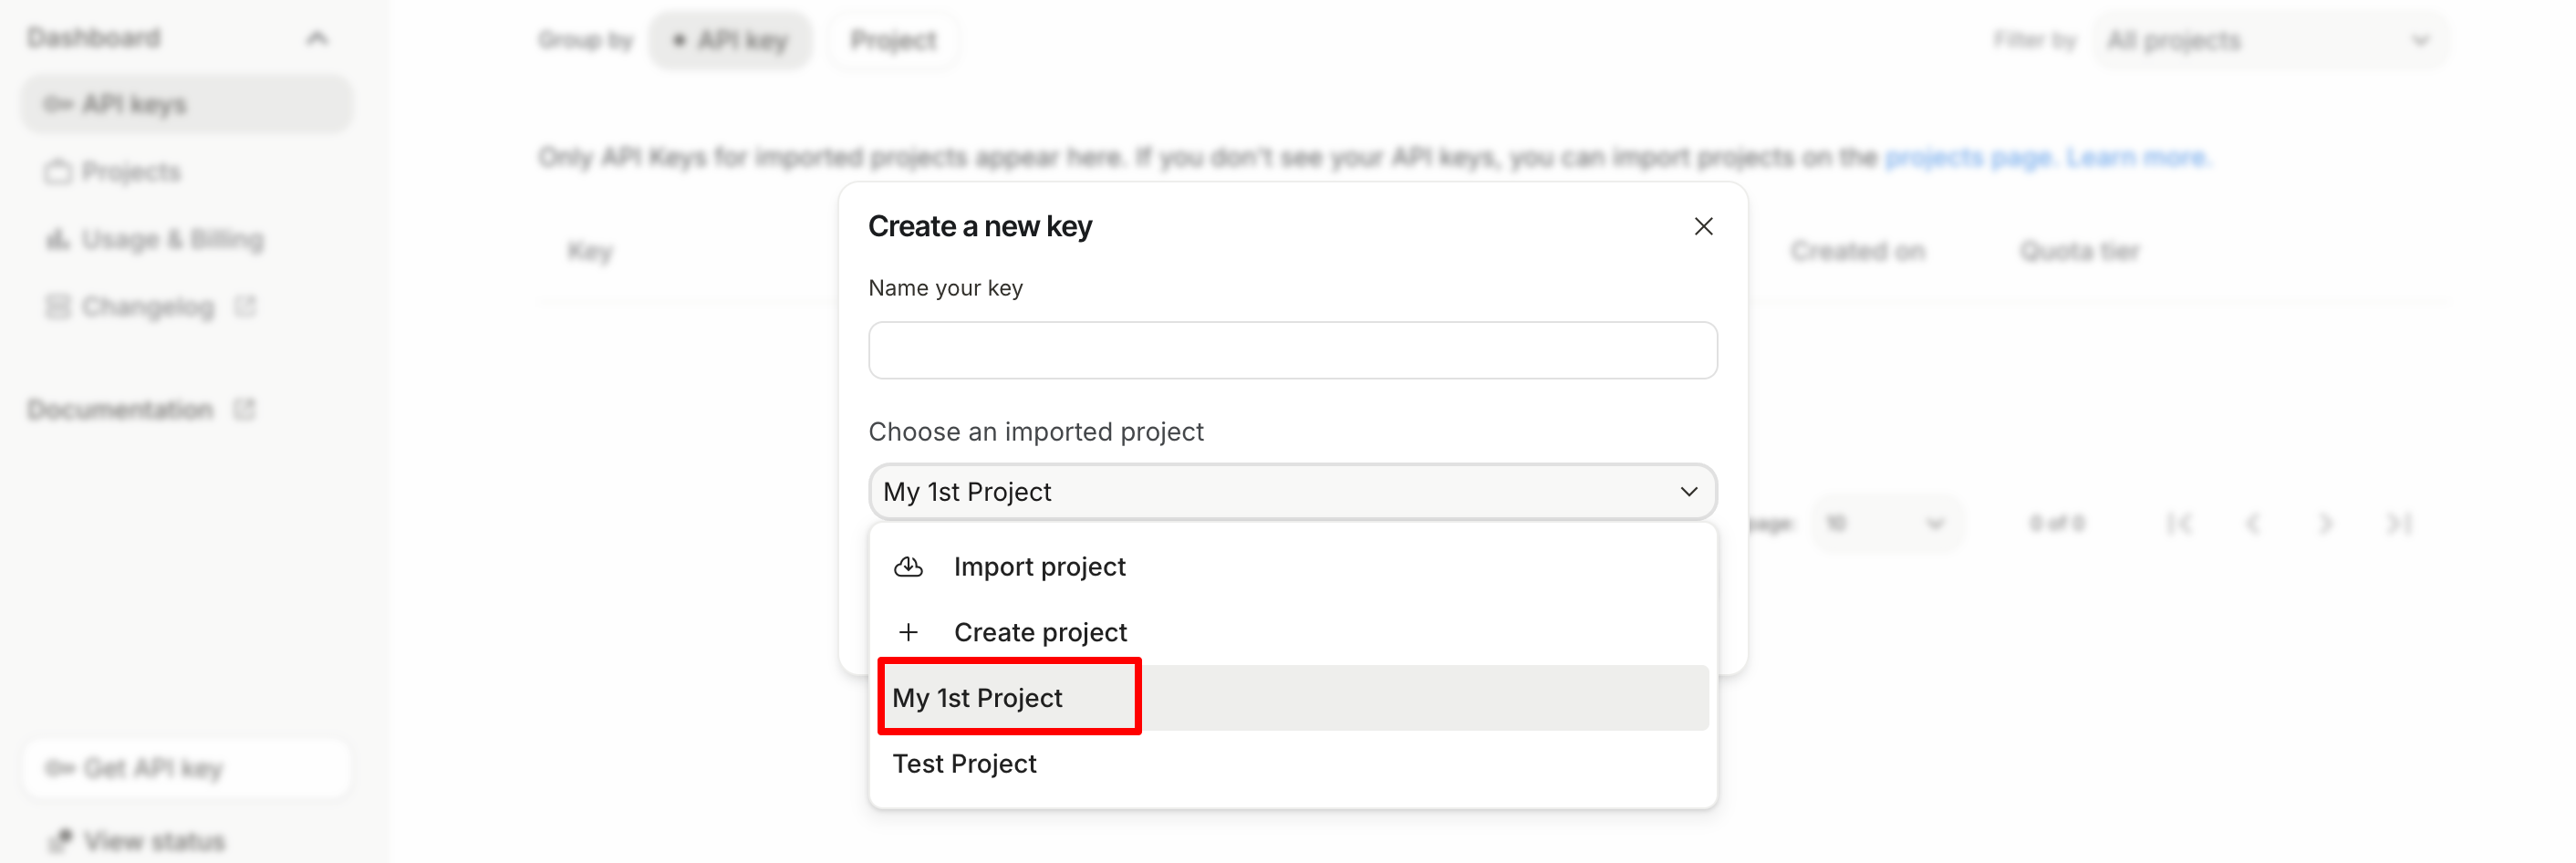
If you are a beginner and have never created a project before, click on the ‘+ Create project' and a new interface will pop up.
Give your project a name and hit the ‘Create project‘ button.

If your project is created successfully, you'll get it in the drop-down list.
4. Create a Gemini API Key
Now select the project name from the drop-down list and give your API key a name. Then hit the ‘Create Key‘ button.
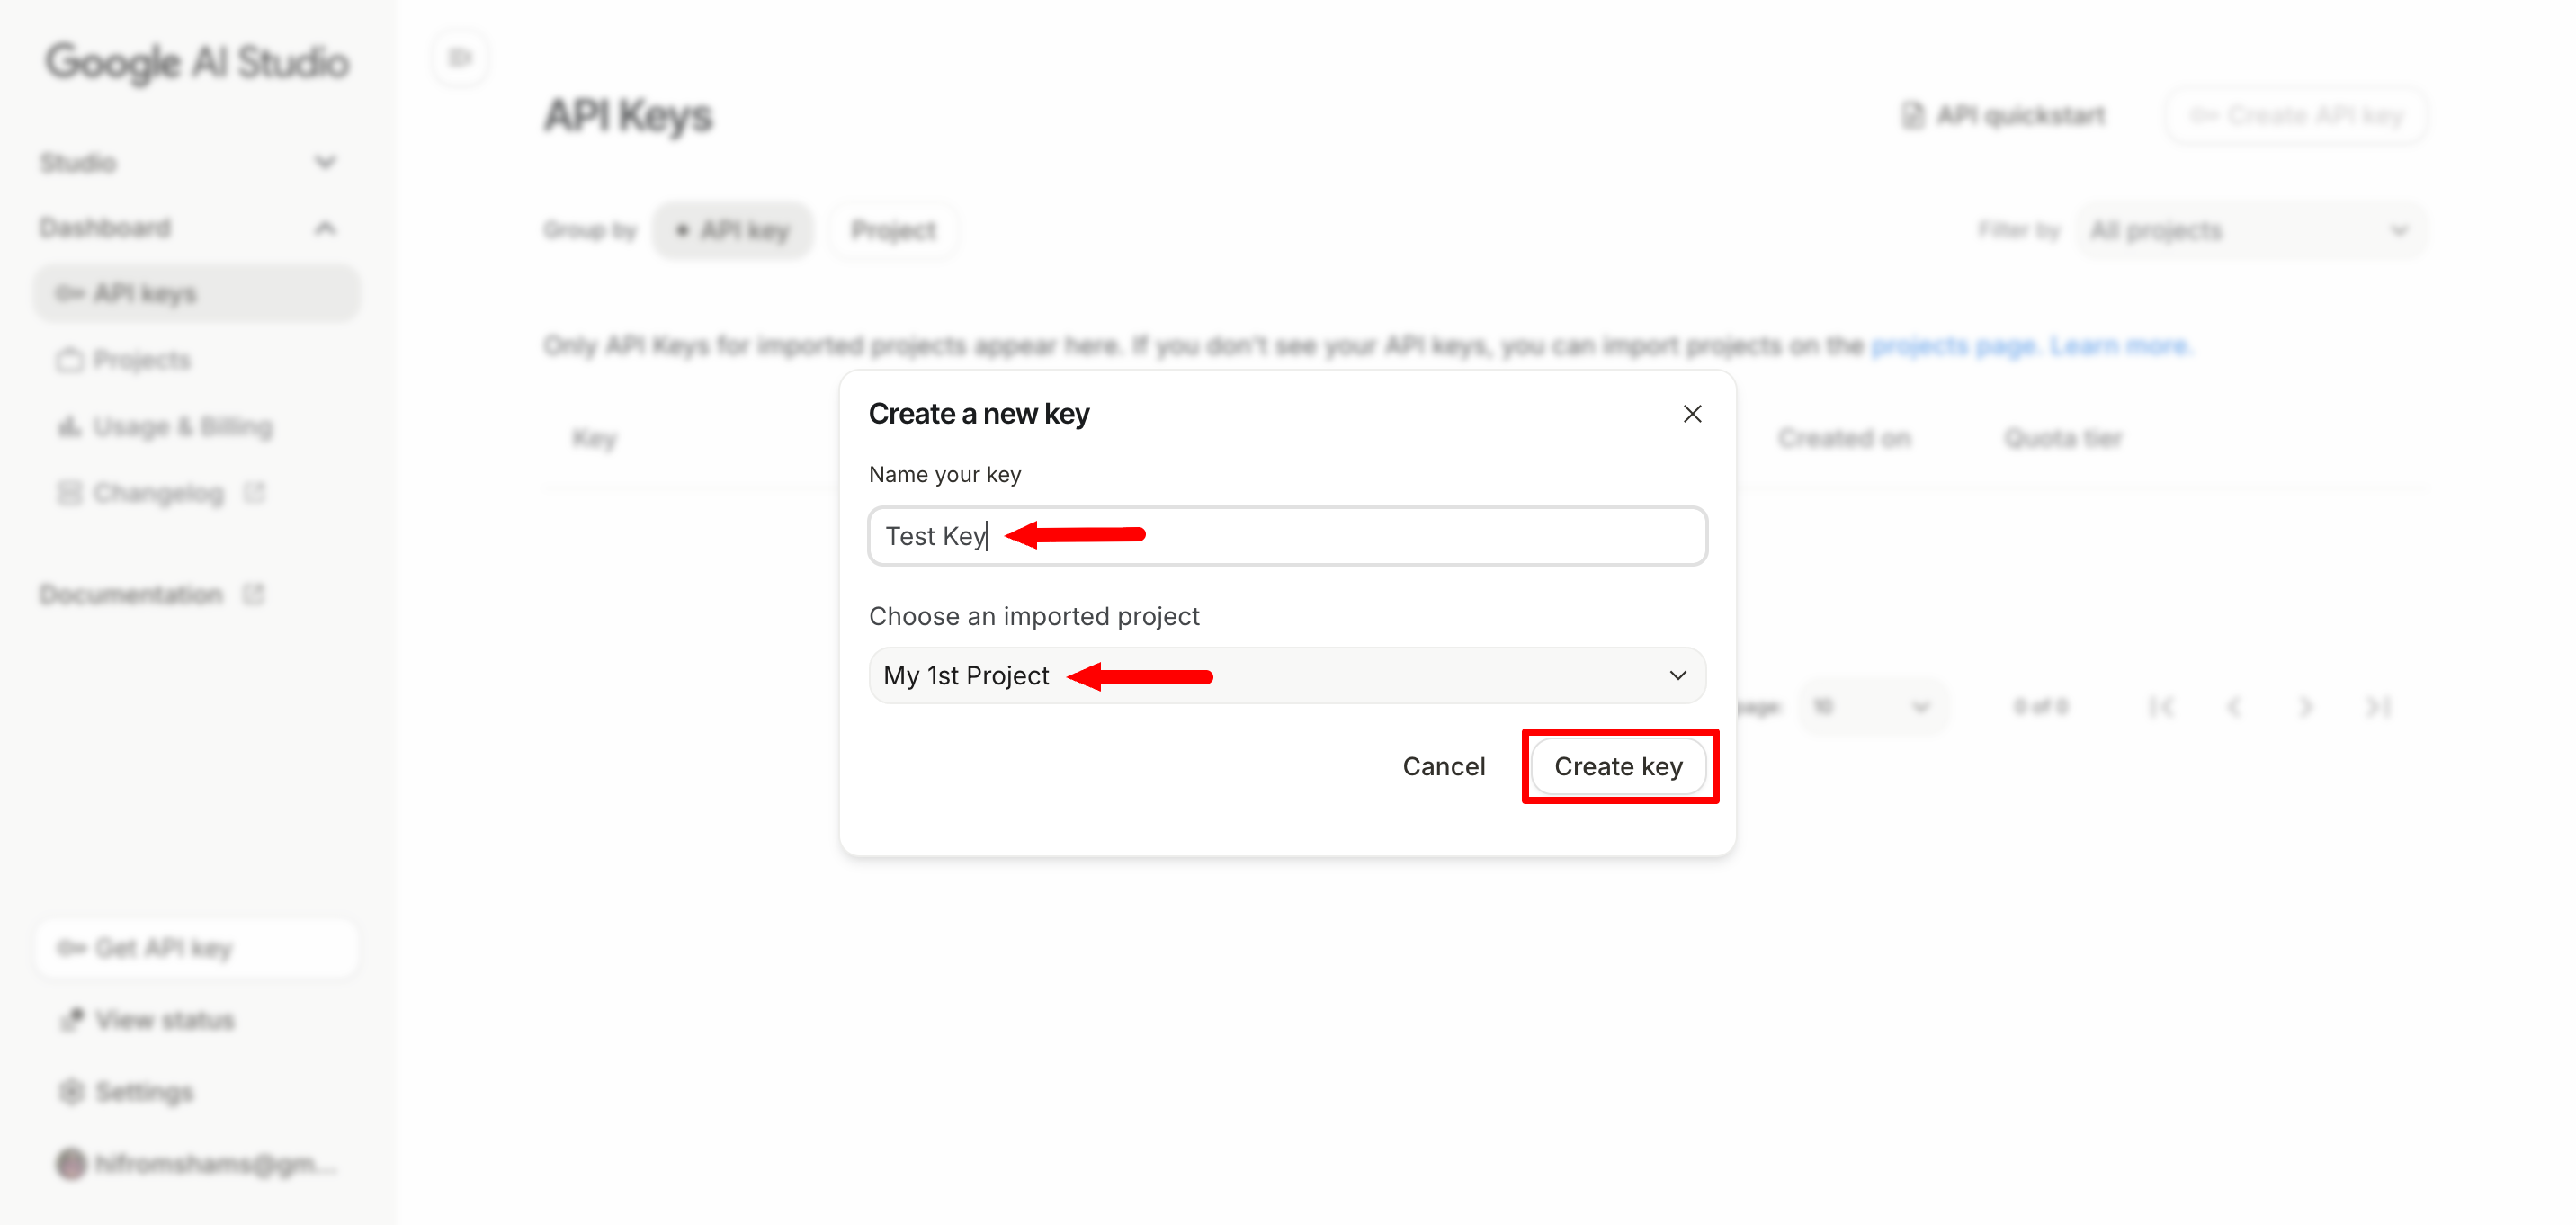
After clicking the button, Google will instantly generate a new key for your project. The key is a long string of letters, numbers, and symbols.
This key is what your apps or scripts use to access Gemini AI. It tells Google which account and project are making the requests. Without it, your app cannot communicate with the AI models.
When you generate your key, it will grant you access to the entire Gemini 3 family. This includes the lightning-fast Gemini 3 Flash (the new default) and the heavy-duty Gemini 3.1 Pro, which was just released in February 2026 for high-level reasoning and complex coding.
5. Copy Your API Key and Save It Securely
After creating your API key, you will see it displayed on the screen. It looks like a long mix of letters, numbers, and symbols. This key is unique to your account and project.
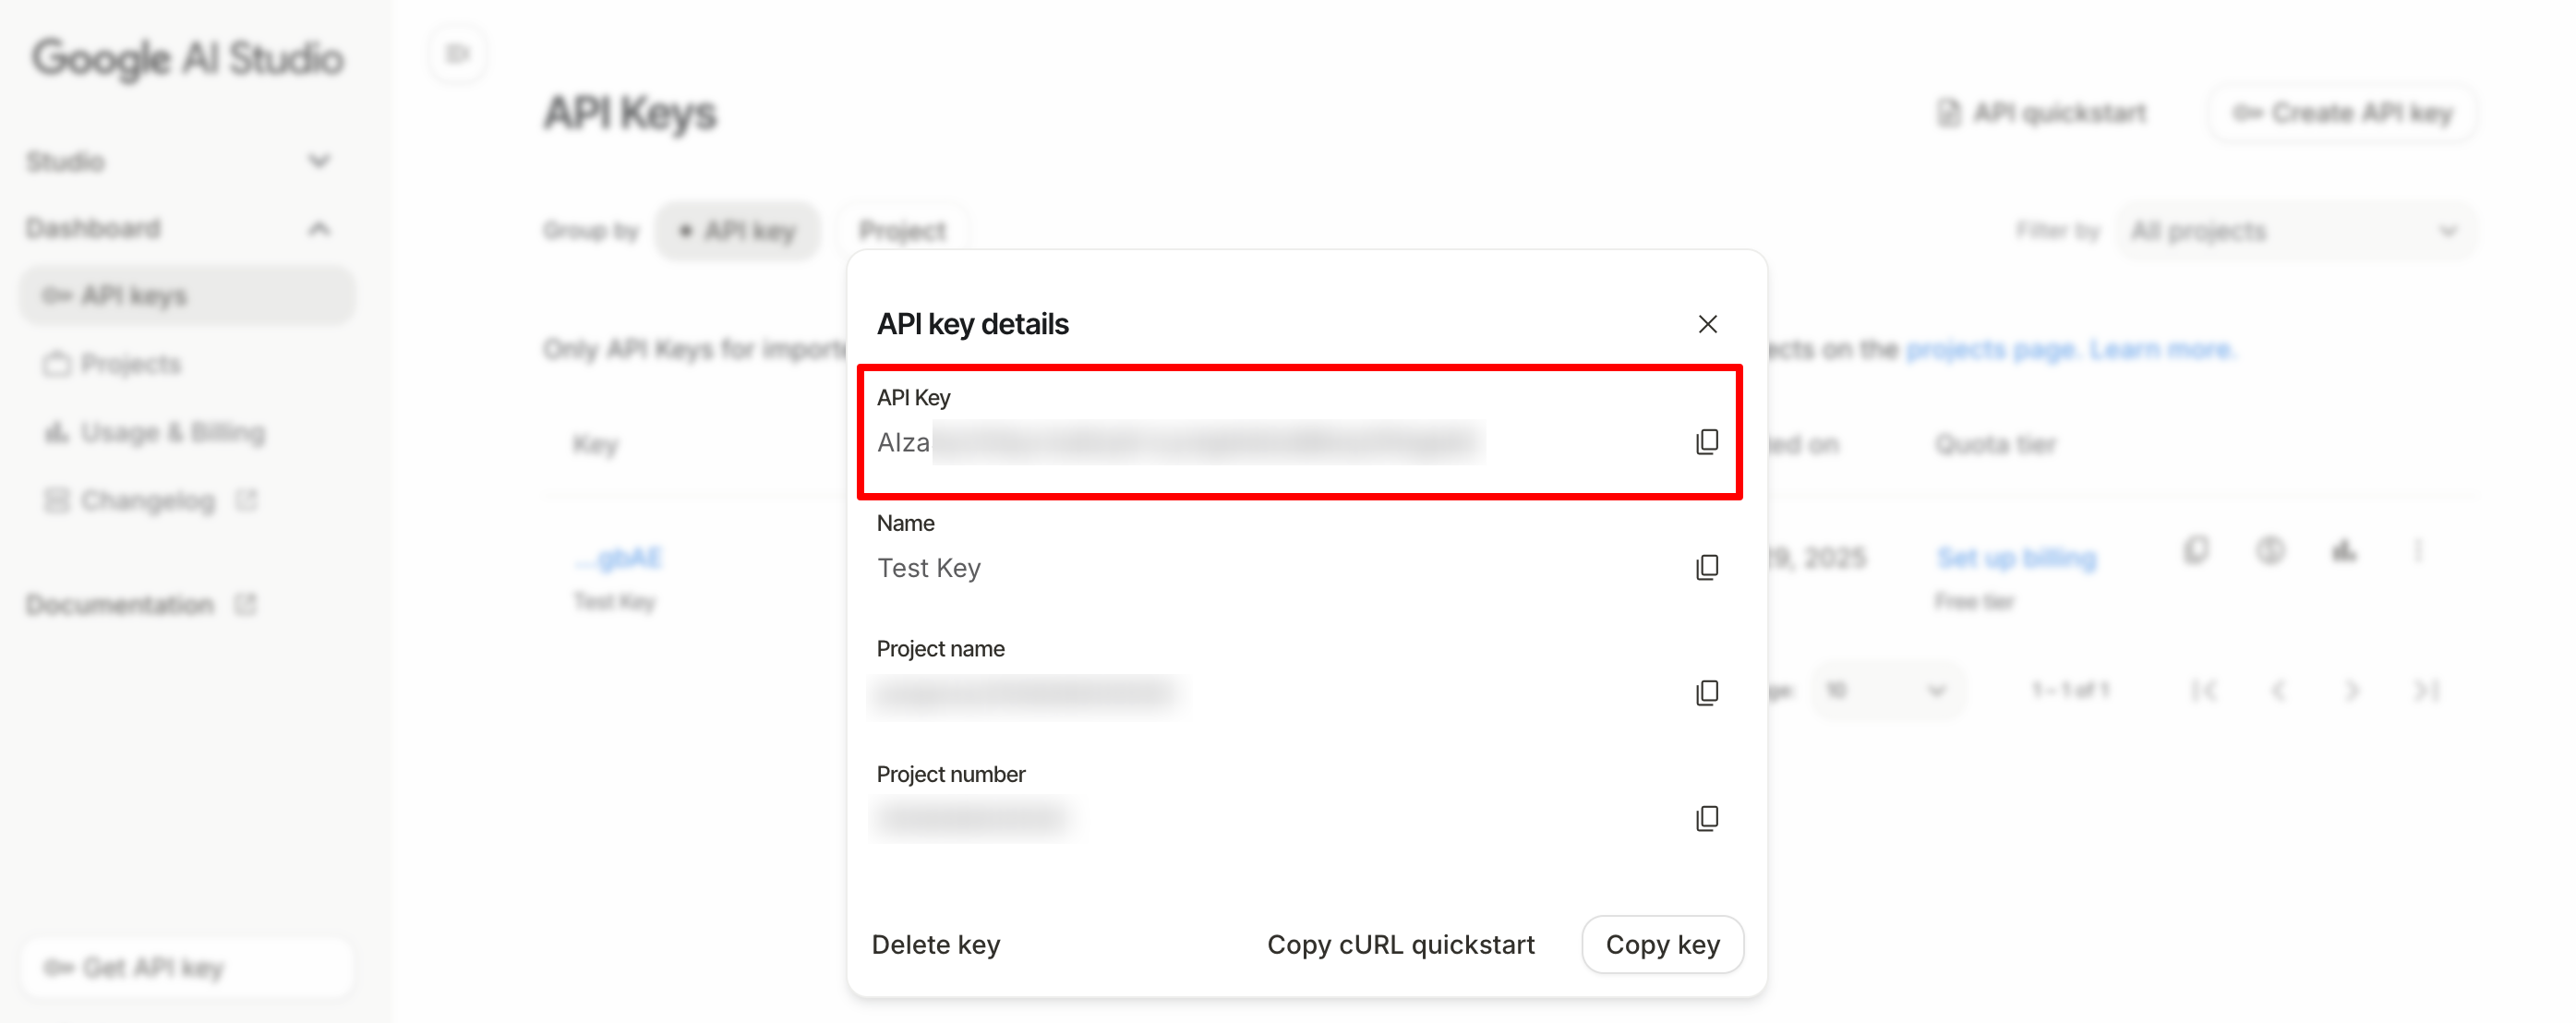
Copy it immediately and store it somewhere safe. You can save it in a password manager, a secure document, or as an environment variable in your computer. Treat it like a password because anyone with this key can access your Gemini AI account.
Do not share it publicly. Avoid posting it on forums, GitHub, or social media. If the key is exposed, someone else could use your free tier or cause unexpected charges.
For extra safety, Google allows you to restrict your API key. You can limit it to certain IP addresses, apps, or projects. This adds a layer of security so only your apps can use it.
Once your key is safely stored, you are ready to start using Gemini AI in your apps, scripts, or experiments.
Important: Anyone with your API key can use your Gemini quota. Never share it publicly or commit it to GitHub. If your key is exposed, revoke it immediately and generate a new one.
Security Best Practice: How to Protect Your Gemini API Key

Once you have your unique key, the next and most critical step is ensuring it never falls into the wrong hands. A compromised API key can lead to unauthorized usage and unexpected billing charges.
Follow these best practices to keep your credentials safe.
A. The Danger of Hardcoding
Hardcoding means embedding the key directly within your application code, like this:
const apiKey = "AIzaSyB-Your-Key-Should-Not-Be-Here";
// ... code continues
This is the number one security risk. If you hardcode the key:
- Public Exposure: If you ever upload your code to a public repository (like GitHub), the key is instantly exposed to the world.
- Client-Side Leakage: In client-side environments (like pure JavaScript in a browser or a mobile app), the code can be easily viewed and the key extracted by anyone using the application.
The Golden Rule: Never commit your API key to any version control system (Git) or expose it on the client side.
B. The Solution: Environment Variables (Recommended)
The most secure way to handle your API key in a development environment is by using environment variables. This keeps the key external to your source code, so you can share your code without sharing your secret key.
Many of the Gemini SDKs (like Python and Node.js) are designed to automatically look for the GEMINI_API_KEY variable.
1. How to Set GEMINI_API_KEY on macOS/Linux (Bash/Zsh)
You set the variable within your shell's profile file (e.g., ~/.zshrc or ~/.bashrc) to make it persistent across terminal sessions.
- Open your shell configuration file:
# For Zsh (default on newer macOS): nano ~/.zshrc # For Bash (common on older Linux/macOS): nano ~/.bashrc - Add the export command to the end of the file:
export GEMINI_API_KEY="AIzaSyB-Your-Actual-Key-Goes-Here" - Save the file and apply the changes by running:
source ~/.zshrc # or source ~/.bashrc
2. How to Set GEMINI_API_KEY on Windows
- Search for “Environment Variables” in the Windows search bar and select “Edit the system environment variables.”
- In the System Properties dialog, click the “Environment Variables…” button.
- Under “User variables” (for your account only), click “New…”.
- Set the Variable name to
GEMINI_API_KEY. - Set the Variable value to your actual Gemini API key.
- Click OK on all dialogs and open a new Command Prompt or PowerShell window to make the variable available.
Note for 2026 Developers: The latest google-genai Python SDK is now ‘zero-config.' If you name your environment variable GEMINI_API_KEY, the library will detect it automatically without you having to write a single line of authentication code.
C. Advanced Tip: API Key Restrictions
For production applications, you should restrict your API key usage to minimize damage if the key is ever leaked. You do this in the Google AI Studio or Google Cloud Console.
- API Restrictions: By default, your key is restricted to the Generative Language API (which powers Gemini). You should ensure this is the only API it can call.
- Client Restrictions (Optional but Recommended): Limit where the key can be used:
- HTTP Referrers: If the key is used on a website, you can limit it only to your domain (e.g.,
*.yourdomain.com/*). - IP Addresses: If the key is used from a server, you can restrict it to the static IP address of that server.
- Mobile Apps: For native Android/iOS apps, you can restrict it by the application ID and signing certificate hash.
- HTTP Referrers: If the key is used on a website, you can limit it only to your domain (e.g.,
Pro Tip: Use a Server-Side Proxy If you are building a front-end website (like a React or Vue app) that needs to use the key, the most secure method is to route all API calls through your own backend server. The key is stored securely on the server as an environment variable, and the front-end only communicates with your secure endpoint, never touching the Gemini API key itself.
How to Validate Your Newly Created Gemini API Key
Once you've securely saved your key as an environment variable, it's time to confirm that it's active and working correctly. This verification step ensures you can connect to the Gemini API before you start writing complex code.
Verification
The most straightforward way to verify your key is to run a simple API call. Since the key is now stored as the GEMINI_API_KEY environment variable on your system, you can use a command-line utility like cURL to make a direct HTTP request to the Generative Language API.
A successful response (HTTP status code 200) containing generated text confirms that:
- Your key is valid.
- Your connection to the Gemini API is functional.
- The specified model (
gemini-3.1-flash) is accessible.
B. Test Command (using cURL)
Before writing real application code, it’s best to confirm that your key works with a simple test request.
Open a new terminal window or command prompt and execute the following command:
curl -X POST "https://generativelanguage.googleapis.com/v1beta/models/gemini-3-flash:generateContent" \
  -H 'Content-Type: application/json' \
  -H "x-goog-api-key: ${GEMINI_API_KEY}" \
  -d '{
    "contents": [{
      "parts": [{
        "text": "Check connection: What is the latest Gemini model as of Feb 2026?"
      }]
    }]
  }'
Expected Successful Output (abbreviated): If successful, you will receive a JSON response containing a text field with the model's answer:
{
  "candidates": [
    {
      "content": {
        "parts": [
          {
            "text": "The primary function of an API key is to authenticate and authorize a user or application when making requests to an API, allowing the provider to control access and manage usage."
          }
        ]
      }
    }
    // ...
  ]
}
If you receive an HTTP 400 or 403 error, carefully re-check that you correctly copied your key and set the environment variable as described in the previous section.
Gemini API Key – Free Tier and Pricing
The Gemini API offers a generous Free Tier designed specifically for developers, students, and hobbyists to learn, experiment, and prototype applications without requiring a credit card.
A. Free Tier Highlights and Limitations
The Free Tier provides substantial capacity for development, but it is not intended for high-traffic production use. Your access is governed by quotas, which are typically measured across three dimensions and vary by the specific model you call:
- Requests Per Minute (RPM): The number of API calls you can make in a 60-second window.
- Tokens Per Minute (TPM): The total number of tokens (input and output combined) processed in a 60-second window.
- Requests Per Day (RPD): The total number of requests allowed in a 24-hour period (resets at midnight Pacific Time).
For popular models used in prototyping, such as Gemini 3 Flash, the free tier limits are generous enough to handle significant development and testing:
| Metric | Gemini 3 Flash (Default) | Gemini 3.1 Pro (Advanced) |
| Requests Per Minute (RPM) | 15 RPM | 5 RPM |
| Requests Per Day (RPD) | 1,500 RPD | 50 RPD |
| Tokens Per Minute (TPM) | 1 Million TPM | 250,000 TPM |
| Grounding (Search) | 1,500 Queries/Day (Free) | Included in RPD |
*Note: Free tier limits may change based on model updates, region, or Google policy.
Pro Tip: The 2026 Free Tier now includes Grounding with Google Search, allowing your AI to access real-time web data at no extra cost for up to 1,500 requests a day.
Important Note: If you exceed any of these limits, the API will return a rate limit error (e.g., HTTP 429). If you consistently hit these limits, you should enable billing to automatically move into the higher usage tiers.
B. When to Upgrade to Production (Vertex AI)
The Gemini Developer API (accessed via Google AI Studio and your API key) is the “fast path” for building. However, for serious, large-scale, or enterprise applications, the recommended step is to transition to the Vertex AI Gemini API.
| Feature | Gemini Developer API (AI Studio) | Vertex AI Gemini API (Google Cloud) |
|---|---|---|
| Use Case | Prototyping, hobby projects, rapid development | Enterprise, mission-critical applications, large-scale deployment |
| Authentication | Simple API Key | Identity and Access Management (IAM) service accounts |
| Data Control | Data may be used for product improvement (in the Free Tier) | Enterprise-grade security, data residency, and compliance controls |
| Scalability | Rate limits require billing configuration to increase | Designed for massive scale with guaranteed Service Level Agreements (SLAs) |
The decision is simple: If your application is moving beyond prototyping and needs guaranteed performance, advanced security, or compliance features, migrate to Vertex AI.
FAQs – How to Generate a Gemini API Key Without a Credit Card
How long does a Gemini API key last?
A Gemini API key does not expire automatically. It stays active until you delete it, restrict it, or regenerate it manually in Google AI Studio. If a key is compromised, you should revoke it immediately and create a new one.
Can I use one Gemini API key for multiple apps?
Yes, you can use one Gemini API key across multiple applications as long as they belong to the same Google AI Studio project. However, for better security and tracking, it’s recommended to create separate keys for different apps or environments.
What happens if my Gemini API key is exposed?
If your Gemini API key is exposed, anyone can use it to make API requests under your quota. This can exhaust your free tier limits or lead to unexpected charges if billing is enabled. You should revoke the exposed key immediately and generate a new one.
Is a credit card required to use the Gemini API free tier?
No, a credit card is not required to start using the Gemini API free tier. You can generate an API key and make requests within the free usage limits without adding billing information. A credit card is only needed if you upgrade to higher usage tiers.
Can I restrict where my Gemini API key is used?
Yes, Google allows you to restrict your Gemini API key. You can limit usage by HTTP referrers, IP addresses, or specific applications. Restrictions reduce the risk of misuse if the key is leaked.
Why am I getting a 403 or 429 error from the Gemini API?
A 403 error usually means your API key is invalid, restricted, or missing required permissions. A 429 error means you’ve exceeded free tier limits, such as requests per minute or requests per day. Check your key settings and usage quotas in Google AI Studio.
Should I use my Gemini API key in frontend JavaScript?
No, you should not expose your Gemini API key in frontend JavaScript. Client-side code can be viewed and copied by anyone. The safest approach is to store the key on a backend server and route requests through a secure API endpoint.
Start Using Your Gemini API Key Today
Generating a Gemini API Key is simple. You can create it in a few steps and start exploring Google’s AI models right away.
Keep your key safe and follow the security tips. Test it to make sure it works, and be aware of free tier limits to avoid issues.
Now that you have your key, you can start building apps, running experiments, or learning AI. Grab your Gemini API Key and start creating today!
If you want to create the ChatGPT API Key as well, follow our step-by-step tutorial on generating ChatGPT API Key and create it with ease!
Don't forget: your new API key also unlocks Nano Banana, Google’s state-of-the-art image generation model. You can now generate 4K visuals and perform ‘Conversational Editing' – where you tell the AI to change specific parts of an image using just text; all through the same API connection.
That being said, if you face any complications while creating a Gemini API Key for your project, feel free to share that with us using the comment box below. We would love to address your questions. Take care!