A Complete Beginner’s Guide to WordPress Full Site Editing
WordPress has consistently ranked as the most loved CMS globally. This becomes possible because it continually evolves to meet the needs of its diverse user base.
The latest advancement in this journey is the introduction of Full Site Editing (FSE), released with their 5.8 version update around 2021.
WordPress Full Site Editing (FSE) builds on the block functionality of the Gutenberg project. It offers a more integrated and user-friendly site-building experience. Users can create, customize, and manage every aspect of their website using blocks.
In this guide, we'll explore Full Site Editing (FSE), its benefits, how to access it, and step-by-step instructions for customizing headers, menus, styles, pages, templates, and patterns.
By the end of this guide, you'll have a solid understanding of using FSE to design, edit, and maintain an optimized and visually appealing website.
What is WordPress Full Site Editing?
WordPress Full Site Editing (FSE) is a groundbreaking feature revolutionizing how users design and manage their websites.
Unlike the traditional WordPress setup, where themes dictate the structure and appearance of different parts of a site, FSE enables users to customize their entire website through a block-based interface.
Why is this so important?
FSE enables site owners to edit the front end of their websites themselves without much coding knowledge. This also removes a lot of their dependence on front-end developers. Overall, it's a step in the right direction regarding technology accessibility.
You no longer need multiple tools and interfaces to build your site. Instead, you can handle everything from the header to the footer and every page from a single, unified interface.
The upshots of FSE are enormous whether you're an experienced WordPress user or a complete beginner.
Key Components of Full Site Editing
- Site Editor: The central hub where users can edit their entire site. The Site Editor provides a visual interface for managing templates, template parts, and site-wide styles.
- Templates: Predefined layouts for different types of content (e.g., single posts, pages, archives) that can be customized using blocks.
- Template Parts: Reusable template sections, such as headers and footers, can be edited once and applied across multiple templates.
- Global Styles: Settings that allow users to define the overall look and feel of their site, including typography, colors, and spacing. These settings apply universally across all templates and pages.
- Blocks: FSE's core building blocks allow users to add and arrange content elements like text, images, buttons, and more in a highly flexible manner.
Differences Between Traditional Editing and Full Site Editing
Traditional WordPress editing relied heavily on themes and theme-specific customization options. It often requires users to work with multiple interfaces and sometimes even code to achieve the desired look and functionality.
The classic WordPress editor almost feels like a relic from the bygone era of floppy disks.
It's all text-based editing. Limited customization forces you to rely on clunky themes and plugins.
Enter Full Site Editing (FSE)!
On the other hand, Full Site Editing significantly shifts the web development process. It integrates all the web design tasks into a single platform, eliminating the need to switch between tabs. Anyone can now create and manage a website regardless of their prior expertise or coding knowledge.
As you know, FSE is built on a block-based approach. It offers unparalleled flexibility, consistency, and ease of use, empowering users to bring their creative visions to life with minimal technical barriers.
How to Access Full Site Editing on WordPress
Getting to and using the full capabilities of FSE is a pretty simple process.
First, go to your WordPress dashboard, and on the left, locate Appearances ===> Editor.
Click on “Editor.”
After clicking “Editor,” you’ll be navigated to a new window with the editor interface and design parameters, such as navigation, styles, pages, etc., to the left. It should look something like this:
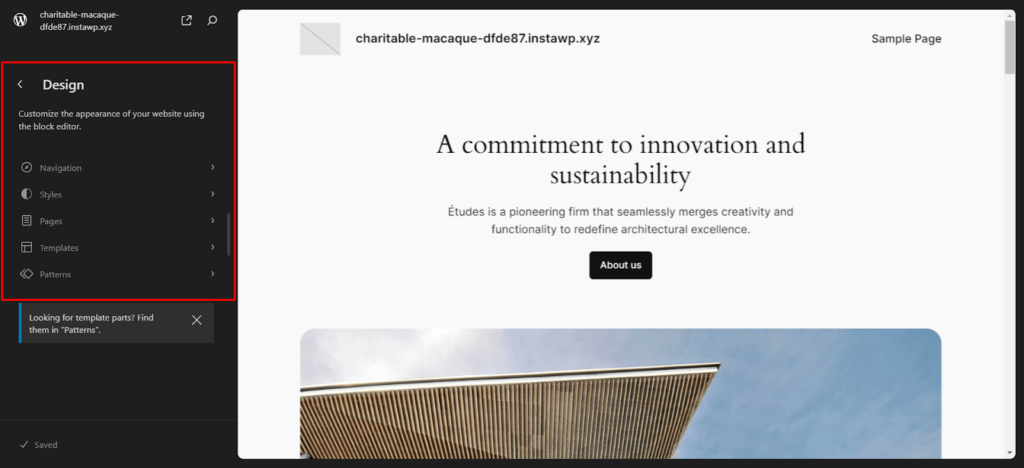
See! Simple! Now, we can think of all the individual block editor functions.
Create a Custom WordPress Header & Footer
Header
To create a header, go to the page you want to edit and click on the list view at the top left. Clicking on list view will give you a drop-down menu on the dashboard. This drop-down will have the header groups and footer just like this:
Now, if you click on the header on your page, you can use the block-based functionality of Gutenberg and drag and drop the elements you want to introduce into your header.
In the example below, you can see that I’ve added a navigation menu and a signup button to my header.
You can edit the header separately without doing it on the whole page. To do so, navigate to the left-hand “Design” panel and select “Templates.”
First, choose the page you want to edit. Then click on “Blog Home,” then scroll down to find “Header.”
You can also edit other template parts separately or add your custom template.
Editing the template by parts also allows you to adjust the width of your header. You can adjust the slider manually or directly input specific dimensions.
Footer
The process is exactly similar to the previous one. All you have to do is scroll down your page to the footer and start creating using the available blocks. Alternatively, you can edit the footer separately, just like the header. Just click on “Footer” in the Areas section of the page.
In the example below, you can see that I've created a pretty standard website footer using columns, stack blocks, and paragraph blocks.
You can also use preloaded templates to create headers and footers. It will speed up your development process.
Edit Your Navigation Menu
Navigation menus are an essential part of website design. They help users find the information they're looking for quickly and efficiently. A well-designed navigation menu can significantly improve the user experience and make it easier for visitors to navigate your website.
Follow these simple steps to customize your menu and ensure visitors can easily find what they want.
We've already seen how to access the site editor. After logging in, go to the page where you want to add the navigation menu.
After getting there, if you want to add the navigation bar to the header, click the “+” sign on the right of the editor block and type “navigation” in the search bar. The navigation element should pop up.
Something like this:
You can even add a completely new section and the navigation bar. With FSE, you have complete freedom.
Remember that you can edit the navigation menu separately from the page, like the header and footer. Just pick “navigation” from the design menu and hit edit.
Now that you have added the navigation menu, you can add as many pages as you like to the navigation bar. Just hit the “+” button to add another page.
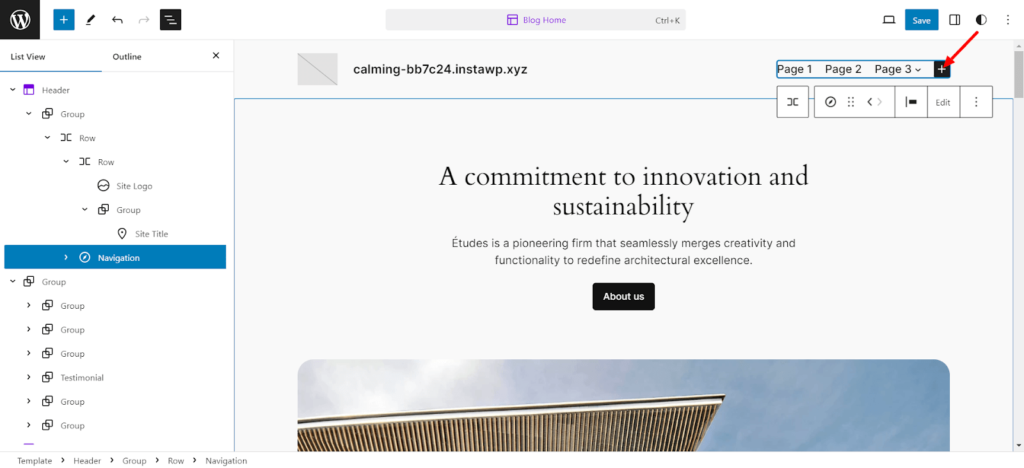
Next, you can add links to each page straight from the editor. Like this:
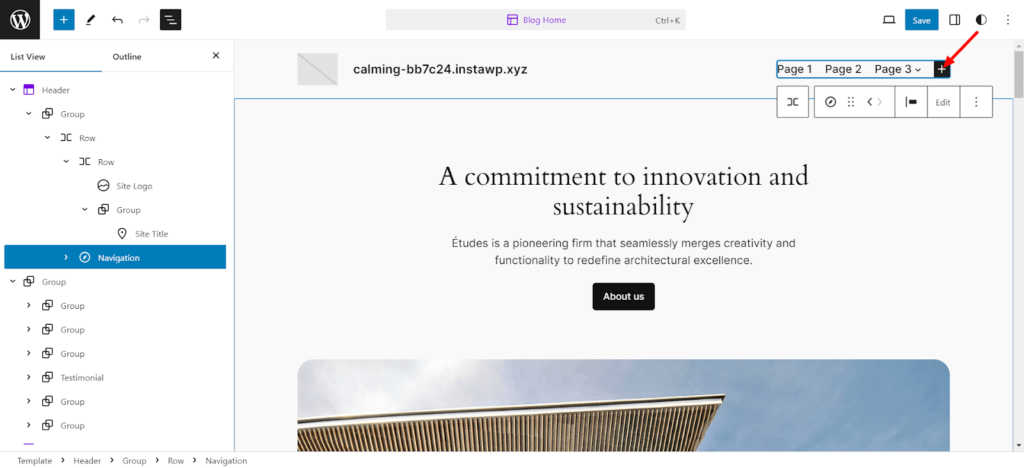
You may even add sub-menus to each page:
After creating your navigation menu, you can experiment with many different settings and styles. Just click the settings tab at the top right of the editor, right beside the save button, and customize and change to your heart's content.
Change Your Website's Global Styles
Go to the editor again and locate the styles button on the top right of your editing page. It should look like a half-black-and-white circle like this:
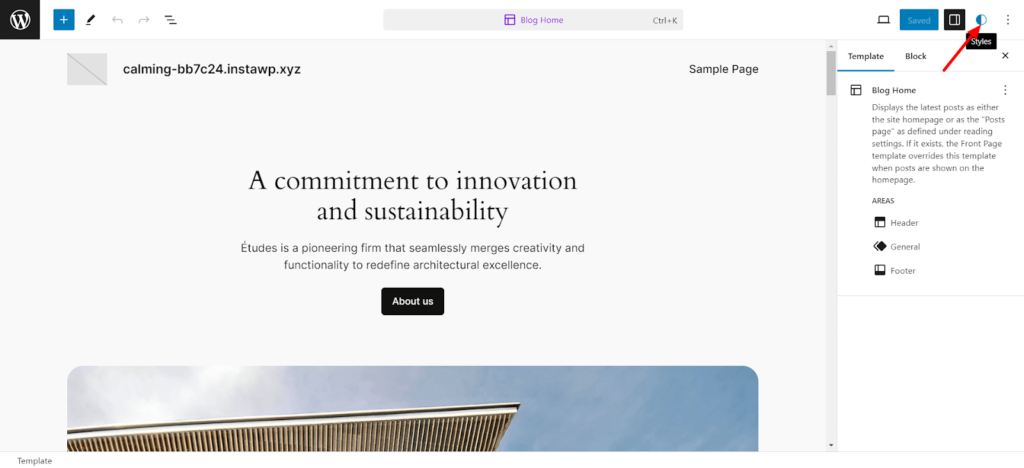
Upon clicking it, the styles menu should appear to the right with typography, color layout, etc. You can browse the different styles by clicking the “Browse styles” button.
There are many excellent and unique styles available to choose from.
Changing Typography
Next, you can change the typography of the fonts just by clicking on the “Typography” button. This will take you to a menu with different fonts used in various places on your page. You can even change fonts in specific elements such as text, links, headings, captions, and buttons.
To change a particular font, click on any of the fonts listed under the “FONTS” header, and you will have the option of:
- Using a default font
- Uploading your font
- Or select any of the Google fonts you have downloaded.
If you want to change the font on any particular element, whether a link or a heading, just click on it. You can customize settings such as appearance, letter spacing, line height, and heading sizes (H1, H2, etc.).
Changing Colors
Next, you can also edit the colors used on your website. Just click the “Colors” button. You can even change colors on specific elements such as text, links, etc.
Inside the “PALETTE” option, you’ll find a host of options you can customize, from theme colors that are solid to gradients.
You can even adjust the type and angle of the gradient if you want!
You can add as many custom colors as you want and set your custom color for any element.
Changing Layout
The third option that you can customize is the layout option.
In this section, you'll find content width, padding, and block spacing settings. Here's a short rundown of what all the settings do:
- The content width denoted as “CONTENT” deals with adjusting the width of the content on your page.
- The container width, or the box denoted as “WIDE,” adjusts the overall width of the page.
- The padding simply deals with padding on all sides of your website page.
- The block spacing handles the separation between each element block on your page.
And remember to save your changes after all the customizations you make unless you want your hard work to go down the drain.
Customize WordPress Pages
We've covered a lot already, but more to come!
Next on the agenda is customizing your WordPress pages. To do so, go to the design panel on the right and click on pages.
Here, you'll find a list of all the pages on your website.
If you want to see all the pages on your website, just hit “Manage all pages” at the bottom of the “Pages” section. This will open a new window with all your pages.
Once there, you can add a new page by clicking the top right button.
You can add a page by clicking the “+” button beside the “Pages” section header. A new prompt will ask for the page title. Just name the page and hit “Create draft.” Your new page will be created.
Now, you can start editing your new page.
Edit WordPress Templates
Head to the “Templates” page in the “Design” panel of the WordPress Full Site Editor.
Templates are preformatted pages that you can use to create specific types of pages. Let's take the “404” page, for example.
The page has already been designed to meet all the basic requirements of a 404 page. This is a pretty nifty feature, allowing you to reuse designs if you have many pages with the same layout.
Another cool feature of this system is that you don't need to edit each page individually. Suppose you use the same template for multiple pages. In that case, these changes will effectively apply across all the pages. Cool, right?!
Just hit the edit button with the pencil icon to edit the template.
Now, you can just start editing the template.
To create a custom template, hit the “+” sign beside the “Templates” header. Then, you can choose from multiple pre-loaded templates.
Or scroll down and make your custom template.
If you want to manage all the templates, just hit the “Manage templates” button at the bottom of the “Templates” section and check out all the template names, descriptions, and authors. You can even delete a template if you choose to.
You can also edit the page template directly without going into FSE mode.
Modify WordPress Patterns
Now we're left with the last editing option on the FSE editor, Patterns!
As you may know, patterns are ready-made blocks that can be used on different pages or posts throughout your website.
Once you create a new pattern, it is automatically added to the patterns directory. You can freely add it to any post or page you want.
Patterns are an extremely helpful design tool to maintain website consistency.
For example, you can create a CTA pattern just once and then use it across all the pages and posts on your website.
Like templates, patterns have a feature called “Sync.” This means that if you change one pattern instance, the changes will be applied to all cases.
If you go to the “Patterns” section of the editor, you'll find many pre-loaded patterns that are locked and cannot be edited.
Here, you can see the template parts section. It contains special patterns reserved for your website's structure. These are customizable.
To add a pattern, click on the “+” button. You’ll see options to create a pattern or template or import a pattern from a JSON file.
The difference between a pattern and a template part is that template parts are, by default, synced. You cannot change them. This is because template parts are used in structural parts such as the header or footer.
Patterns, however, can be synced or unsynced, depending on how you use them.
Create a pattern, set the category, and determine whether it will be synced.
Once you click “Create,” it will take you to a new editing interface. Here, you can use the FSE editor to edit that element.
FAQs on WordPress Full Site Editing
To enable full site editing in WordPress, you must have a site editing-compatible theme installed and activated on your website. Once you've activated a compatible theme, you'll see a new “Editor” option in your WordPress admin sidebar, which will take you to the Full Site Editor interface.
Styles in the Full Site Editor refer to the design and formatting options available for blocks and various elements on your website. These styles can include typography settings, color palettes, spacing, and other visual properties that determine your site's overall look and feel. Styles can be customized globally or for a particular block.
The Gutenberg editor is the default block editor introduced in WordPress 5.0, which replaced the classic editor for creating and editing content using blocks. Full Site Editing (FSE) is a more advanced feature built on top of the Gutenberg editor, introduced in WordPress 5.9. It expands the block editor's capabilities to customize the entire website, including headers, footers, sidebars, template parts, and regular content.
A block theme is a WordPress theme designed and optimized for the Full Site Editing feature.
Block themes follow the new block-based approach. Using blocks, you can easily modify the layout and appearance of your website, including the header, footer, content, etc. This allows for a more flexible and dynamic website design.
Closing Notes on WordPress Full Site Editing
The Full Site Editing (FSE) feature in WordPress aims to transform the web development process into a more block-based approach. So users can enjoy a more intuitive and flexible content editing experience.
FSE allows you to design and customize your website directly in the WordPress admin, using a visual, drag-and-drop interface. This eliminates the need for coding or working with a separate design tool.
This is the future of WordPress site development. You should learn more about this new feature and utilize it to increase productivity.
Do you have any further queries about WordPress Full Site Editing? Do use the comment section below.