How To Customize Your WooCommerce Store Using Happy Addons
eCommerce business is evolving day by day with the rapid growth of technology. In a general sense, it's comparatively easy, inexpensive, and low-risk to build an online shop, whether or not you already have a brick-and-mortar store.
But why should you keep your store page's design as a first priority?
Your products are unique — the product pages that showcase them should be, too.
WooCommerce
A well-designed makes the buying process easy for users. That's why you need to customize your eCommerce site in a proper way.
Fortunately, you don't need to be an expert or developer to do this. Rather you can use some – handy & convenient page builder tools to customize your store. For sure, it will help you to stand impressive & competitive generating more sales & revenue!
So, in today's post, we'll show how you can easily customize your WooCommerce store and add some splendid features using Happy Addons. Let's start with a basic question-
What Makes a Good Product Page?
A product page is a place where you showcase your online products to your customers in an organized way. So they can search, choose and buy products easily.

These days people prefer online shopping more than physical shopping. Because of the global pandemic, the total shopping scenario has shifted from physical to online store – which is more than 95% of all purchases. That's why it becomes more important and competitive to retain customers.
Suppose you enter into an online store to buy something (mobile phone). What will be your first requirement?
An easy shopping experience. right?
Yes, an easy shopping experience with a simple checkout process determines how organized a shop or product page is. Also, it will help customers to find what they're exactly looking for. This is where a well-customized shop page comes to play.
So let's check out why WooCommerce store customization is important to:-
- Build a great brand identity
- Engage more customers
- Increase user-experience
- Stand out from other competitors
You may also like: How to Find and Convince Vendors for Your Multivendor Marketplace
How to Customize WooCommerce Product/Shop Page Using Happy Addons

Now it's time to demonstrate the process of customizing the WooCommerce shop page. Carefully follow the steps and apply them to your WordPress-powered WooCommerce site.
Prerequisites before customizing WooCommerce Store Page
- WordPress
- WooCommerce (Free)
- Elementor (Free)
- Happy Add-ons (Free & Pro)
Firstly, make sure you have successfully installed and activated all these prerequisites on your website.
Let's show you how to customize your WooCommerce shop page using Happy Addons.
Step One: Open Your Shop Page
Go to your WooCommerce Shop page from your WordPress dashboard. And then click on Edit with Elementor.
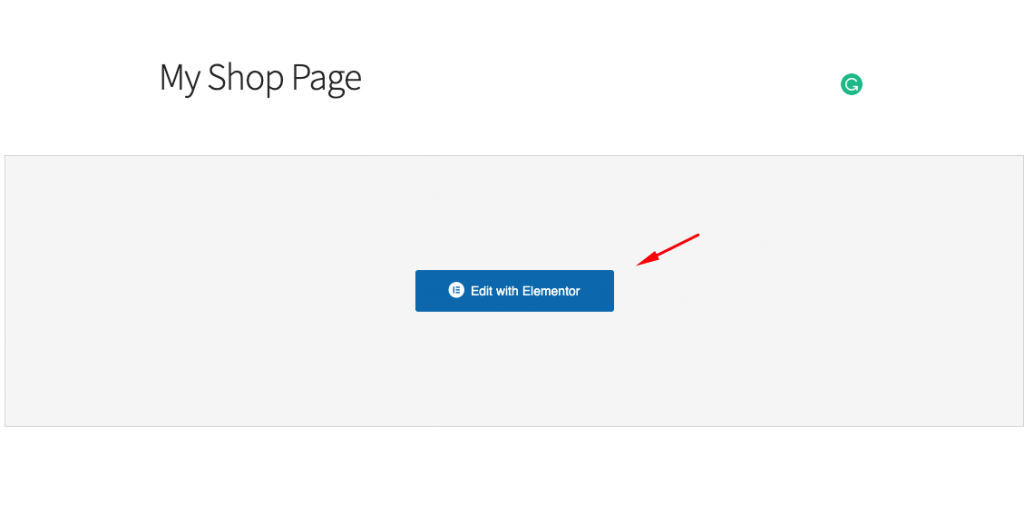
After that, the default WooCommerce page will open. And here your store customization journey starts.
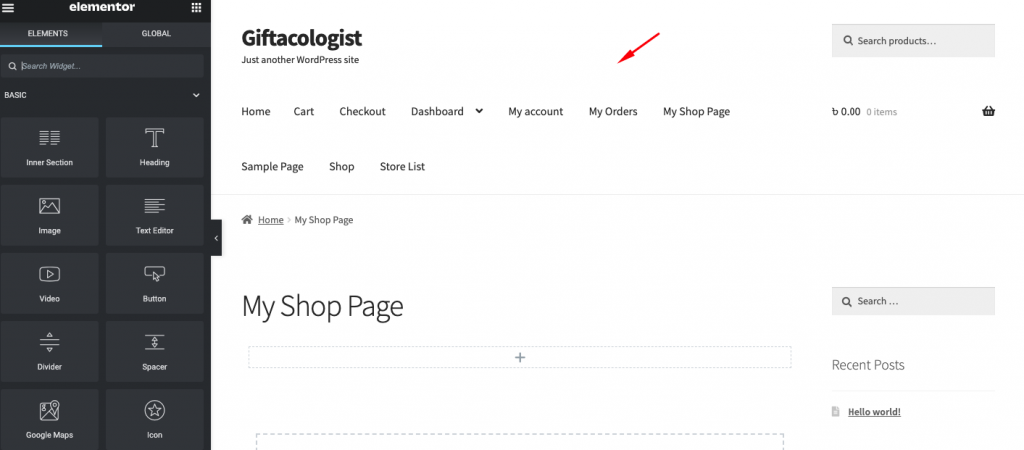
Step Two: Utilize HappyAddons WooCommerce Widgets
To make the customization easier, we'll use four amazing Happy Add-ons WooCommerce widgets.
- Product Grid:- You can display your products in grid views lucratively with HappyAddons Pro Product Grid Widget.
- Product Carousel:- A complete WooCommerce Product Carousel widget to grab the attention of customers
- Product Category Grid:- The best fit for displaying WooCommerce Products category-wise.
- Product Category Carousel:- You can publicize products in carousels based on specific categories with the help of the Product Category Carousel Widget to make them more fruitful
NB: These are all pro features of Happy Addons. So if you want to use them on your site, you must upgrade free to the premium version.
Using Product Carousel Widget
Let's see how you can utilize the Product Carousel widget on your WooCommerce site. To use the widget, you need to select the widget and drag-drop on the screen.
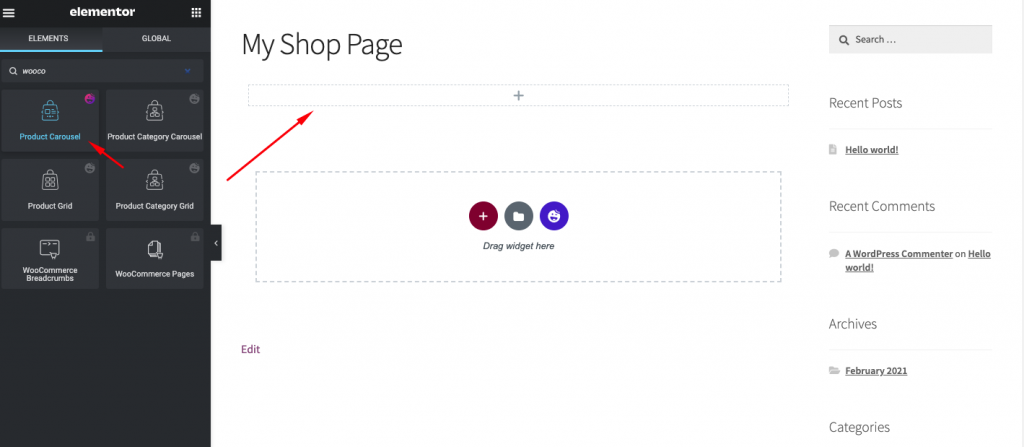
So after adding the widget, you'll get an interface like this.
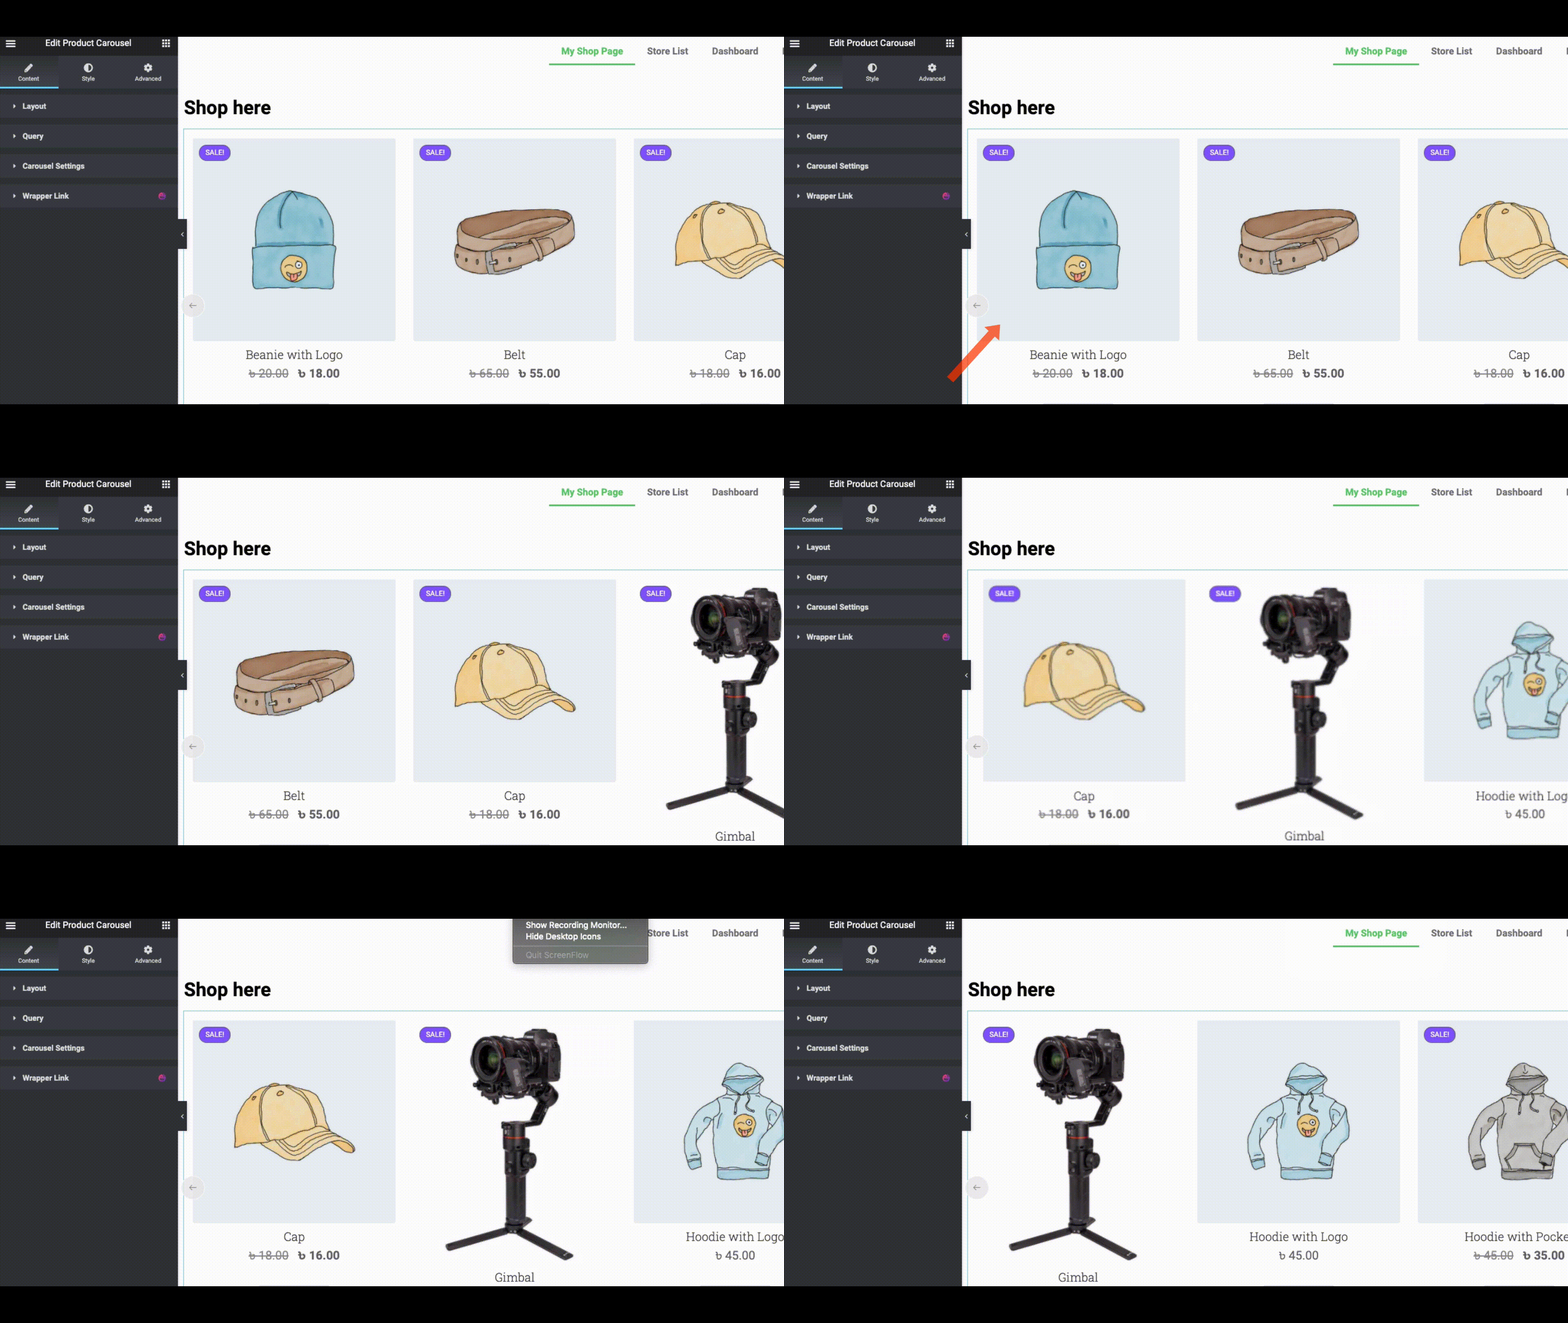
Here you will get four options-
- Layout
- Query
- Carousel Settings
- And wrapper link
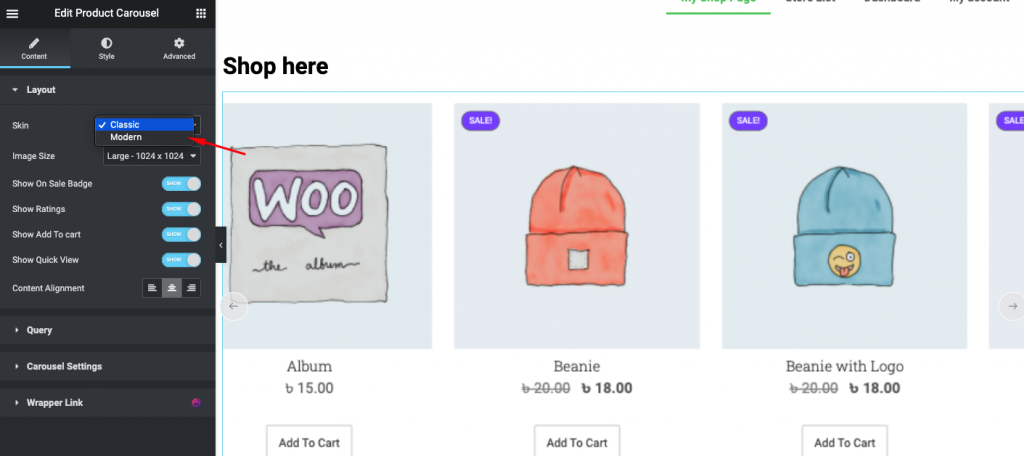
In layout, you can choose two different skins. Classic and modern. Toggle on or off the options if you want. And align the image content according to your design.
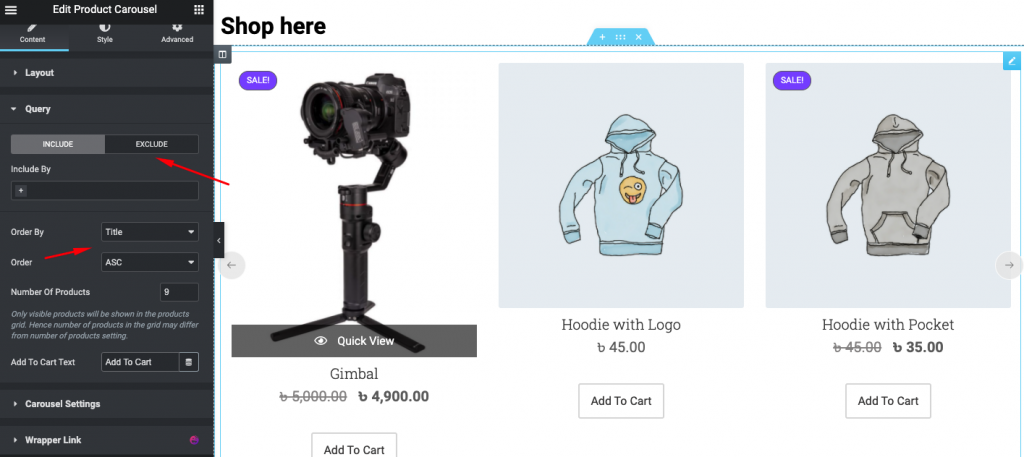
Now click on the query option to customize more things. Here you can showcase products according to the category.
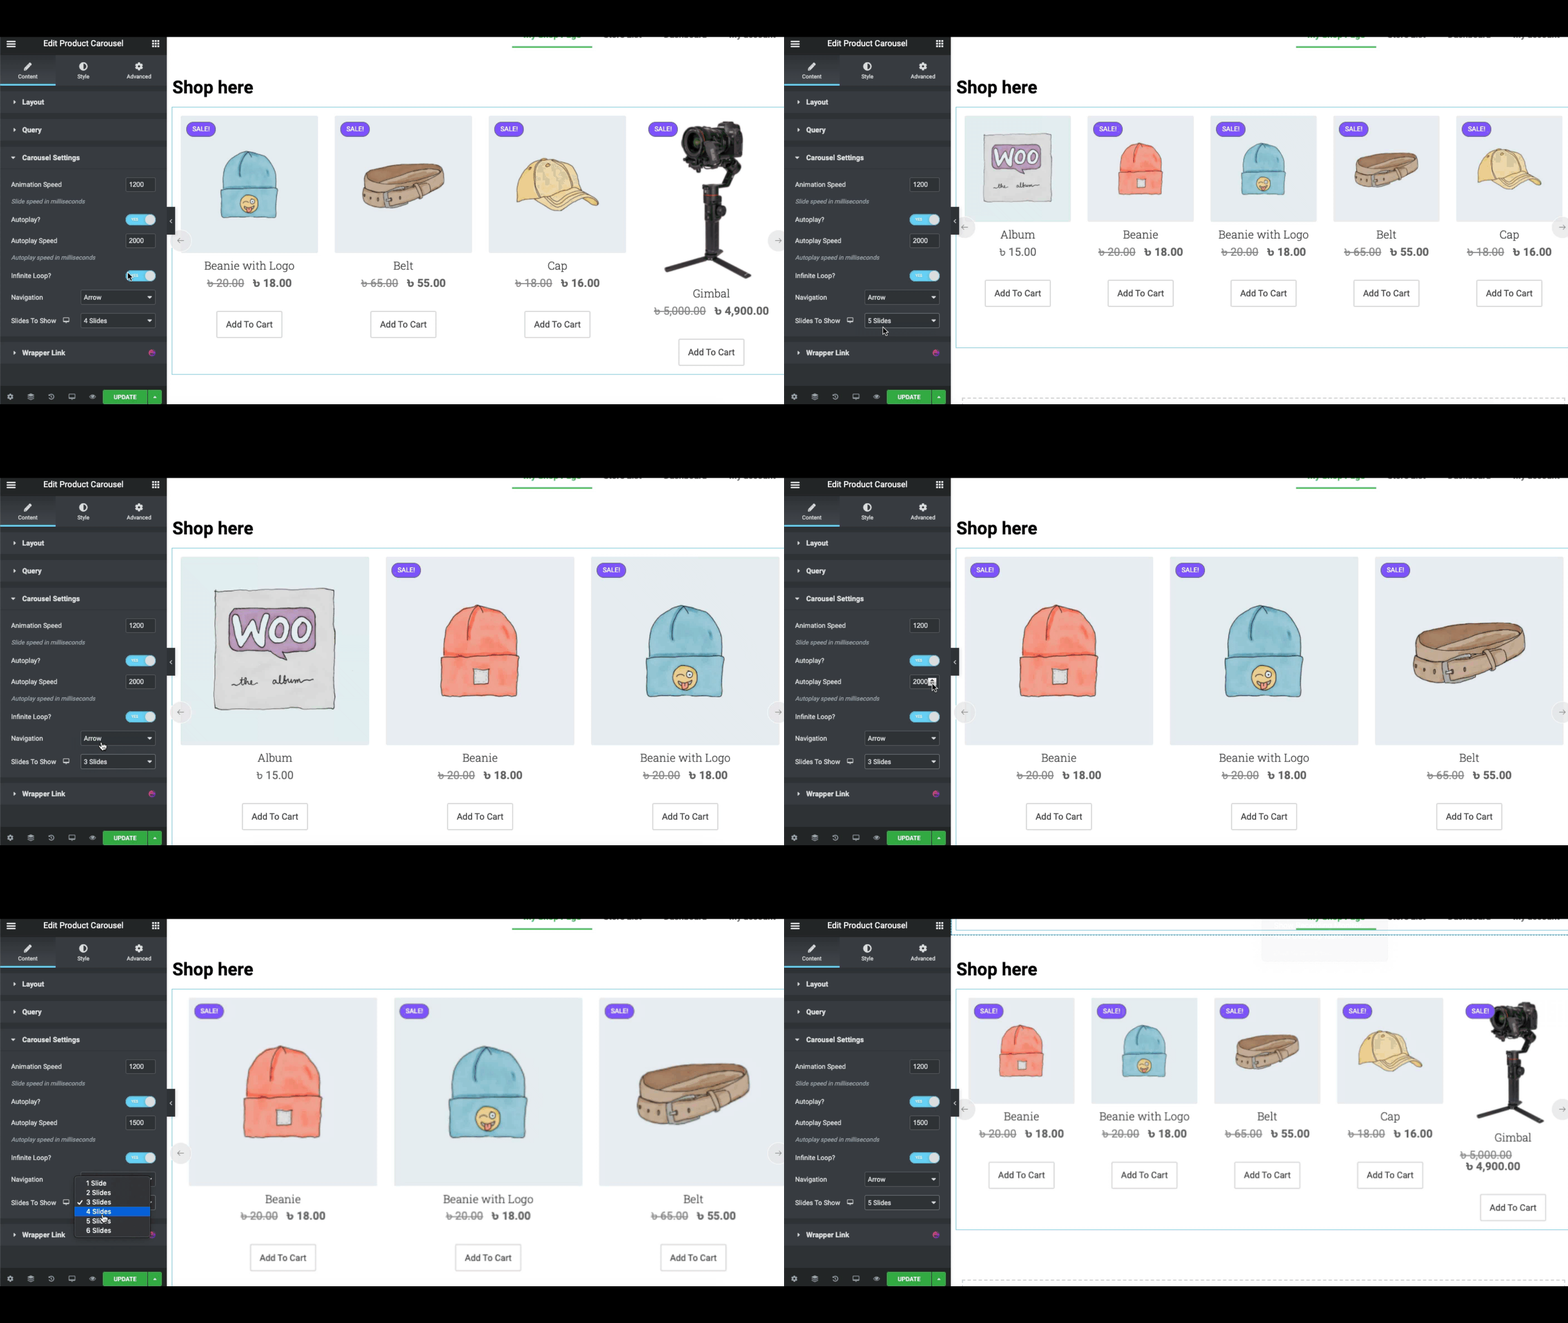
Also, you can add some animation features to the design. To do that you need to click on the Carousel Settings. For example, set the animation speed, slides, slides arrow, etc.
In the end, you can add a wrapper link to the design.
However, you can stylize the design by clicking on the Style button.
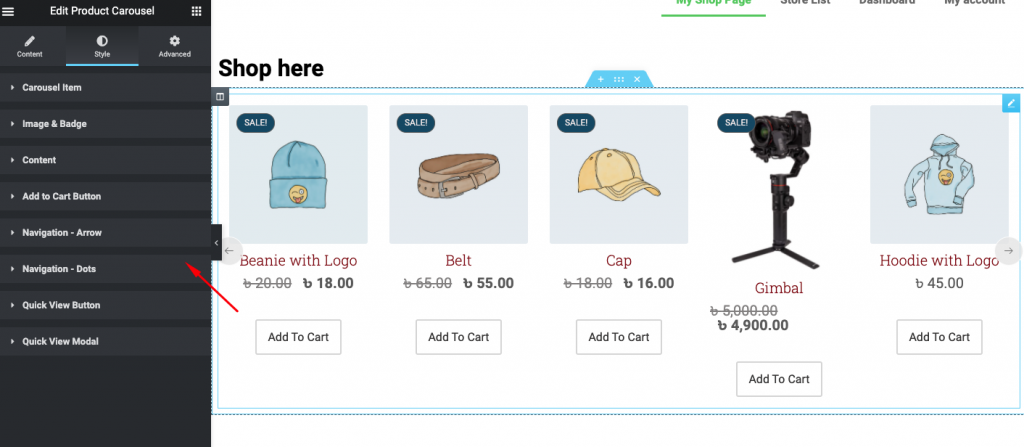
To know more about the product carousel widget, you can check out the official documentation.
Using Product Category Grid
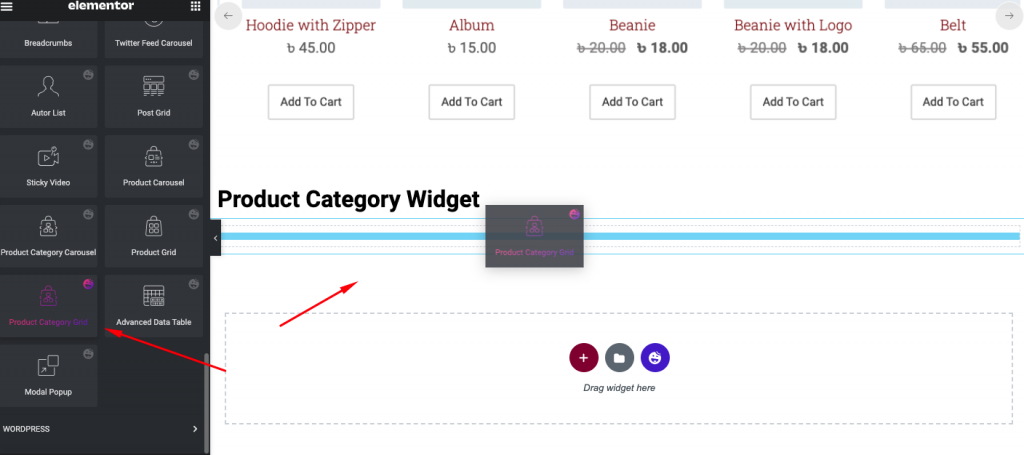
Similarly, select the product category grid widget and paste it on the screen.
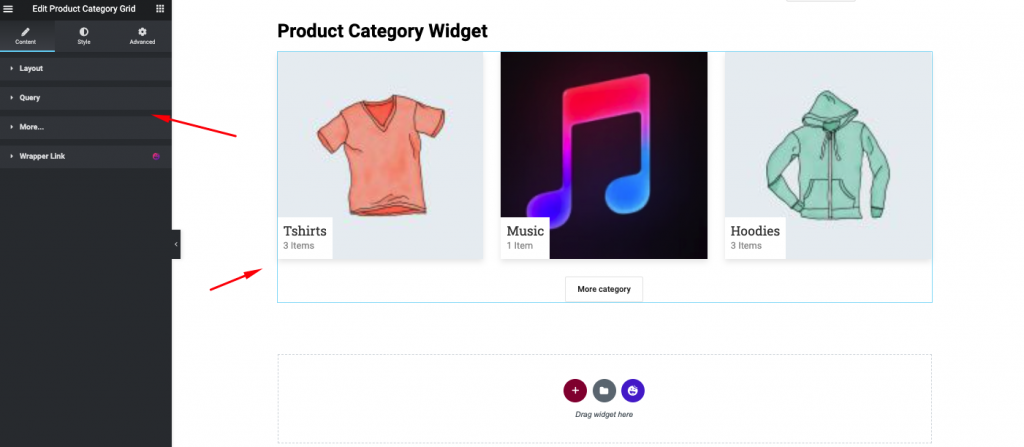
After adding the widget you'll see the preview of your category. Also, you can use the useful options on the left side of the screen.
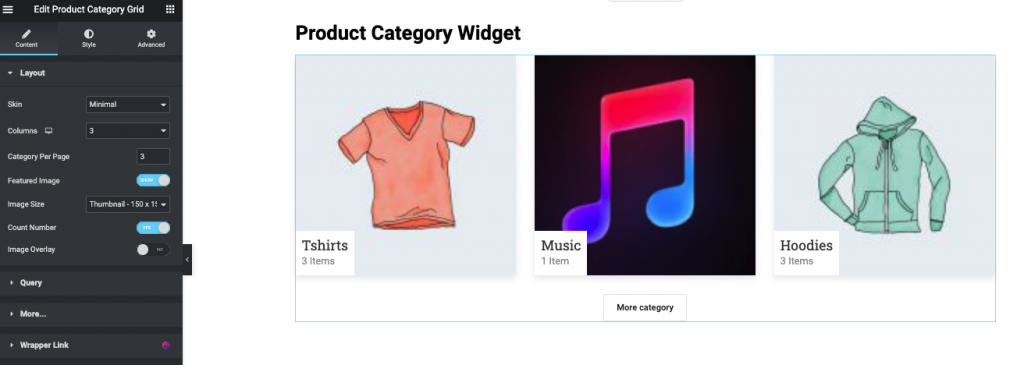
Next, customize the query section to add more features to the design. For example, you can set the column, skin style, image size, add an image overlay, etc.
However, if you don't want to showcase all the categories here, you can also exclude or include them. Do make sure you're showing the right category to your users.
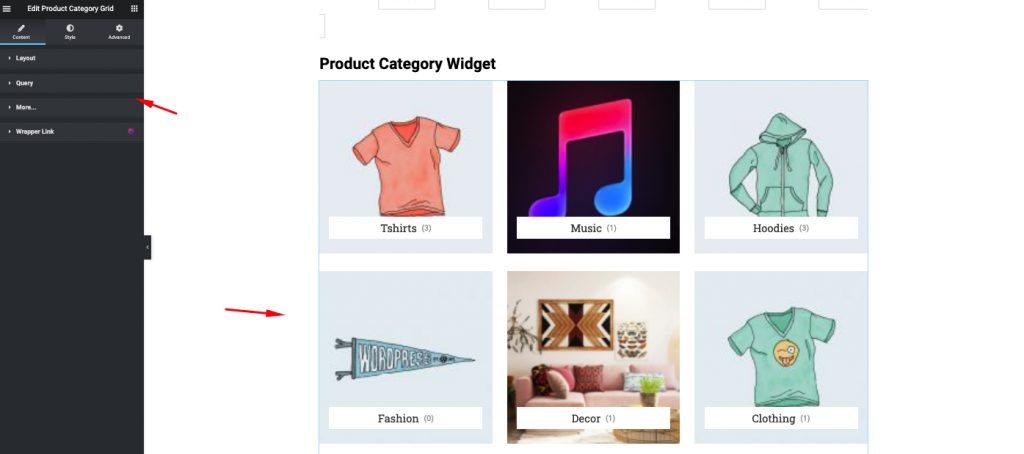
To stylize the design, click on the style button. Here you will have four available options.
- Layout:- Change layout design, height, weight, row-gap
- Item box:- You can change an image's height, weight, color, and more
- Content:- To change content color, background, height, weight, spacing, etc
- Load more buttons:- From here you can customize load more category button's, font color, typography, background color, etc
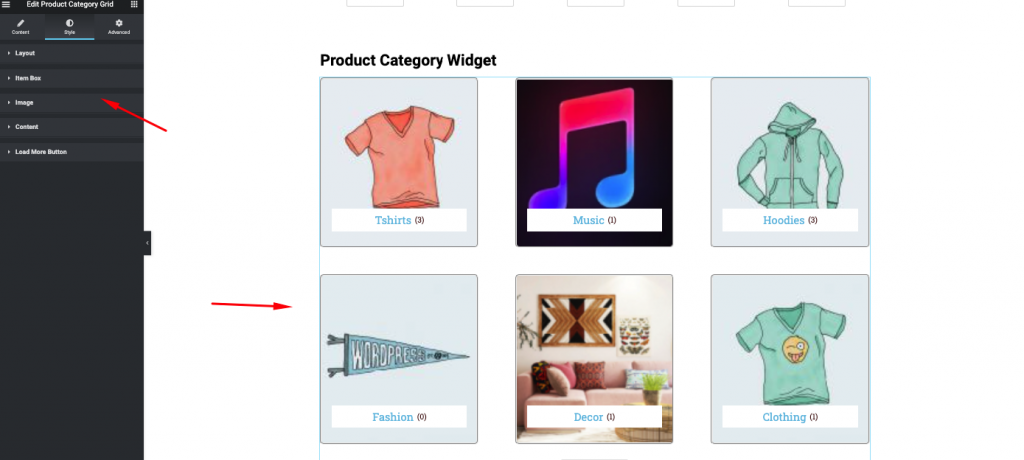
However, if you want to utilize this widget more on your WordPress site, you can check out our official documentation here.
Product Category Carousel Widget
Select the widget and drag it to the selected area.
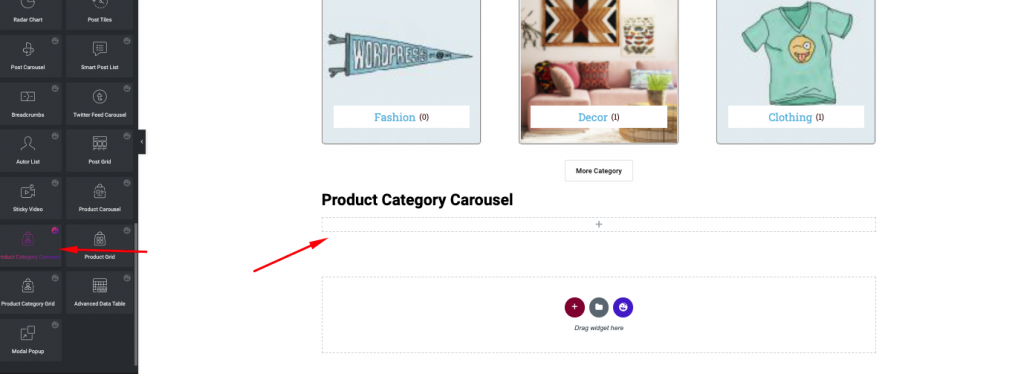
After that all the options will be available to you. This widget is almost the same as the product carousel widget. Product category is showing categories and product carousel is showing the products.
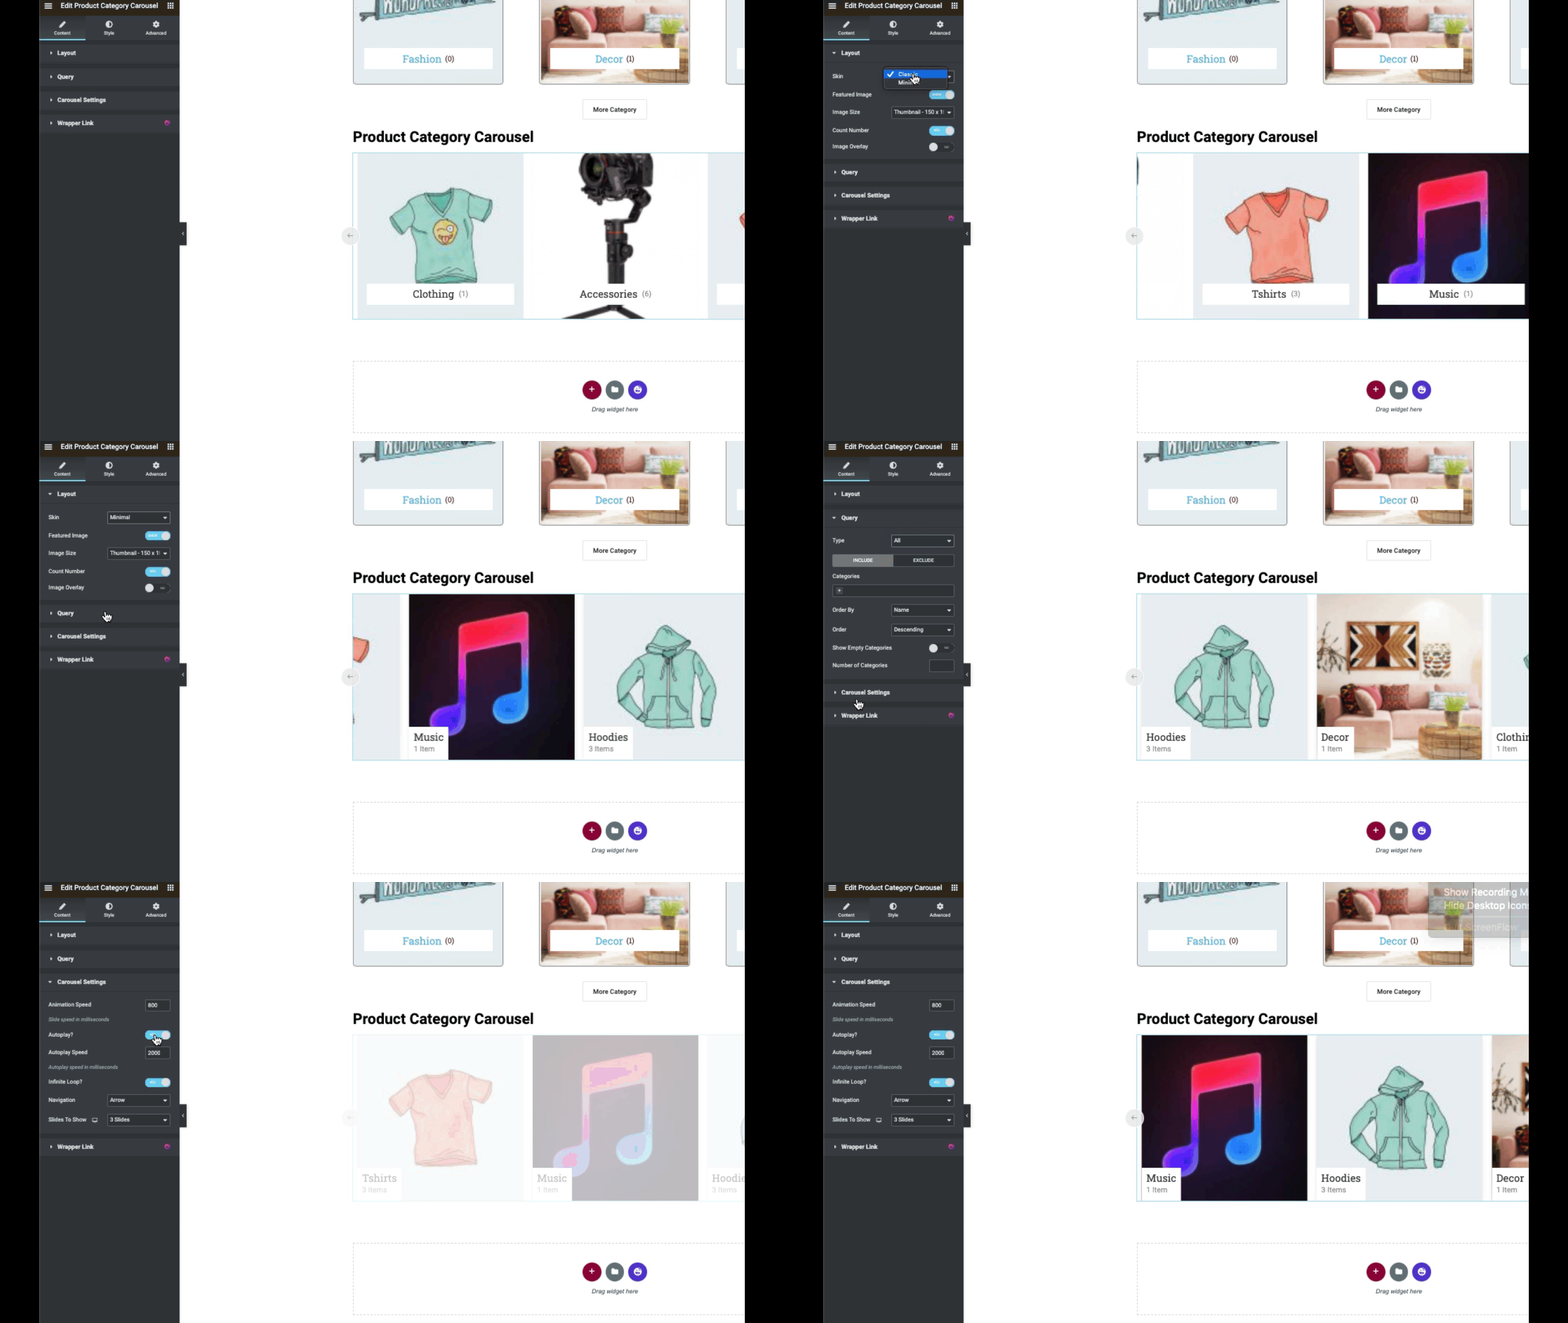
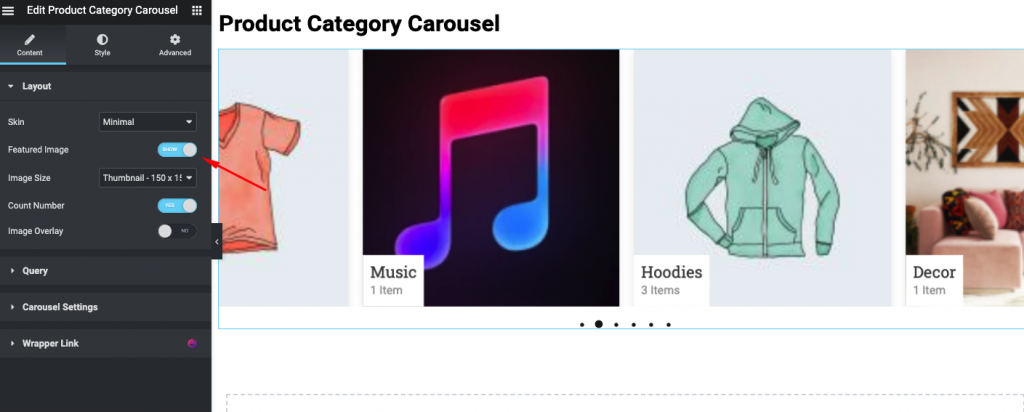
After you click on the Layout button, you can set the skins, image size, count number, and define image overlay. Therefore, if you can implement these correctly, they will look more beautiful and engaging.
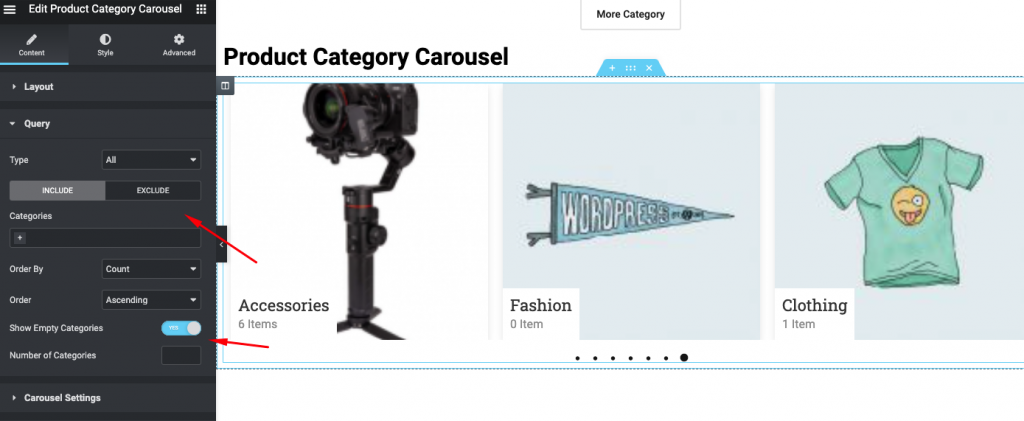
Click on the query to exclude or include the category in the carousel. Also, you can set the carousel according to the order.
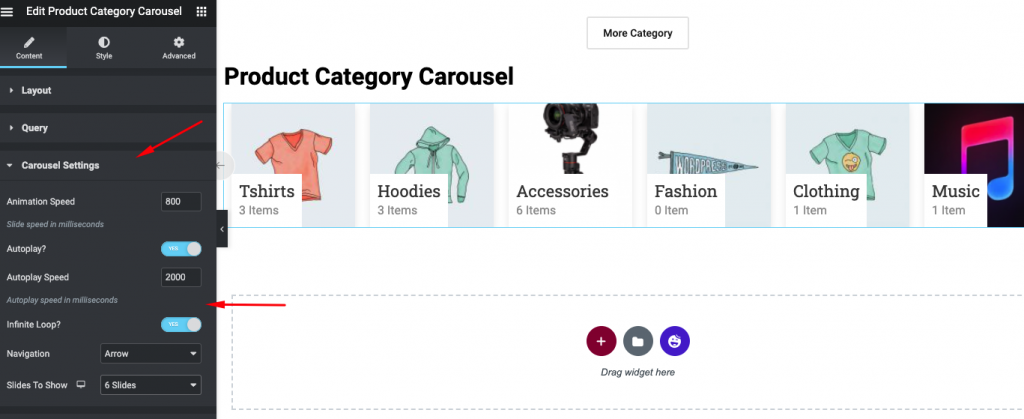
Then click on the carousel settings to change the animation speed, autoplay option, navigation style, and slides. And this will help you to customize your WooCommerce shop page to showcase your most preferred product category to your users.
Anyways, if you want to get a detailed guideline of the product category carousel, you can always check out our official documentation.
Product Grid Widget
If you're facing issues displaying your products in the perfect grid position on your WooCommerce shop page? Yes, you can do using the Product Grid Widget.
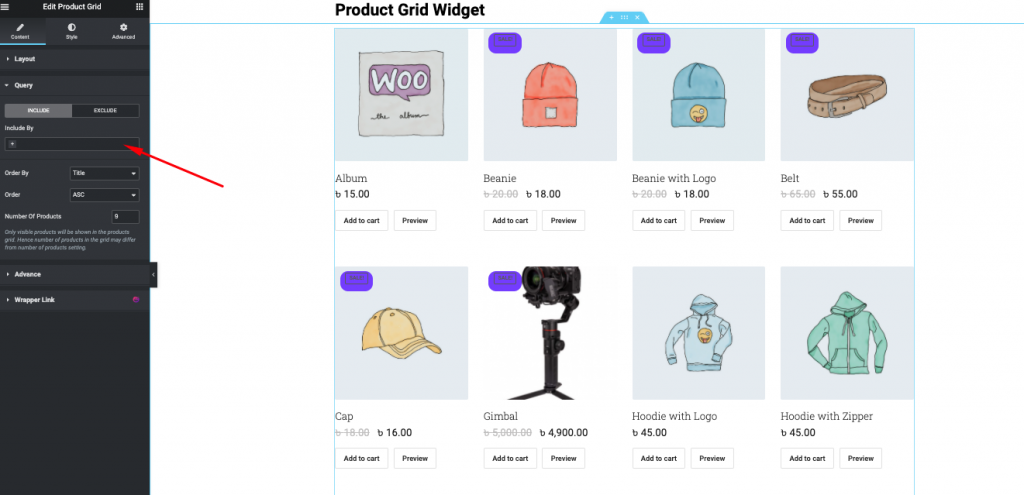
To do that click on the widget and drag it to the selected area to start using the widget. So when you add the widget, all the products will be added as a grid view.
And you will have a layout option to customize. All the products will be added automatically on the screen. Here you can show the pricing page, rating, badge, cart button, and quick view button.
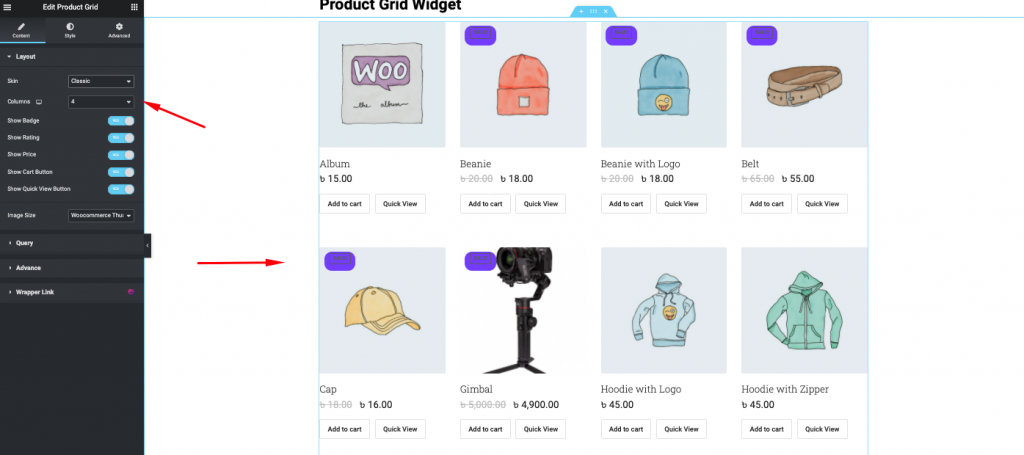
You can show the products that you want and also you add them or exclude which product you want.
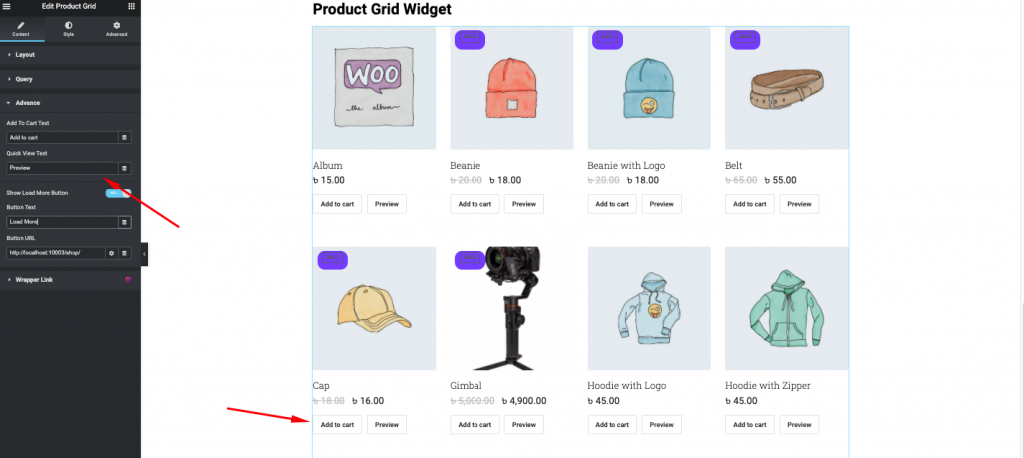
In advance settings of this widget, you can customize add to cart button, quick product view button, and attach a link.
Lastly, you can give a style to your design using the Style button. Here you can customize badge, content, image, cart and quick view, etc.
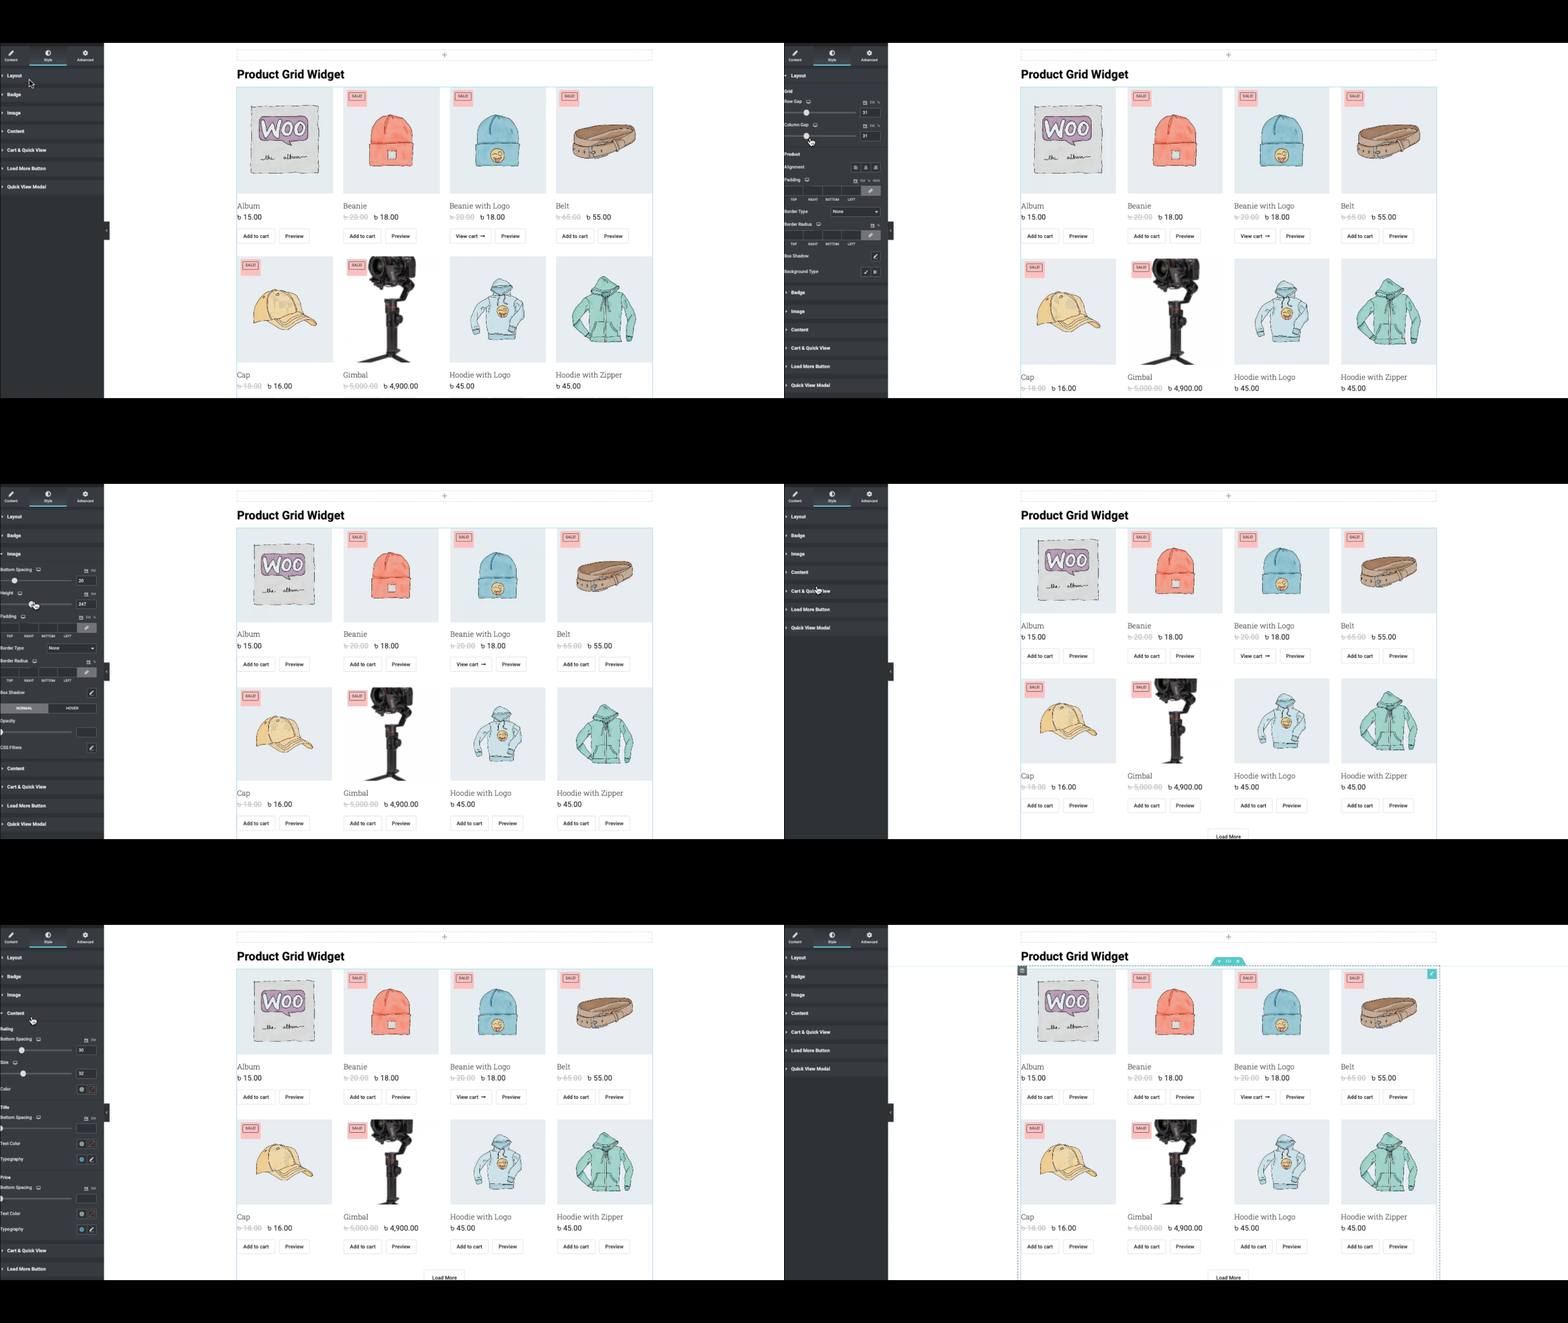
So this is how the Happy Add-ons WooCommerce widget helps to customize shop pages. So take your time and carefully follow the steps to implement all these things on your WooCommerce shop page.
Final Preview of The WooCommerce Store

Well, the process that we showed above is for a single vendor store page. But what if want to design a full-fledged multivendor website using Dokan, you could check out the following article.
Build Your Own Marketplace Website for Beauty Care Items Using Dokan
Mistakes You Should Avoid During Customizing Your WooCommerce Product Page
No one but only you can ensure your site's performance is as strong or low as you like. Generally, we all want our website to look professional, good-looking, and engaging. But this may not happen so easily.
This is why we all need to make the right decisions before making any changes to your website.
But while thinking about adding any changes to the website, many of us make some silly mistakes – eCommerce marketplace mistakes. Because we're all in a hurry, or we just forget to follow the proper structure, especially customizing an eCommerce store.
To help you out, here are some of the important marketplace mistakes that we think you should know. And these can undoubtedly ruin all your efforts and hamper your business growth.
So let's check out the common mistakes that you must avoid before customizing your WooCommerce shop page:-
- Not updating WordPress in time
- Using an older version of WooCommerce
- Keeping outdated plugins
- Not using SSL Certificate
- “Admin” As Your Username
- Using “Free” WordPress themes
- Too many irrelevant categories and tags
- Not focusing on user experience
- Not optimized store for mobile responsive
- Forgetting Google analytics
These are the mistakes that you must avoid before sitting to customize the WooCommerce shop page. So if you want to dodge some costly blunders or want your eCommerce business to rock, then these mistakes could help you, for sure.
Final Words
Well, the post has come to an end. We tried our best to show you the easiest way to customize your WooCommerce shop page. And the WooCommerce widgets of Happy Addons are undoubtedly easy to use.
So if you're not happy with your existing product page look, and want some variation on your product page, you can try these features on your site and follow the steps that we showed.
