
9 Proven Ways to Increase Returning Users Growth Using weForms
If you are running an online website for your business, you need an enormous amount of visitors. Because these visitors will one day turn into paid customers.
And, to this end, a web form can play a vital role. Because using a webform builder will help you to create contact forms, rating forms and a lot more to grow your business.
Luckily, if you do have a WordPress website, you don't have to create any webforms with hard-core coding knowhow. Because there is already a plethora of web form builder plugin available in the WordPress repository.
In this tutorial, we will show you a few ways to increase returning users using weForms and get the most out of this WordPress form builder. Now, let's dive in…
1. Use Conditional Logic to Ask the Right Questions
No one loves redundant and non-personalized content. To sustain visitor traction, it's quite necessary for you to make your content precise and properly personalized.
For example, you may want to run a survey to collect reasons for the deactivation of your plugin. Now, you can use a few checkboxes for that purpose. However, there may be reasons you might miss to include in the checklist. In this case, you may use the ‘Other' option. When the user clicks on the other option a text box will open up.
And to do so, you need to use conditional logic. Here is how it works:
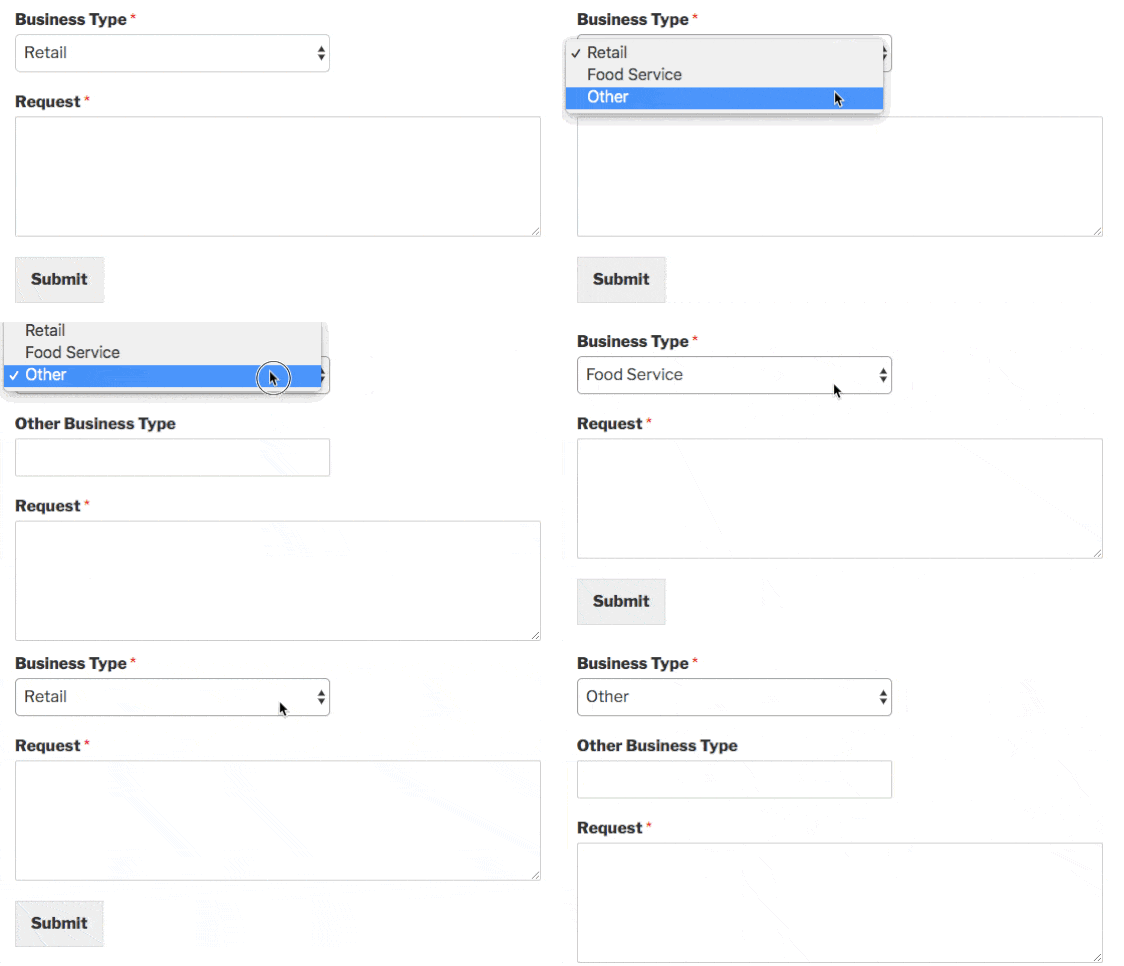
Hiding in such a way is also pretty useful when you want to hide or show particular fields. For example, you may want to show particular fields for males while you don't want to show them to females.
2. Send Custom Form Notifications to the Right People
Now, if a visitor opens an account on your site, you may need to send them personalized notifications to their associated email inbox. You can not only configure this email but also can edit its content effortlessly with weForms.
The best part here is that you can send this notification to the users based on their user roles.
To learn how to do it, you can go through this tutorial.
3. Display Success Messages Based on User Actions
You can also display success messages to your users as per their user roles. For instance,
- You can show a “Thank you…” note to just after a user register or makes payment to your website. Read more.
- After successful submission of the form or after having purchased an item you can redirect your visitor to a certain page of your website.

- You can also take your users to a different website after successful form submission.
4. Create Multi-Column Layouts With a Click
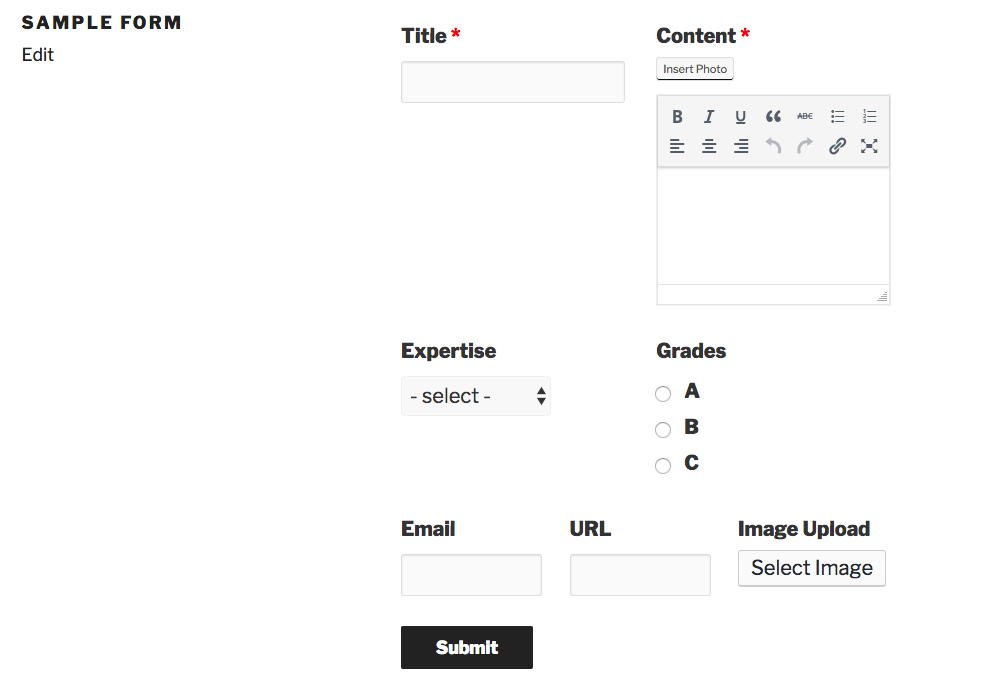
Surprisingly, it is also possible to give your forms different appearances using multi-column layouts.
Out of the box, weForms will show fields in one column which can be changed with multi-column layouts.
5. Use Multi-page or Multi-step Forms to Boost Completion Rates
Another amazing hack can be using user's psychology, that is, to breaking down the steps of the form if your webform is unusually large.
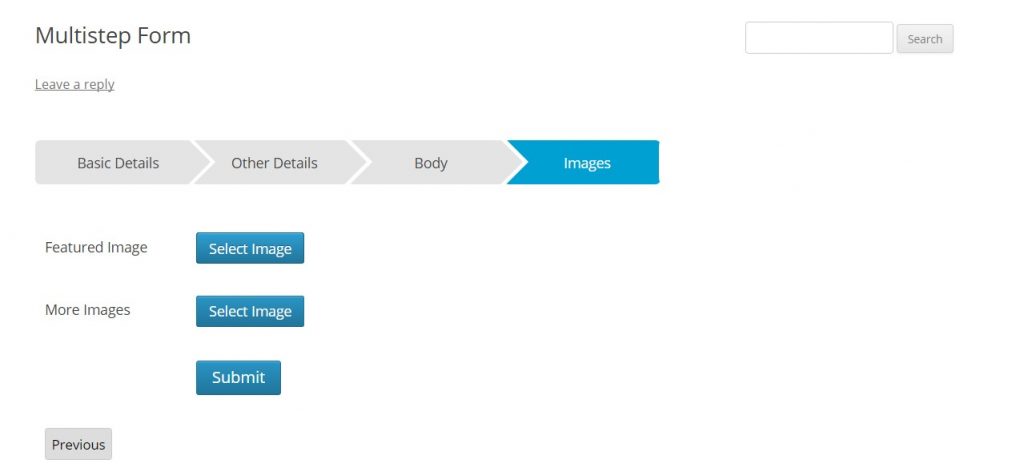
And weForms can allow you to do so in two ways. You can use either multi-steps functionality or can use the multi-page functionalities.
Here is a sample of a multi-step form:
You can also change the text color, background color, and active background color at your disposal:
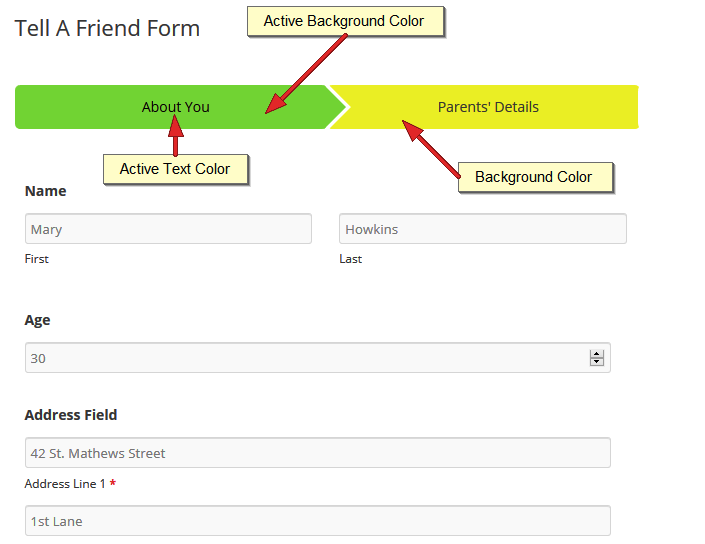
Breaking down your long-form into bite-sized pieces will make it more user-friendly and eventually increase the number of form submissions.
You can follow these tutorials to create a multipage or multi-step form.
6. Customize Breadcrumbs for Multi-Page Forms
If you are already using multistep forms, then you may need to style the progress bars or breadcrumbs.
In weForms, you can not only use different types of breadcrumbs but also change their color.
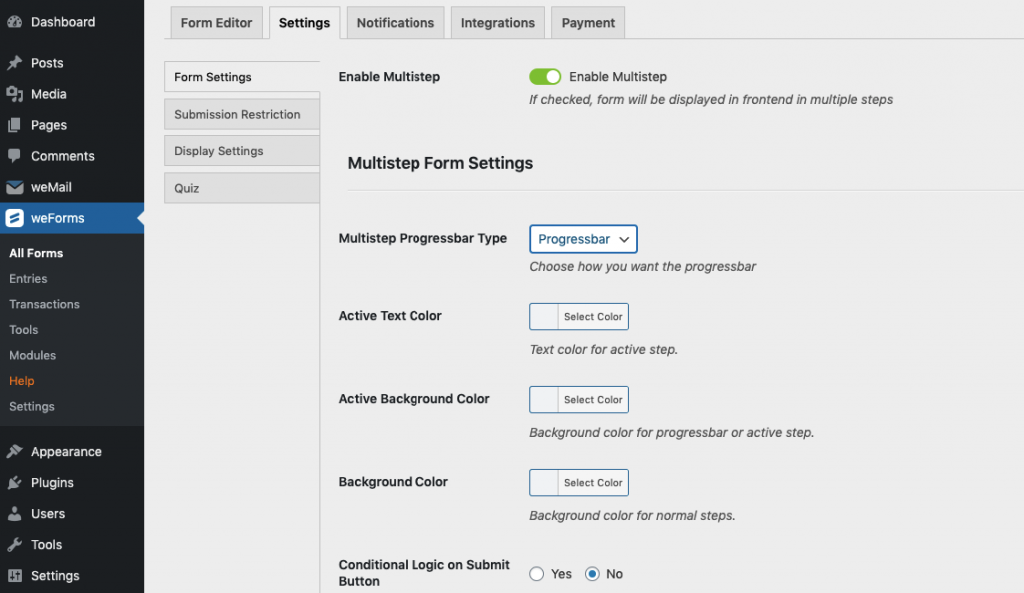
weForms supports the following two breadcrumbs:
- Progress Bar
- Step-by-step
To learn how to use breadcrumbs or to customize them, you can go through this doc.
7. Attach Google Maps in Your Form
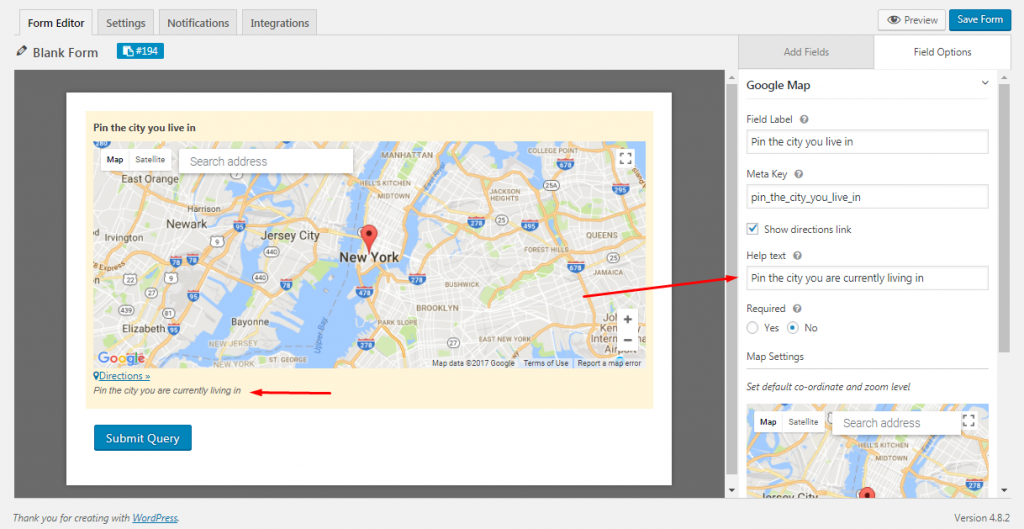
If you want to register your visitors for a particular event, you can even use Google maps on your form. This will help your visitor get to know the exact location where the event is going to be held.
To learn how to use Google maps follow this link.
8. Use Payments Fields to Get Paid
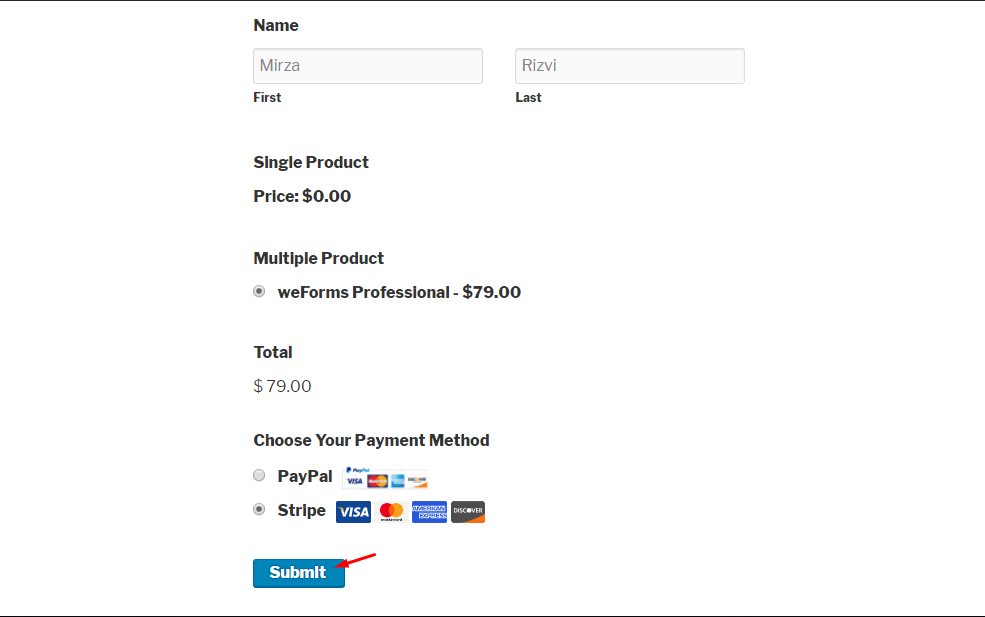
When you have your visitors on your web form, you may want to sell your products or services to your potential customers. And surprisingly, weForms supports popular payment gateways like Stripe, PayPal, etc.
You can go through this documentation to learn how to use payment methods on weForms.
9. Filter Your Leads through ReCaptcha

With weForms, you can block unwanted users and their content. This is a Google service you will find in weForms. For your online business, you need quality leads. This is where weForms got you covered.
Click here to learn how to use reCaptcha using weForms.
Extra Bonuses: Integrate Other Platforms
weForms integrates a ton of other platforms. For instance, it has a successful integration with the following:
- MailChimp
- Hubspot
- Zapier
- Stripe
- Google Analytics
- Zoho
- PayPal
- Salesforce
Final Thoughts
Now, it's time to implement these hacks in your form. I hope that this article will be helpful to grow your business by gaining more quality leads.
However, there are more untapped resources in weForms you can play around with.
If you are yet to be convinced, you can try out the demo to get a hands-on experience of the web form builder.
So, what are you waiting for? Get the weForms now and start attracting more qualified visitors to your website.