
How to Create an RSVP Form in WordPress in 5 Easy Steps
Events now are the parts of our daily life. We participate in or manage one or more events almost every week. It's also the same important to know the number of actual participants to handle an event perfectly.
If you are an invited guest you should inform the host whether you are going to attend or not. In this era of technology, you can perform both of the obligations by just creating an RSVP form in WordPress.
Treat technology as a gift of time. Make your life easier and more comfortable with automation. In this short article, we are going to show you how to easily create an RSVP form in WordPress.
What is an RSVP Form
You may be confused yet what an RSVP means on an invitation. It’s a term comes from the French expression ‘répondez s'il vous plaît’. It means ‘please respond’. If RSVP is written on an invitation it simply means the guests should certainly tell the host whether or not they plan to participate in the party

But the funny thing is- it’s now a fixed idiom even in French! French people also use the term RSVP in their invitation instead of the regular form ‘répondez s'il vous plait’. Sometimes hosts write ‘RSVP’ to make it easy to understand to all.
Remember: RSVP doesn't mean to respond only if you are coming. Or respond only if you are not coming. It simply means the hosts need a defined headcount for their planned event with the specified date in the invitation.
Why Need an RSVP Form in WordPress
RSVP is a broadly used term in today's invitation card around the world. Print or digital whether is the format, RSVP has now become a trend. Check out why do you need an RSVP form in WordPress to ensure total headcount of your planned event.
- An easy way to handle the event registration
- Informing all your targeted guests in a simple way
- Receiving the data about attendees headcount
- Saving your precise time and money
- Ensuring a massive response from your target attendees
- Gathering detailed guest information
- Ensuring perfect planning for your event
- Making your event more engaging
- Security issues are also an important fact to consider
- Collecting your guest opinion on some specific points
- Getting exact data on what type of food/drink they prefer
- Selecting the soundest idea of your event by giving them options to choose
…And many more
Where to Use an RSVP form?
An RSVP form in WordPress can be used for any occasion you have planned for. You could simply use it for your most formal corporate events or a special family celebration.
Use RSVP forms for any type of incident-
- Party invitations
- Club events
- Company training
- And even a birthday party or wedding!
A single WordPress form will perform all the tricks.
The Best Way to Create an RSVP Form in WordPress
There are several ways to create an RSVP form in WordPress. The easiest way to make your job done is to use a plugin. You could select WordPress User Frontend, Ninja Forms, WP Forms, and weForms to create your RSVP form. Our pick for you is the weForms– the easiest drag & drop form builder in the WordPress community.
Why weForms is the Best Option for You?
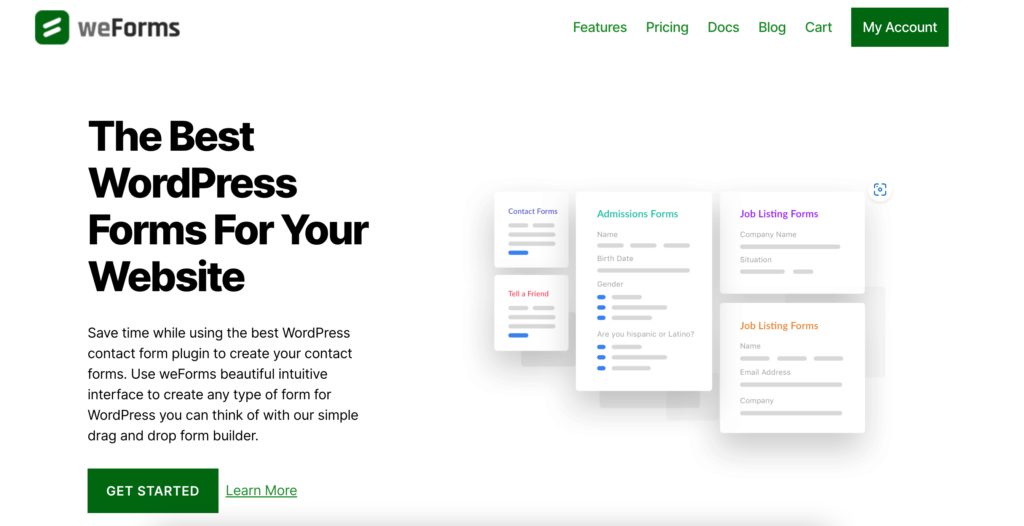
- Extremely fast drag & drop form builder with live preview
- Advanced custom form fields
- Shortcode based forms to publish in the frontend
- User & admin notification for form submission
- Single click forms export/import
- Lots of available modules to integrate with
…And finally, it's free!
How to Create an RSVP Form in WordPress with a Few Clicks!
Can you add or install a plugin on your WordPress site? if yes, then that's enough to create an RSVP form on your own. Follow the instructions below.
Step 1- Install weForms to Your WordPress Site
- Log in to your site's backend or dashboard and install weForms by clicking on Add plugins Option
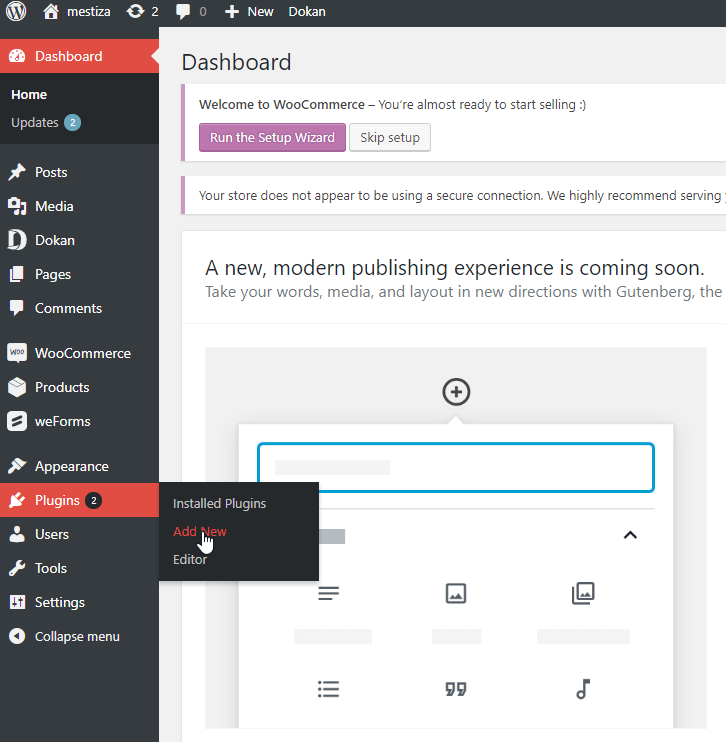
You won't get all the necessary features for creating an RSVP form in the free version. So, install the weForms premium version to get all the required features.
Once you have done the installation, go ahead to create a form using weForms.
- Before creating your form, just check how weForms actually works!
Step 2- Create an RSVP Form in WordPress just as You Want
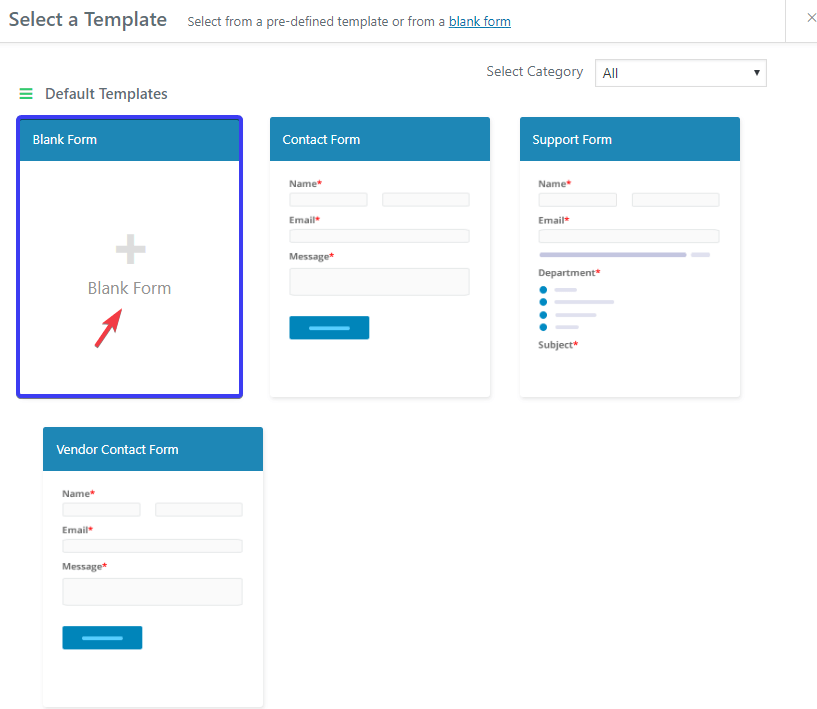
- Please navigate to WP-Admin→ weForms→ Add form
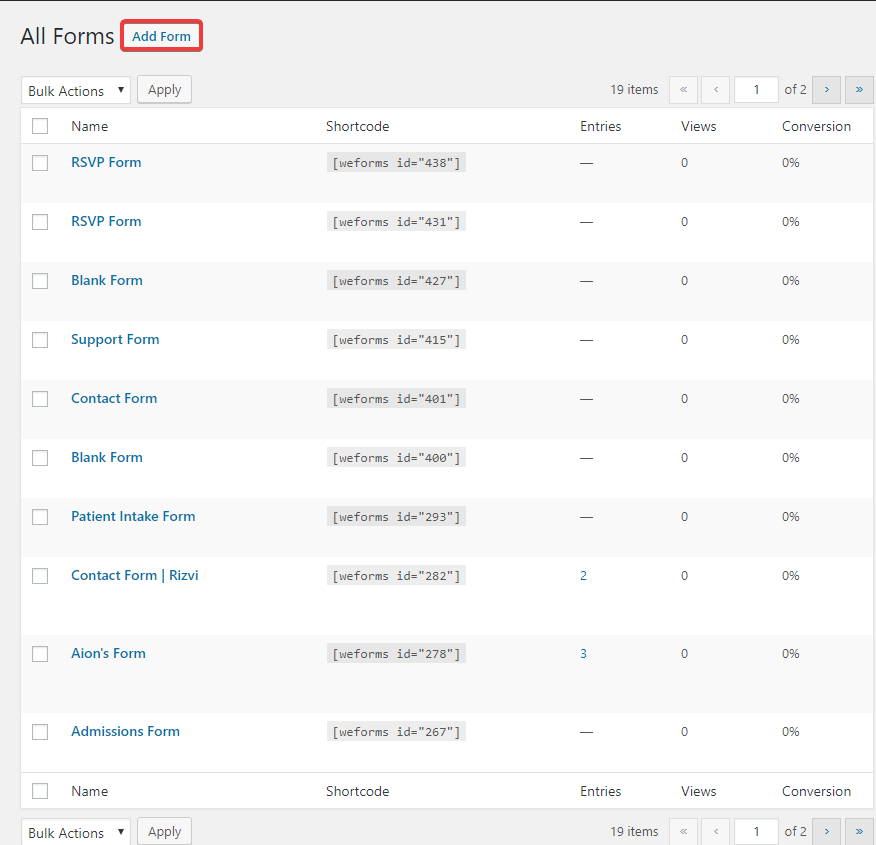
- Click on Blank Form default template to create your form
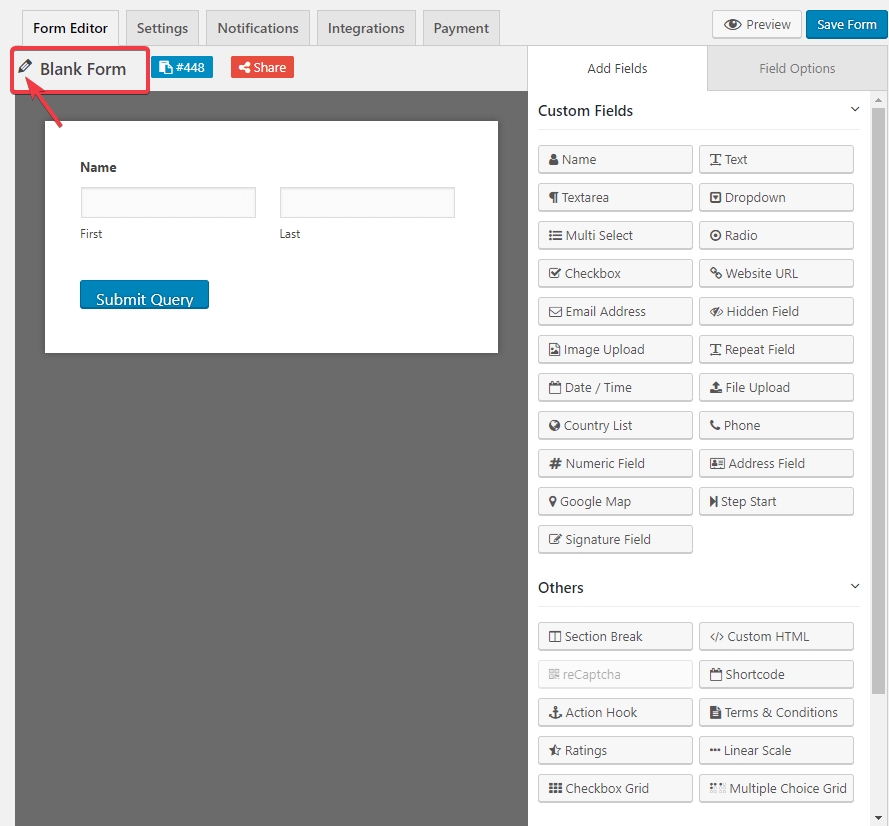
- Edit the name of your form. Write RSVP Form in the marked area from below screenshot
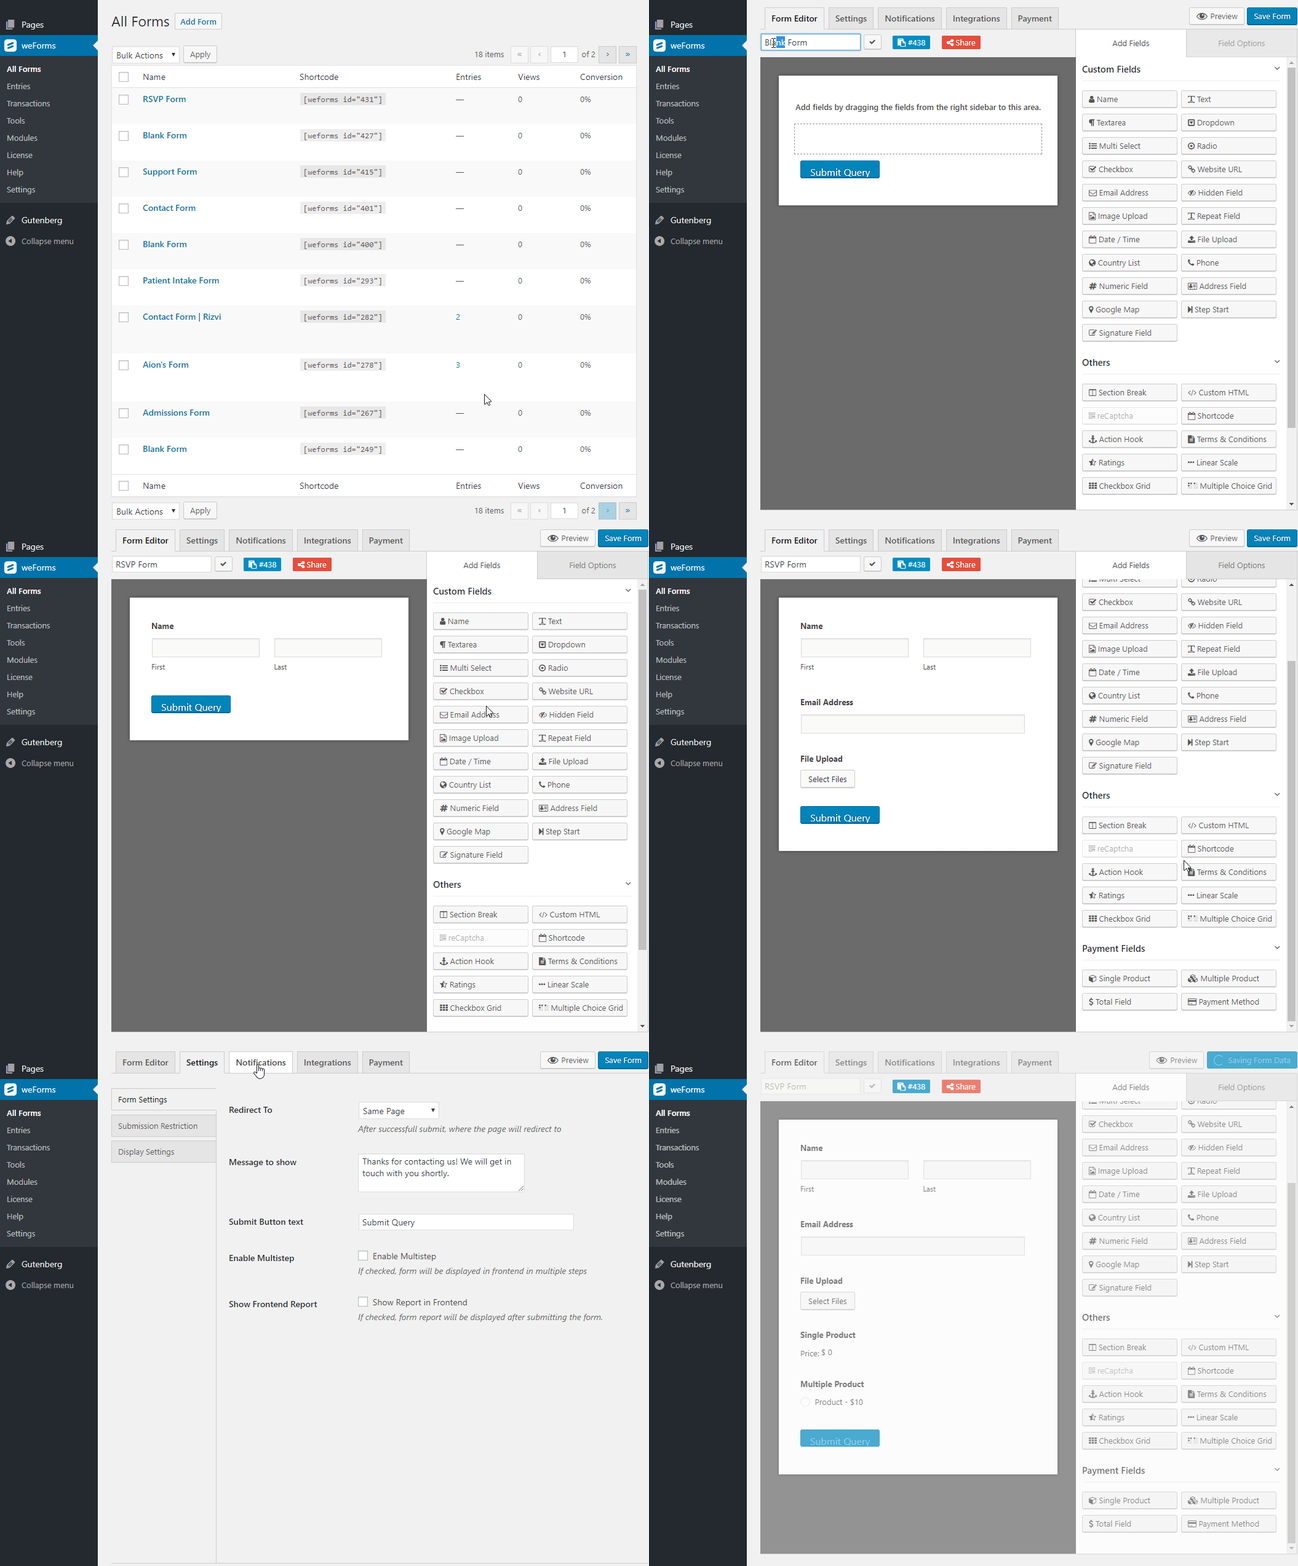
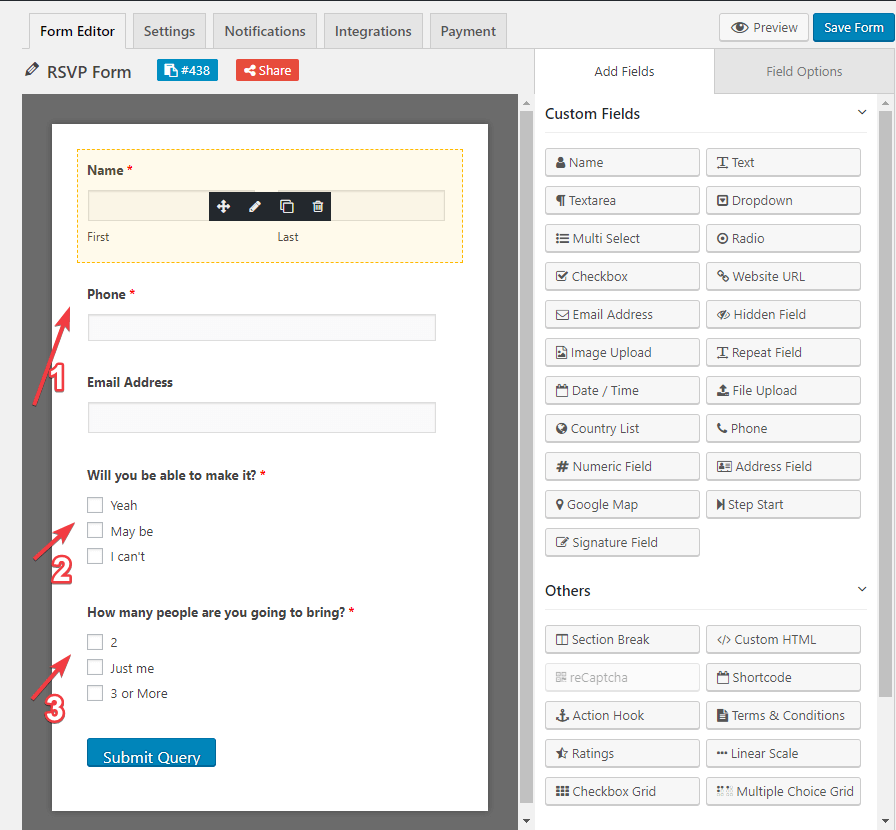
- Now you have to add or select your custom fields. Ask yourself what kind of information you want to collect based on your planned event. We have added 5 fields to collect the data about-
- Some personal information of the attendee
- Will he/she be able to make it or not
- And finally, how many people he/she wants to bring with
Just check out in below screenshot.
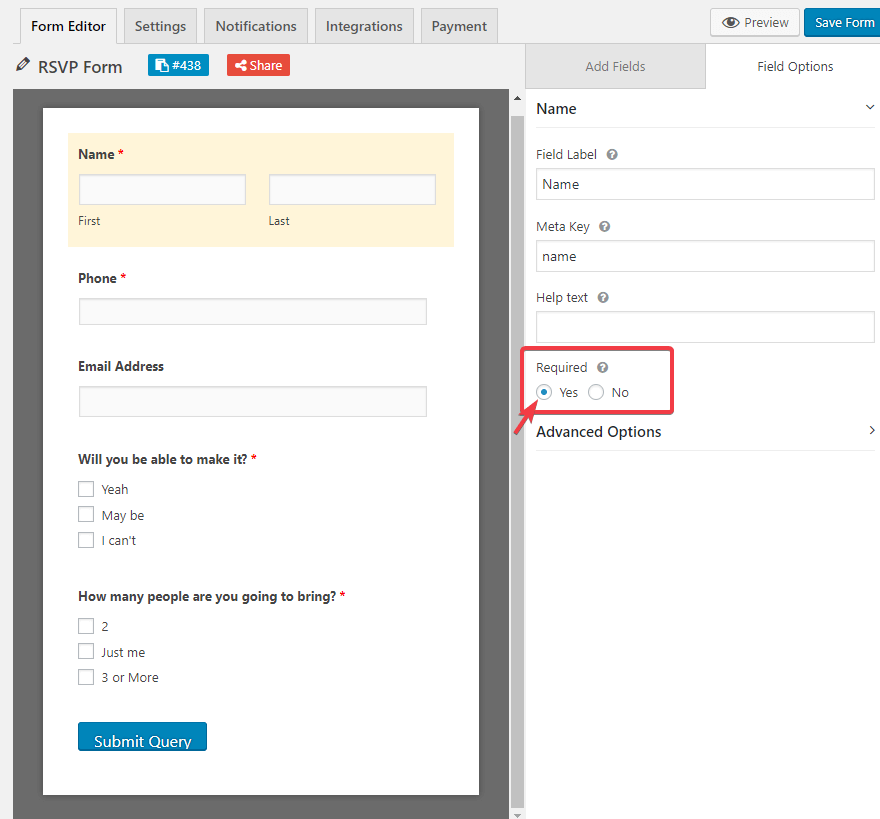
- Carefully check the required option of your form. Select Yes if you want to keep that particular form field as Required to fill for the user, otherwise select No.
You have successfully created your RSVP form in WordPress.
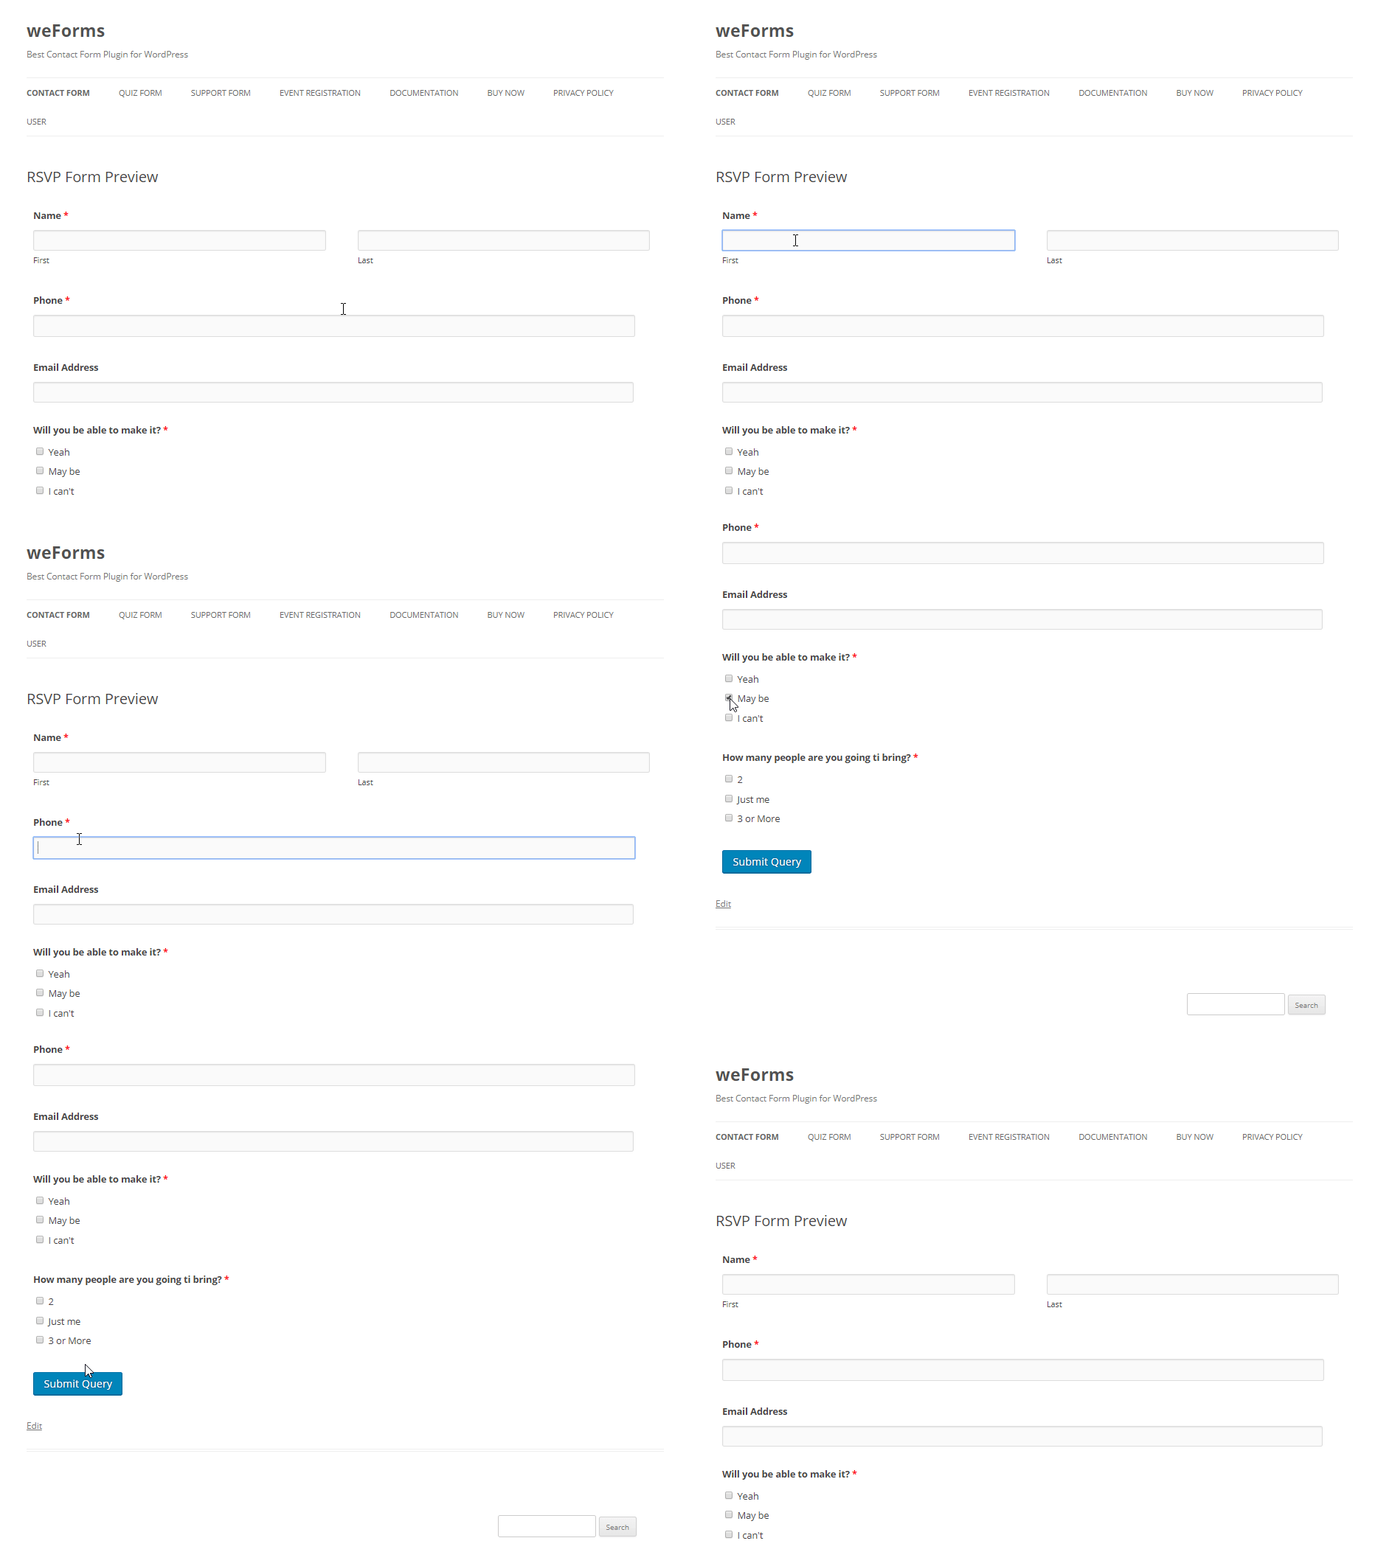
- Here you can see the form preview you just created. Yes, creating an RSVP form in WordPress is this easy with weForms.
Step 3- Configure Your RSVP Form's Settings
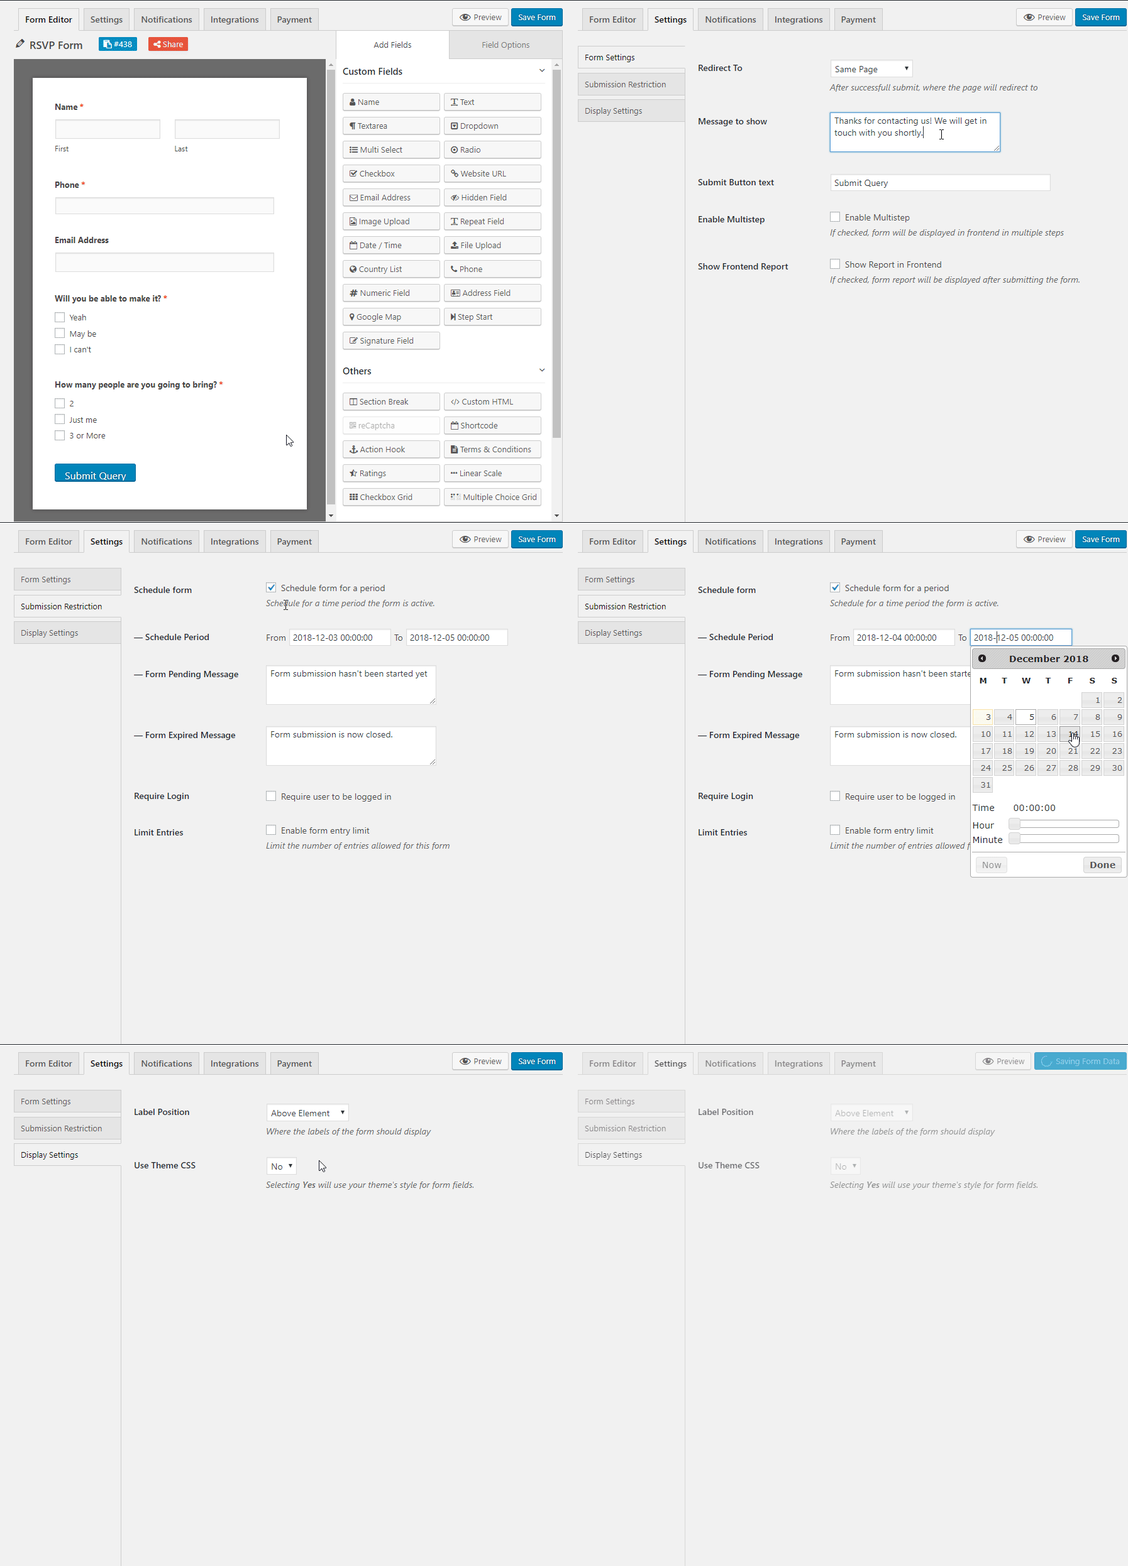
Go to your form-creating page. Select- Settings→ Form Settings/Submission Restriction/Display Settings. Edit and change as your needs and click on Save button in the top corner of the page.
Check out the below GIF.
Step 4- Configure Your RSVP Form's Notifications and Other Settings
Like earlier, Go to your form creating page.
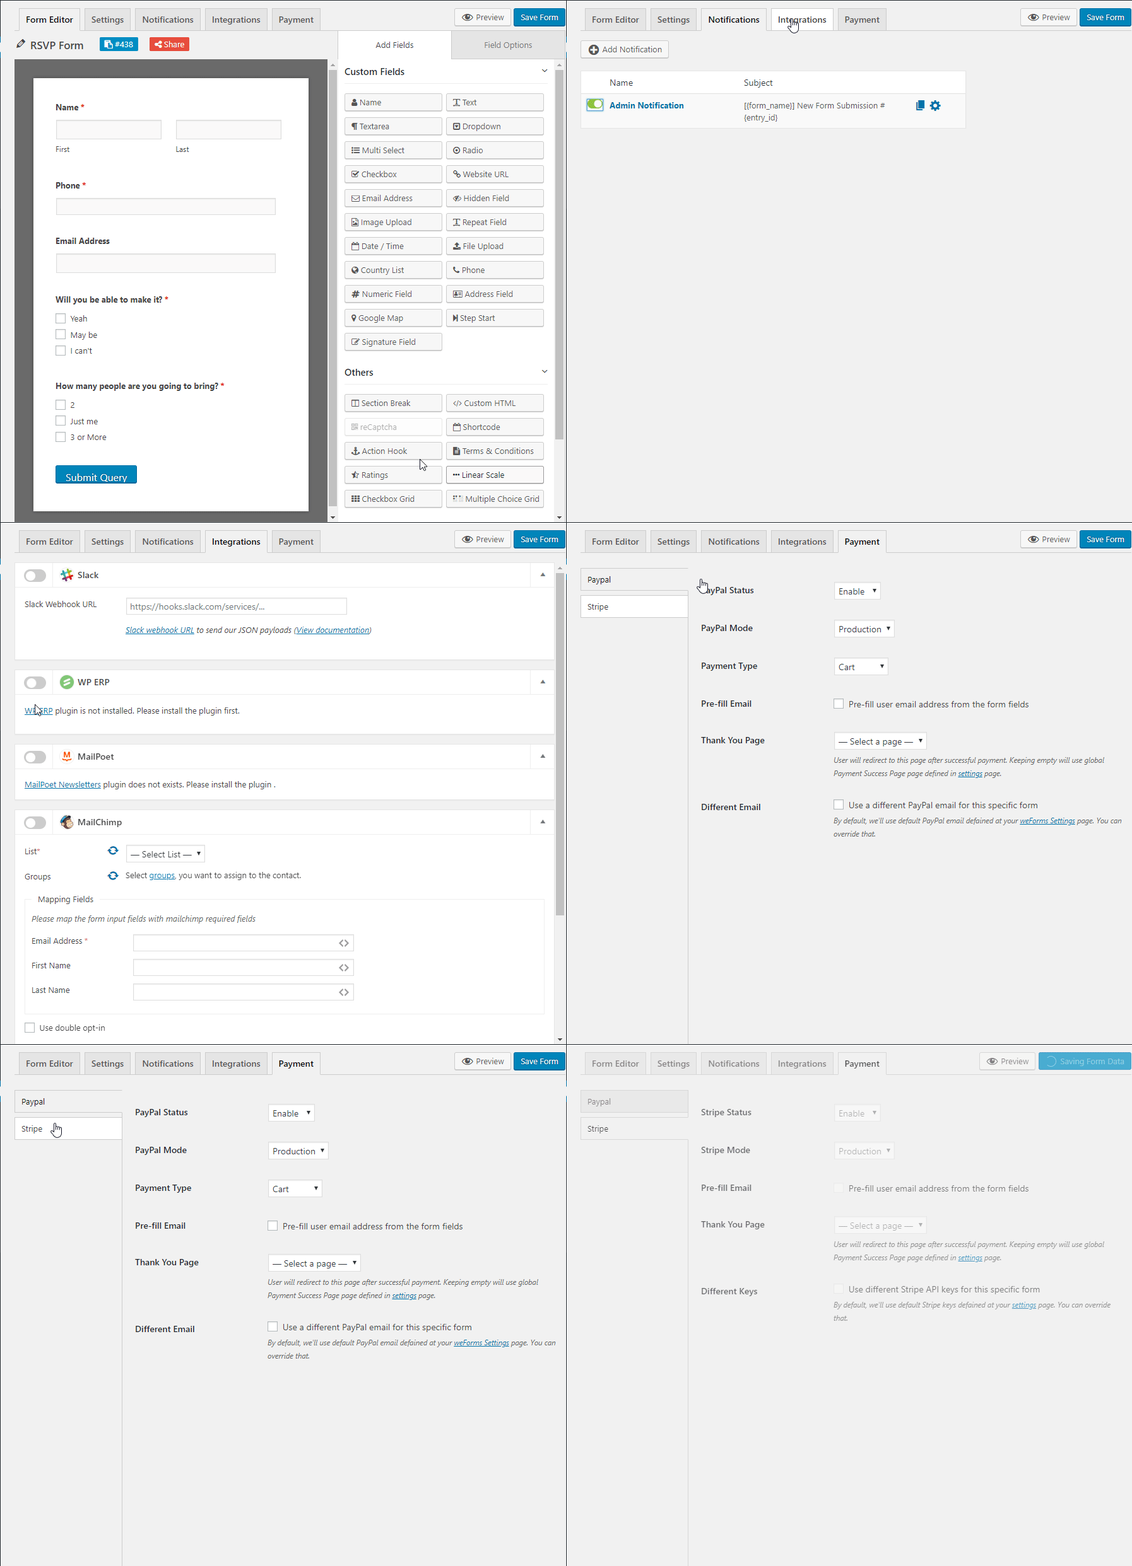
- Select→Notifications→ Enable or disable the option
- Then select→ Integrations→select and finalize your integration
- And finally, there is a payment option for you for further needs.
See the action below:
Once you have done all the above process, click on Save button. Congratulation! You have successfully completed all the necessary tasks. Your RSVP for in WordPress is ready now.
Note: weForms will give you the opportunity to integrate the plugin with some most useful available modules. weForms have 2o+ available modules for you to integrate with.

Step 5- Add the RSVP form in Your Website
After you have created an RSVP form, you need to add it to your WordPress website.
weForms allows you to add your forms to many locations on your site including your blog posts, pages etc.
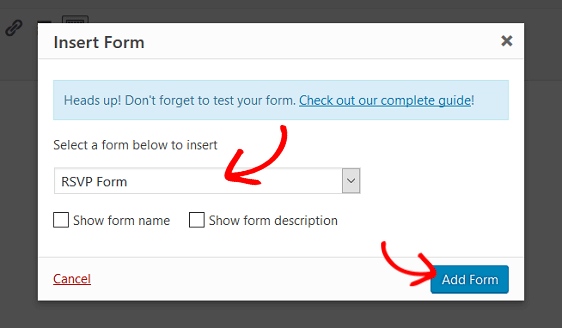
- To start, create a new post or page in WordPress and then click on the Add Form button.
- Next, select your order form in the modal popup and click Add Form.
Now, publish your post or page. Your RSVP form will appear on your website.
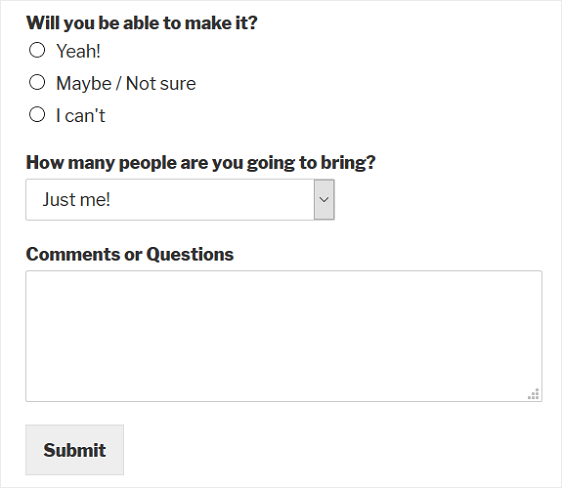
Now you know how to create an RSVP form in WordPress easily with weForms.
Closing Thoughts
Events are always important in our lives. Why not make it easy using automation? Collect necessary data and make a perfect plan. Your attendees will wonder seeing everything perfect just as they expected. And weForms is the kind of plugin that can help you manage everything easily.
So if you are still not a user of weForms, then it's high time you become one today !!
Still not convinced? Learn more about weForms features and compare it with some of the best form builders of WordPress to decide for yourself.
Also, check out this easy step-by-step guide if you want to create your own blog using WordPress in minutes! Like blog sites, WordPress is now the best fit to create a business website. Big brands around the world now rely on WordPress for their online presence.