
Use WordPress Forms To Upload Files Directly To Google Drive
Time is of the essence. Especially in today's fast-paced world. That's why you need the proper tools that will save you time, your most valuable asset. That too, in the most efficient way.
Today we will talk about, just the tool you need if you want to make the most out of your productive time. Especially if you are looking for a WordPress contact form builder for taking user submissions.
Connect WordPress Forms With Google Drive
Unfortunately not all form builder plugins for WordPress will give you features that will help you to send the submitted files that you are taking in. Not weForms! It has built-in integration with Zapier, the popular automation tool that everyone love, which can be used to connect your form fields to your Google Drive account.
It can also connect your forms built with weForms to other services too. A long list of services that are supported by Zapier.
Though there are some prerequisites that you must make sure you have.
- A Google Account, which you can get for free
- A Zapier Account, you can also get this for free
- weForms Business or Developer version
A Little About Zapier
Zapier is one of the most successful automation tools out there on the internet today. You will be able to create little conditional statements called Zaps that will help you automate all the boring tasks that you would have needed to do manually. Zapier supports more than 1000 apps.
It is completely free to get started.
Why connect to Google Drive?
Google is everywhere now. With its long range of services, it is a productivity enthusiasts dream. One of those awesome services they provide is Google Drive. It is a cloud-based storage service that comes with every Google account.
It will provide you with a limited amount of cloud storage that will help you free up space from other places. So, why not use it with the form submissions that you get when you publish a form to your site. Especially on a WordPress site.
The necessary steps
The process is fairly simple. At first, you need to install the weForms plugin on your WordPress site. If you are not sure on how to install weForms to your WordPress site you can do learn more from here.
Please note, you need to have weForms Business/Developer version. For convenience, we have added the link to the pricing below.
Step 1
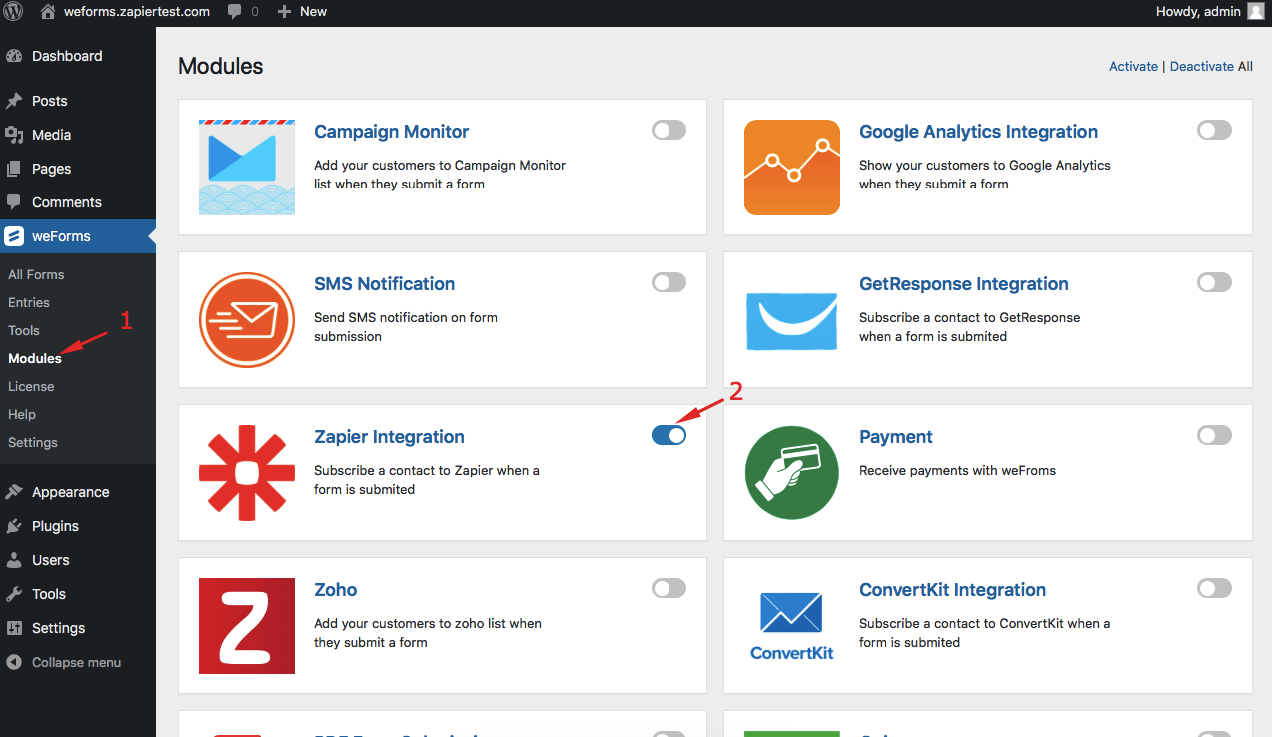
After successfully installing the weForms plugin, at first, you will need to enable the Zapier module.
Go to wp-admin→weForms→Modules and enable Zapier integration.
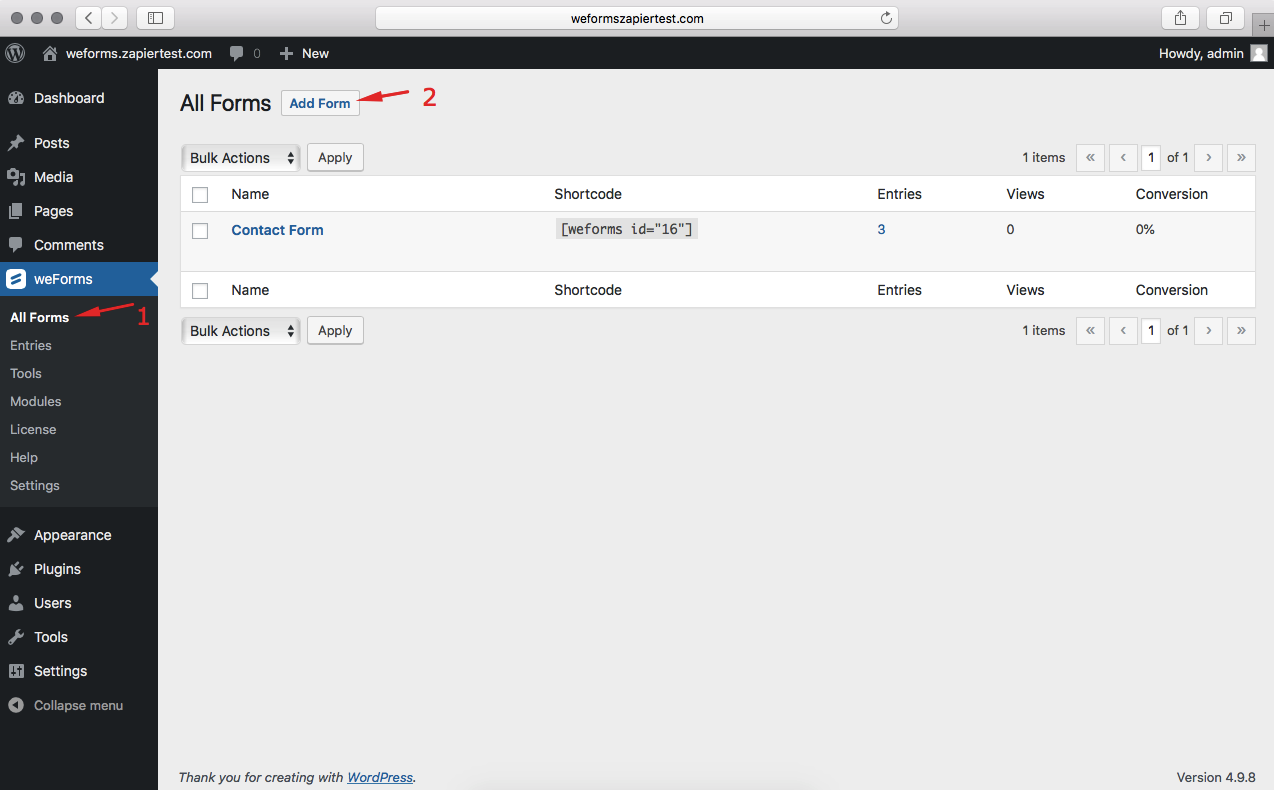
Then you will need to create a form. Click on the All forms section and then on the Add Form button.
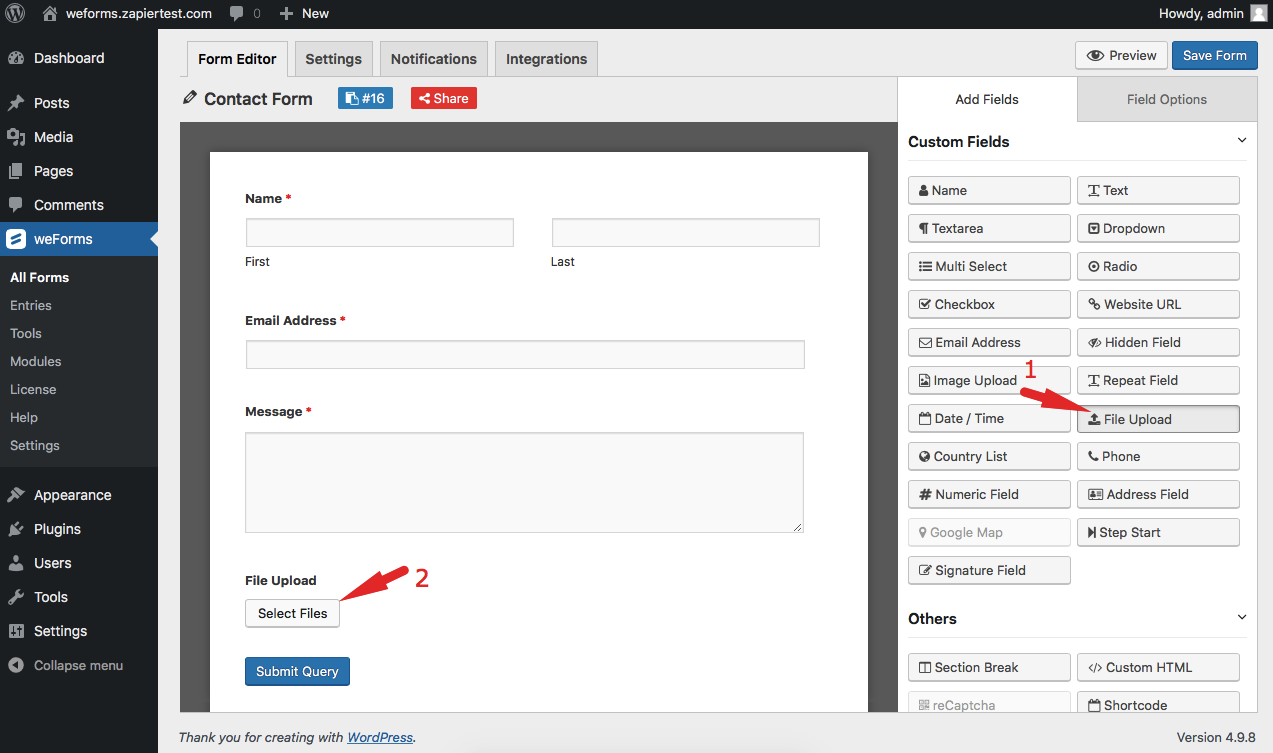
There are prebuilt templates to help you get started. After you have created the form, you will need to add the field named File Upload. Drag & drop it into your form.
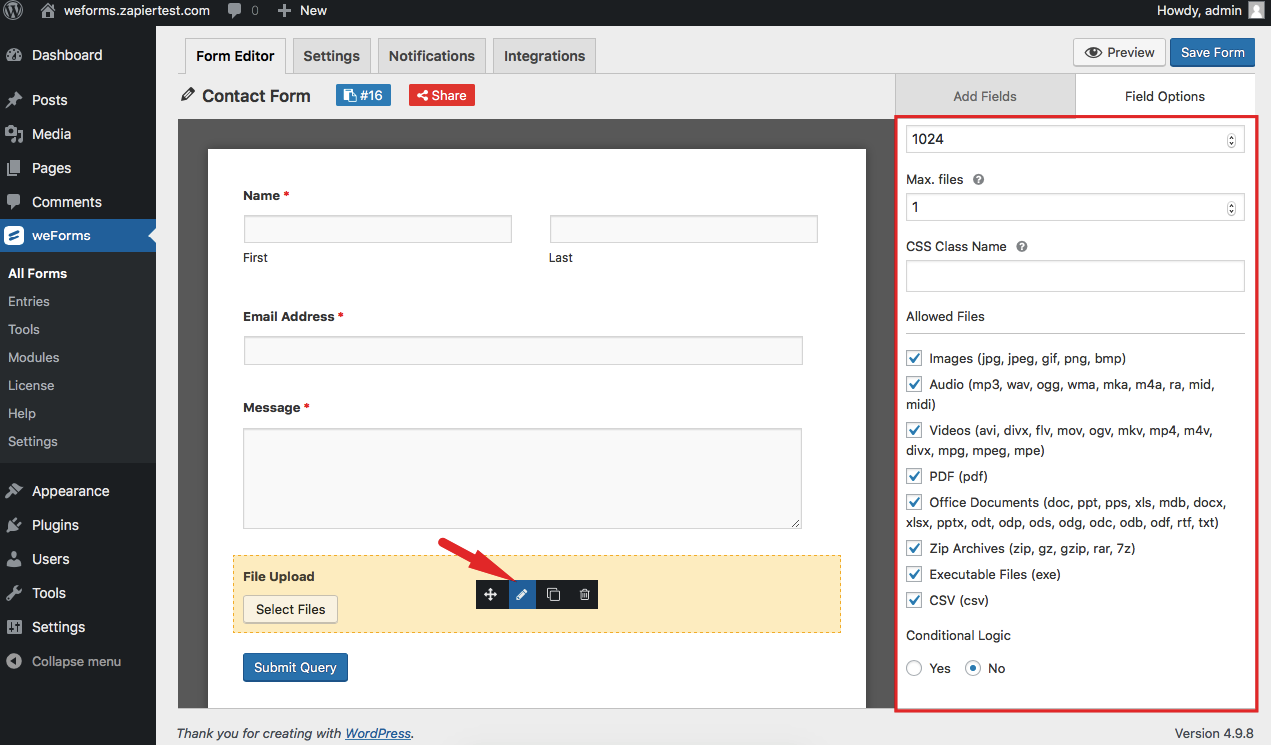
Pro Tip: In the advanced settings of the field you will find options to restrict certain types of file upload, change the max file upload limit, set conditional logic, etc.
Now you will need to go to the Settings tab in the upper right section and enable Zapier. Then click on the Zapier Webhook URL link.
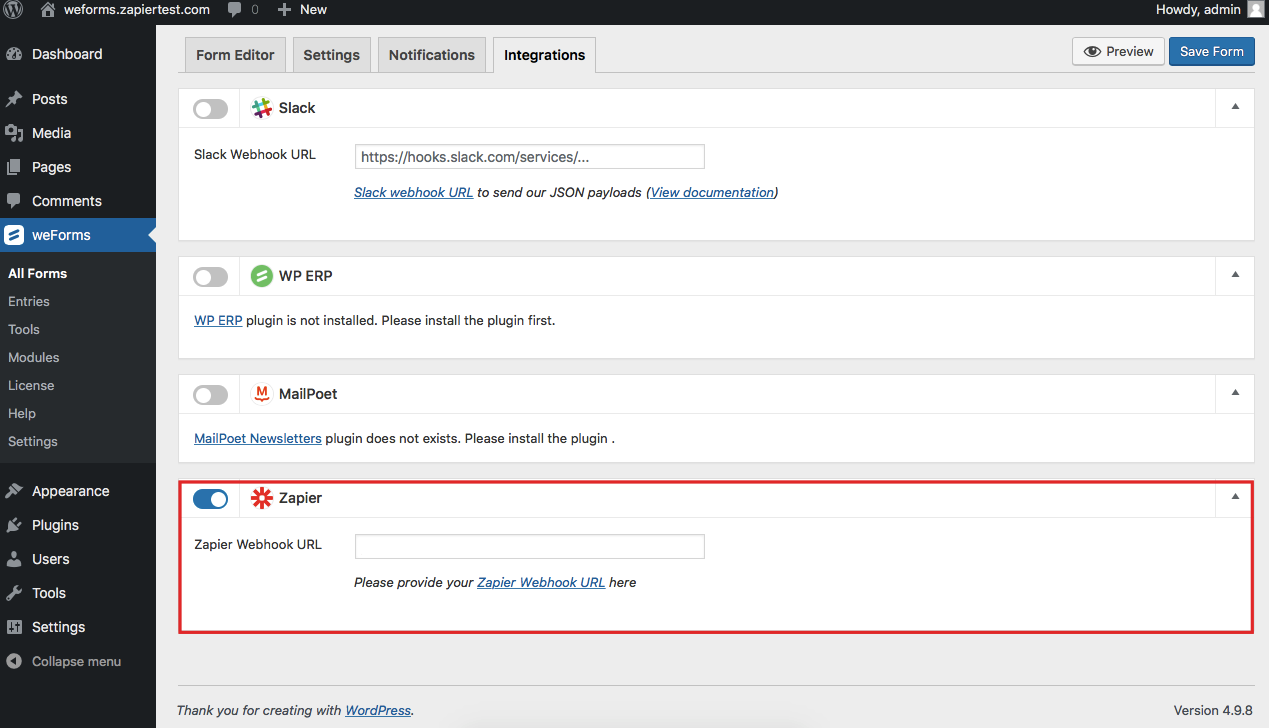
Step 2
After clicking on the link you will be redirected to Zapier's official website. There you will need to log in. If you don't have an account, you will need to create one using your credentials.
Don't worry! It is absolutely FREE.
Then you will need to create what is called a Zap from your newly created account. We have made a dedicated video showing you how you can create a Zap. Do check it out.
Or if you would like, you can check out the official documentation.
Step 3 (Connect Google Drive)
After you have set up your trigger it should look something similar to this.
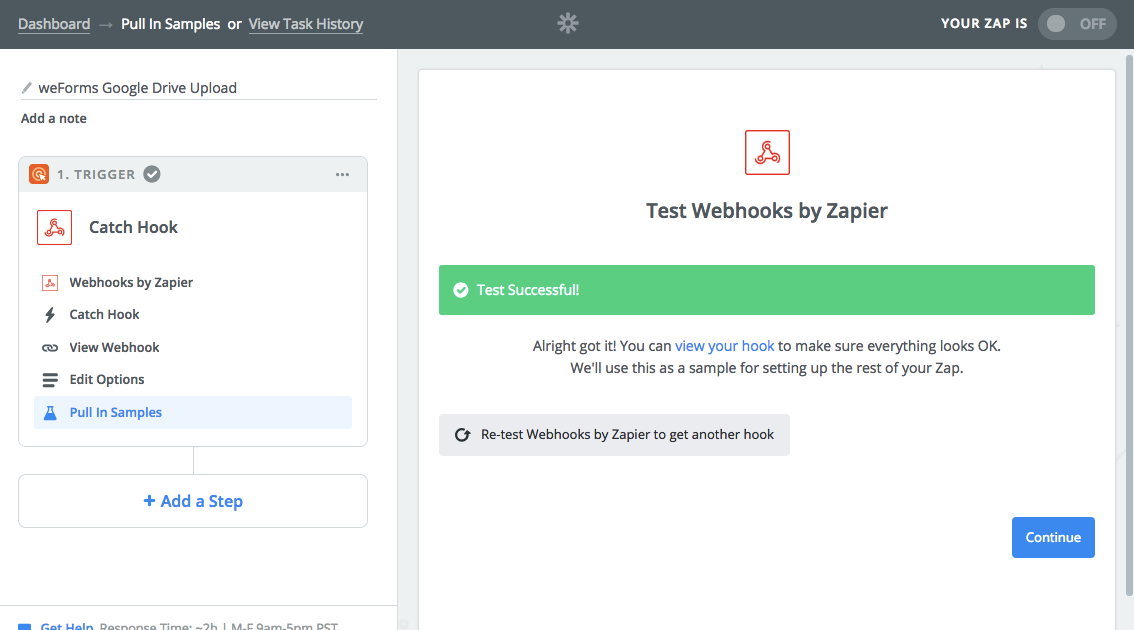
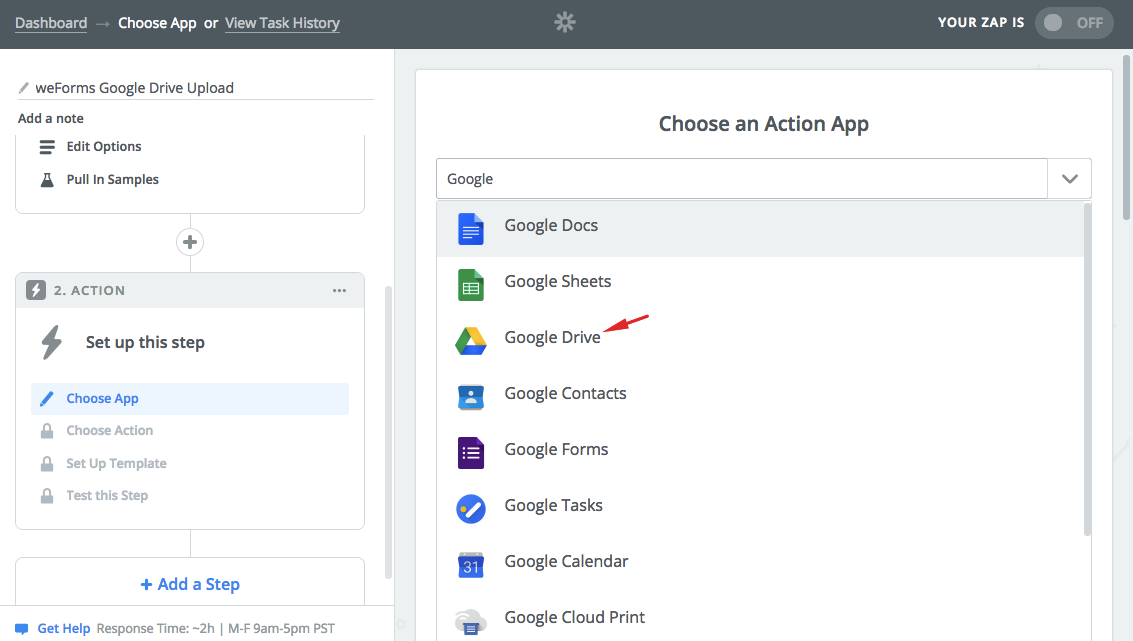
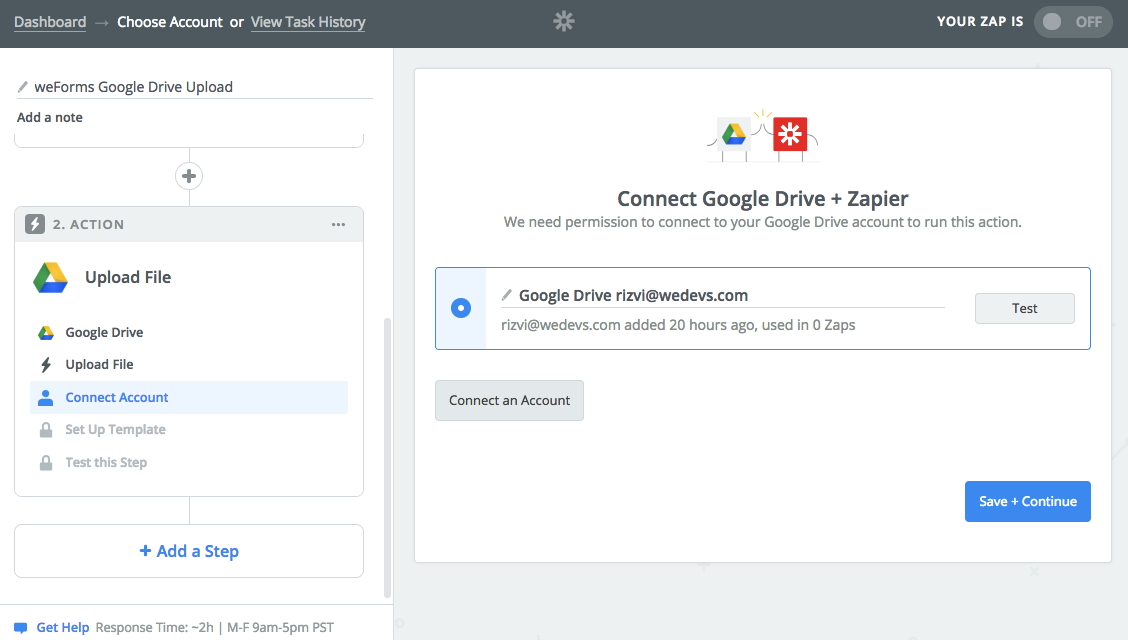
Now you will need to create an Action. In the Choose App, search and select Google Drive.
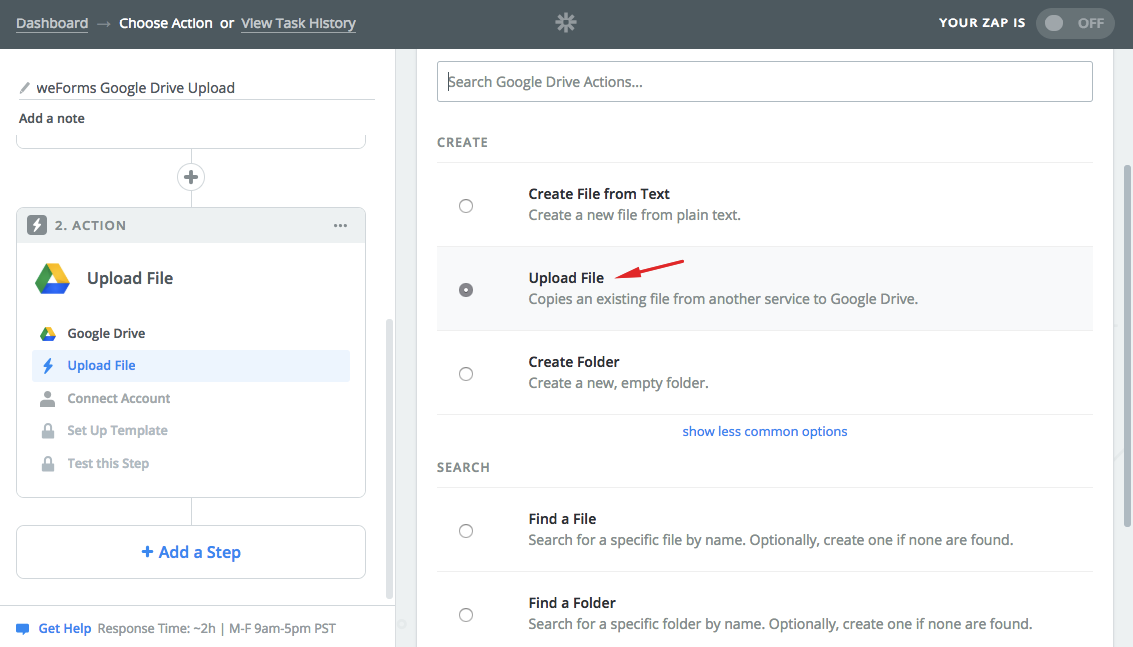
After selecting Google Drive you will need to choose an action. Because we want the submitted file to be automatically uploaded to our Google Drive account, we will need to choose the Upload File option in the action settings.
Then we will need to connect our Google account with this Zap. Log in with your Google accounts credentials. Save and continue.
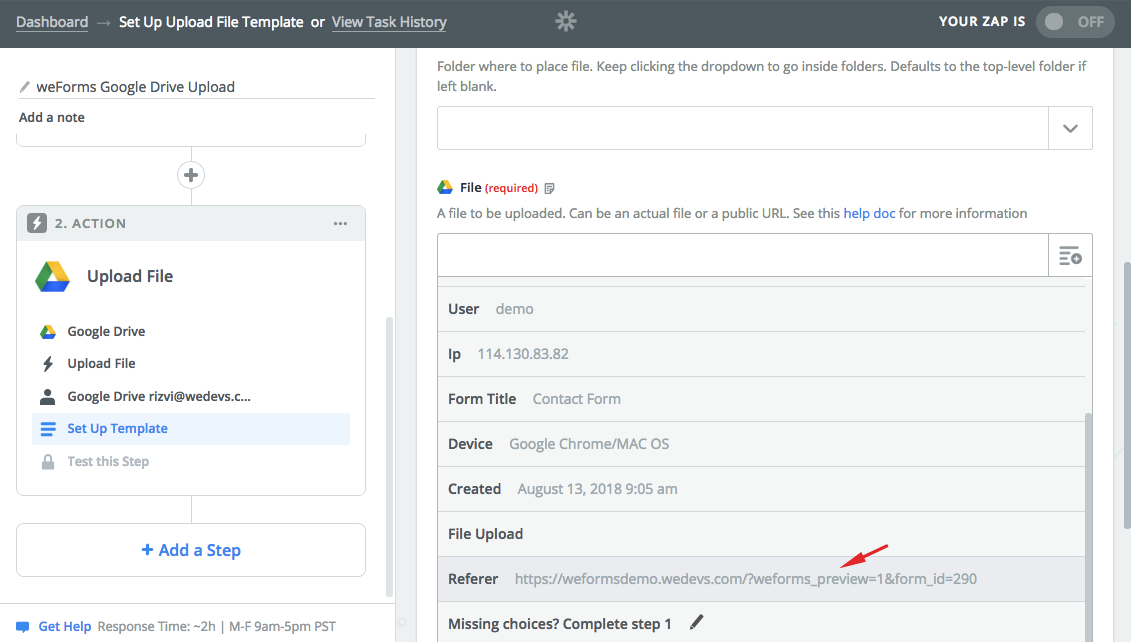
In the next step, you will need to set up the template. Scroll down to see the File section and click on to see your options from your form. The form that you created using weForms with the necessary fields.
Scroll down to select the referer value right under the File Upload option. Select it and continue.
Please note, in the upper section, you will find an option called Folder. From here you can choose which folder in your Google Drive will it all the submission be aggregated.
Now in the test step, you can check if your settings are alright. Click on the Send Test To Google Drive it will send a dummy file to your connected Google Folder.
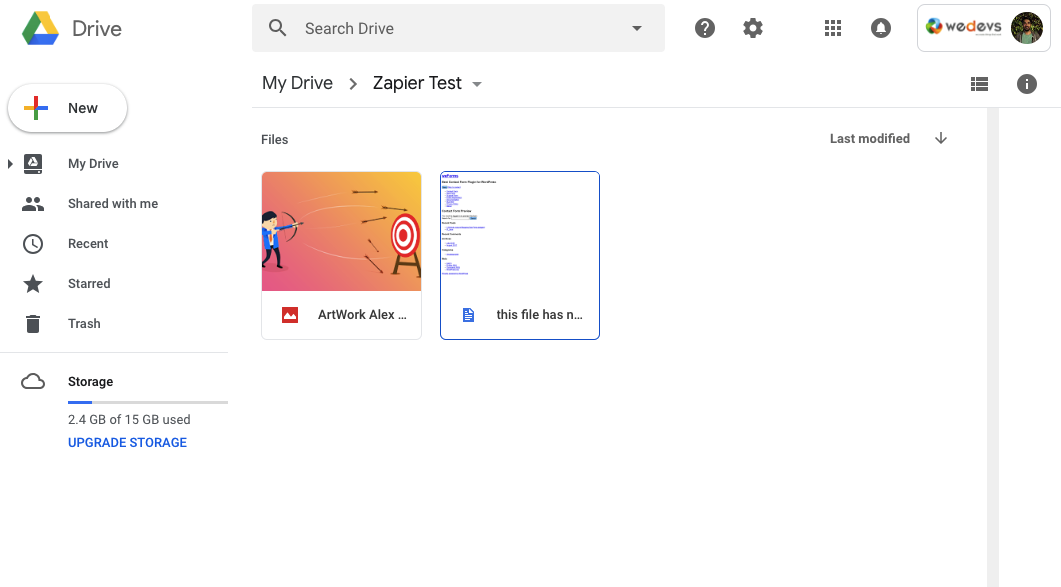
That's it! Your File Upload form field, from the form built with weForms, is now connected to your Google Drive. Every time someone submits a file using your form, it will be saved instantly to your directed Google Folder.
Frontend View
You need to make sure that you have added the File Upload field if you want to upload your submitted file to your Google Drive. It should look something similar to this.
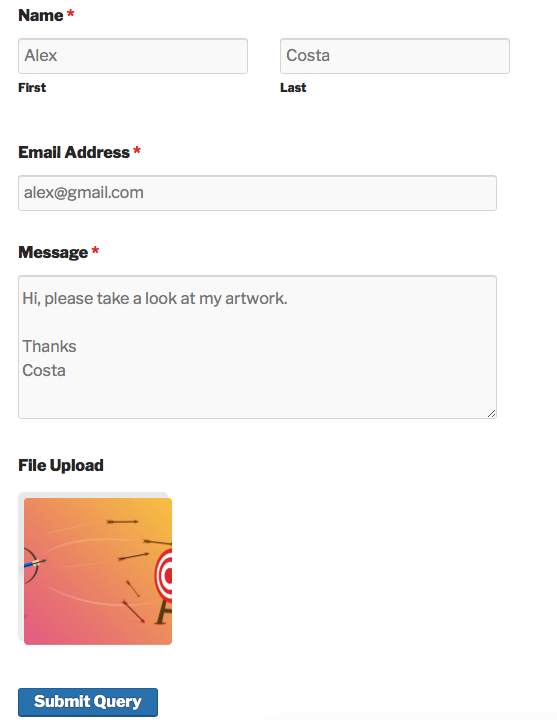
The file that someone's uploads will automatically be added to the Google Drive folder that you set beforehand. When you were creating the Zap.
Now it's your turn
The most important part of this feature is that it will save a lot of time in your organizational process. Also, it will make sure that always have a backup copy of all your submission.
If you want to get started but want to make sure it is what you need, we got you covered. We made a demo just for you.