
Create Your Own Email List Using WordPress Popup Optin
One of the biggest myths in the online world – list building is dead!
So, a lot of folks just ignore any attempt to build an email list and rely on social media marketing.
There are two major reasons why many online marketers easily believe this myth;
- They believe list building is hard, cumbersome, and frustrating.
- They think people will rather spend time on social media than opening emails.
But here is the catch; 89% of markers say that email is their primary channel for lead generation. According to Custora, email marketing was the biggest driver of Black Friday sales in 2016, it accounted for 25.1%.
A Salesforce survey also revealed that 95% of people who opt in to a brand mailing list found their emails somewhat or very useful.
Emphatically, stats like these shows that list building is not dead, it is indeed well and alive. The money is still on the list, not a purchased list but in a list built from scratch.
Social media marketing may give you instant result, but won’t give you loyal customers and it attracts reoccurring billing to keep your products to a large audience.
Why Email Marketing & List Building is Important
If you own an eCommerce store or marketplace and looking to double or even triple your revenue; one proven strategy to accomplish this is to build a segmented email list. You could have a list of customers who bought specific products or products from a given category, just name it. Combined with a conversion tracking tool, you can determine which lead or subscriber made a purchase or took a given action on your store.
List building is not as hard as the so-called myth carriers want you to believe, there are several list building tools that can aid you in getting started immediately.
If you are a WordPress user, it makes the whole process even easier. The only hurdle would be deciding which lead generation WordPress plugin you need. Once that has been settled, you can begin your list building journey.
If you build an email list for your business that will be worth every effort you put into it.
For this to happen, you will not need to rely on any complicated list generation tool. That alone is a pain. Normally, you’ll want an all-in-one solution that is easy to use, customizable, and actionable with A/B split testing and reporting stats. Then, you won’t want to be restricted or limited to a single email optin form for collecting emails, you will want multiple themes to select from and a WordPress plugin that can do that will be a plus to your list building strategy.
List Building Tools for WordPress
As we have already mentioned how important list building is, it's about time that you should consider start building your own lists. There are many ways you can do so.
The most effective way is to create list generation forms and let your users and visitors subscribe using them. These forms can be of many types including contact forms, subscription forms, opt-in forms, etc. Most importantly, you can use them for creating a solid email list for marketing purposes.
In today's article, we will show you how you can create popup optin forms in WordPress for email list building.
We are going to use weMail, a WordPress lead generation plugin to build an opt-in form and also find out ways to maximize conversions.
Getting Started
weMail comes with stylish templates and unlimited customization, once you activate the plugin, you can start creating optin forms within few minutes.

There are currently five different opt-in display types available for use and they are:
- In-Line: Easily create in-line forms with various stylish templates.
- Floating Bar: The plugin allows you to display opt-in forms at the top or bottom.
- Slide-up: This opt-in form appears at the bottom corner of your site.
- Modal: Modal opt-in form works as a popup window that is displayed on top of a page.
Integration with Mail Providers
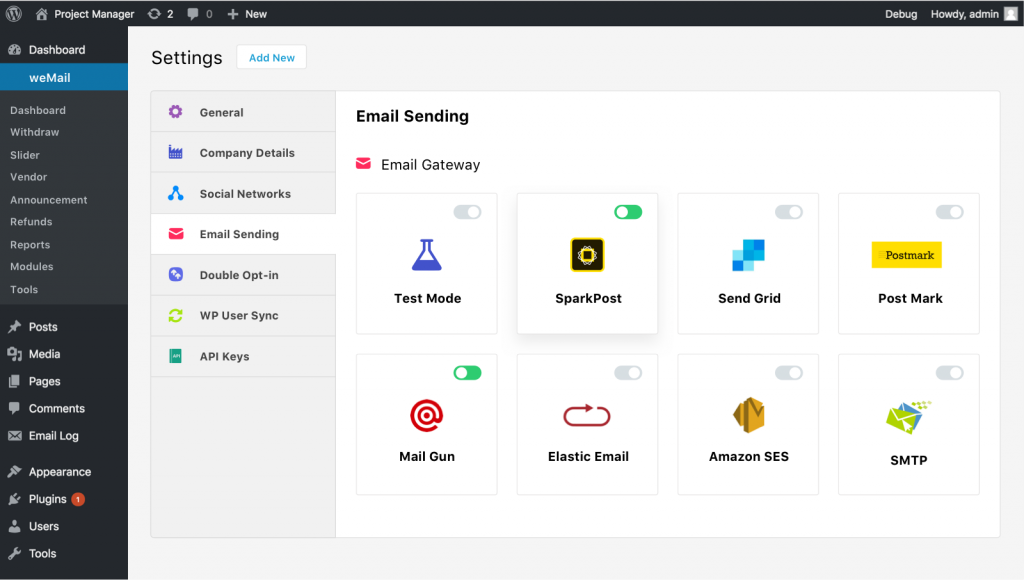
weMail allows you to integrate with different email providers including Amazon SES, Mailgun, SparkPost, Elastic Email, SendGrid, SMTP, so the choice is pretty much up to you.
How to Create Your First Popup Optin Form for Lead Generation
Earlier, we explained the various optin form types in the plugin, and for the purpose of this guide, we are going to use the Modal optin form type, which is the popular popup you see on many websites.
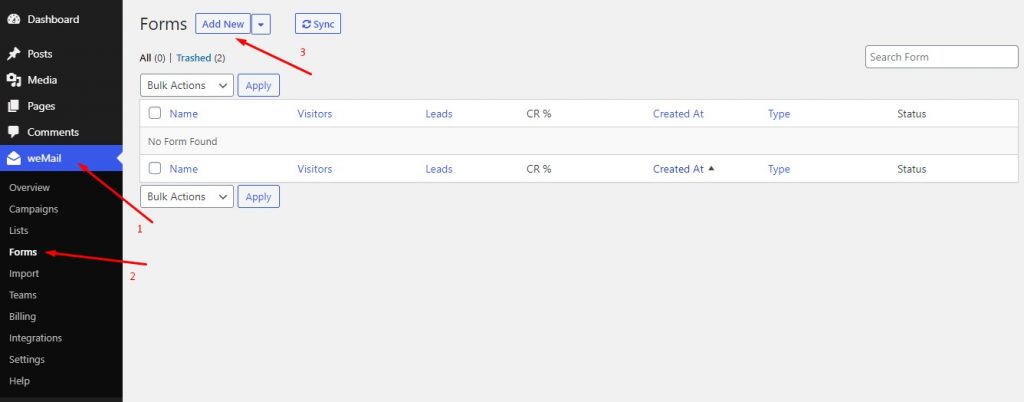
Firstly, we need to go to WP Admin Dashboard > weMail > Forms. From here, you need to click on Add New.
You can find four different types of optin forms. For our tutorial, we will select Modal, which is by far the most popular method. It is also the one that you will see the most.
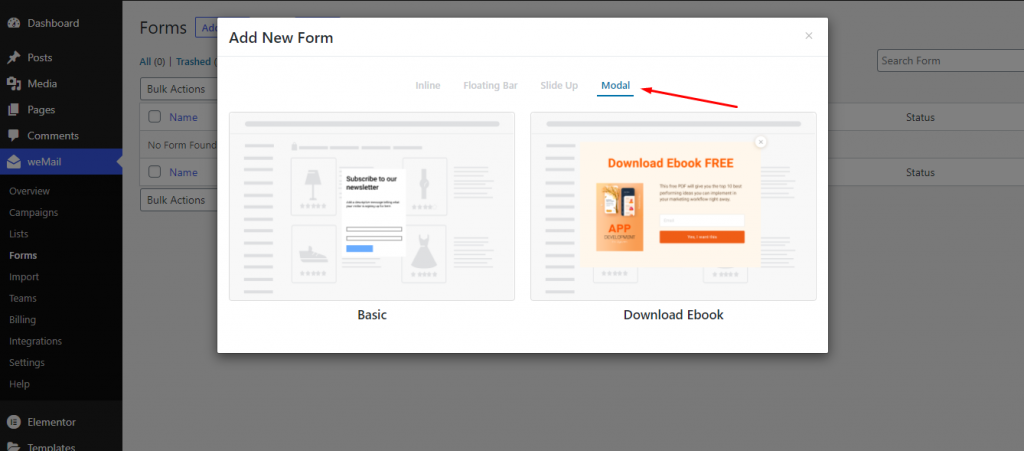
We are choosing the basic template. But don't worry, you can customize upon that.
Once you select the template, you will be asked to add the form, all you need to do is giving the form a name and selecting the list where the leads will be stored.
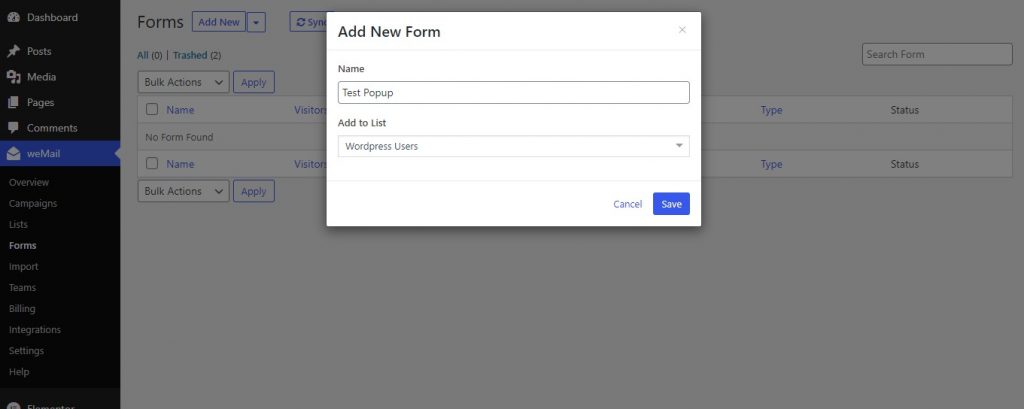
Click on Save, once you are done. We will now be moving on to design the form.
Designing the Pop-up
After clicking on save, you'll be redirected to the Fields option, where you can select and edit the fields of the form. You can also add several types of fields, as you can see from the image below. We're leaving it as it is.
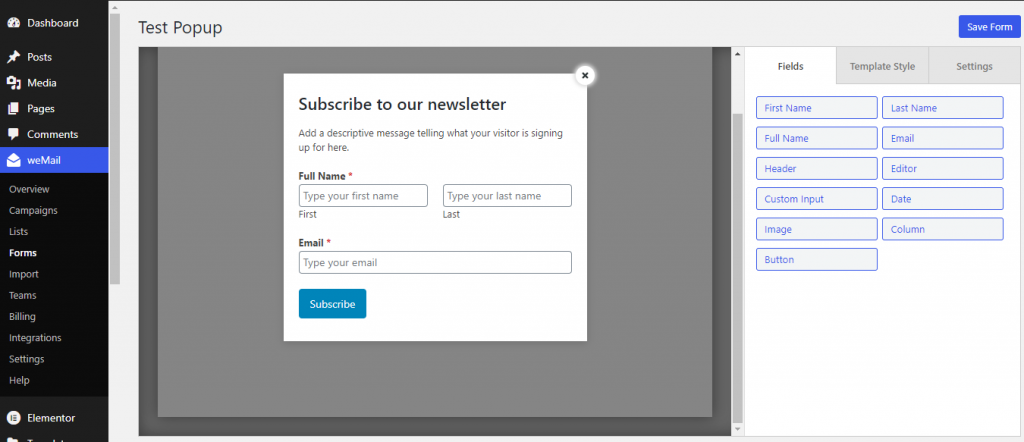
Next up, click on Template Style, here you can change the colors, paddings, margins, width, and other aspects of how the opt-in form will look visually. You'll also be able to select which type of opt-in form it will be.
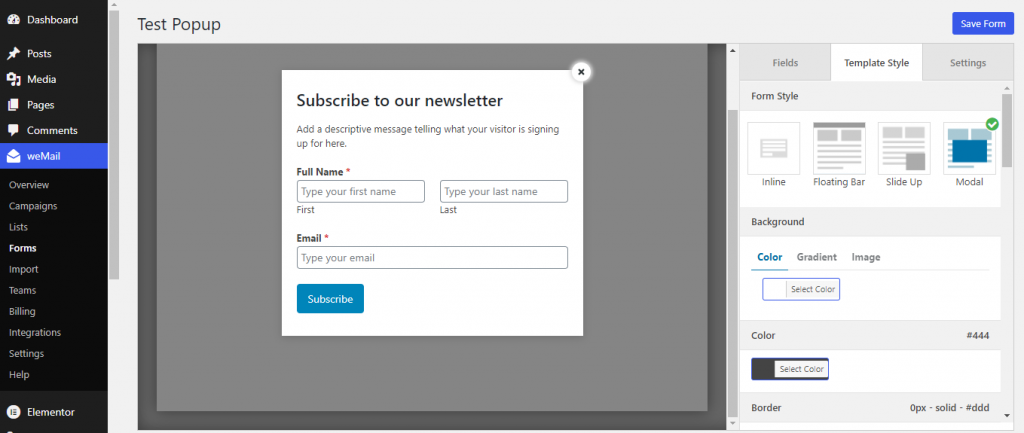
Once you're done updating the outlook of the opt-in form, head over to the Settings for the final and the most important part.
Setting up the Pop-up
Settings of the pop-up will decide when and how the pop-up will be triggered and how it will act.
You can find the below options in this page.
- Message on Submit: Once a visitor act upon the popup and submit the requested information, you can set the exact message that will be displayed on that occasion.
- Select a List to Store the Details: You can select a list where the information will be stored. The list can be created using the weMail as well.
- Set Trigger Option: You can set what will trigger the popup to display. You can either set it to trigger automatically or when people click anywhere on the page. If the option Automatically is selected, you set exactly after how many seconds the popup will be displayed. Scroll position is also available, which will allow you to set the percentage of the page scrolled to trigger the popup.
- Schedule the Popup: Option to schedule the popup is also available in weMail. You can set it to Always, or a specific time of the day.
- Exit Intent- This allows you create high converting popups that are not intrusive. Basically, when you turn on this feature, your opt-in is triggered only when your visitors are about the exit your website. Statistics have shown that visitors are more willing to take action and avail your offer so long their browsing experience is not distorted. You could literally turn your eCommerce store to a sales machine by offering abandoning visitors discount to complete their checkout.
- Click Launch Trigger- Another unique feature in MailOptin is the Click Launch Trigger. This can help you properly add content upgrades to your website. In case you do not know, content upgrade is the act of using incentives to lure your visitors to give up their email addresses in other to get access to bonus contents. For example, you could ask visitors to provide their email address in other to download premium contents for free. The download link is sent to their inbox while you capture their email addresses.
- Page-Level Targeting- It allows you to display optins in a specific page in your site and it’s one of most powerful ways to build a targeted audience. This means you can send out more relevant emails which will eventually lead to higher click-through rate, increased sales and a low percentage of subscriber rate.
- Schedule- As you’d expect, this features gives you the ability to schedule when to show your opt-in forms. You do not need to manually enable an opt-in for a specific purpose within a period of time. You can schedule it based on your time-zone or that of your visitors.
- Scroll Trigger- Another display rule is the scroll trigger that display of your opt-in campaigns be activated when a user has scrolled to a certain percentage on your website. Immediately the user gets to that percentage which you have set, the opt-in will be triggered.
How to Enable Your Optin Popup Form
Now, you have integrated the plugin with your email service provider and have created your first optin form to kick off your list building journey. It’s time to turn it on.
Navigate to “Optin Campaigns,” you will see a list of optins you have created. Simply toggle the “Activate” button to turn on the optin form. When it turns to blue, it means your popup email form is live in your website.

The good thing is MailOptin email list builders don’t stop here and you don’t have to step here too. We need to make the list building journey successful by paring our newly created form with A/B split testing to maximize conversion.
How to Create an A/B Split Test
To create a split test on MailOptin, navigate to “Optin Campaign” and create a split test on a specific optin form.

Click More Options and create A/B split test.
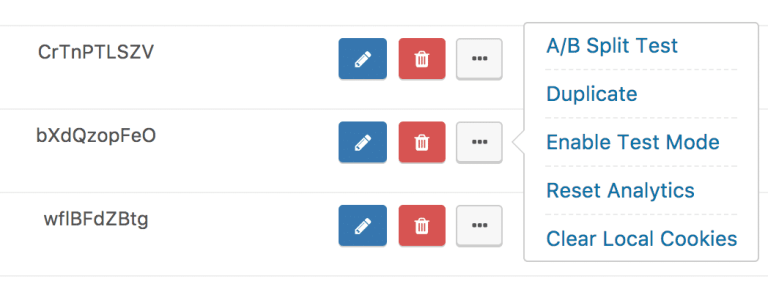
You will be redirected to the optin form live editor where you can customize the variation.
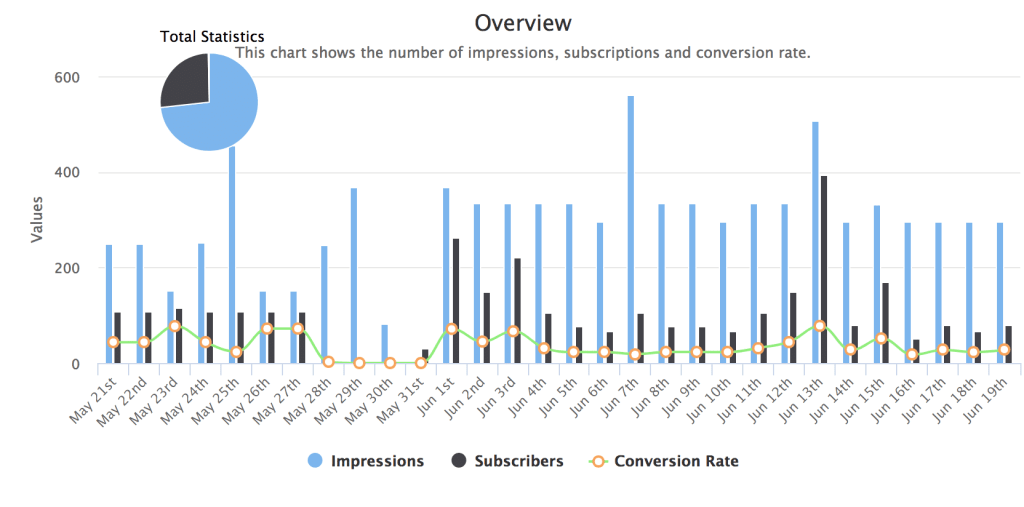
The plugin also has a built-in analytics; this means you can track things like number of impressions, conversions and conversion rate. Combined with lead bank, other important data that normally can’t be passed to an email marketing service provider (ESP) such as the page URL where the conversion occurred, URL that referred the user to the conversion page, date and time of conversion, user agent are available for you to make data-driven decisions.
Wrapping Up
As far as functionality and simplicity go, MailOptin seems to make creating an email list building form easy, and it doesn’t really matter if you have little or no programming knowledge. The clean user interface wouldn’t make your list building journey messy.
From start to finish, working with the plugin is self-explanatory; every option has a description that gives you a clue of what is required to get to the next step.
The real-time opt-in form builder adds to the already simplified nature of the plugin and customization options are well arranged to give you complete control over your design.
Do you use any other optin form builder? Do let us know in the comments.