Manage Your Own WordPress User Directory Using WP User Frontend
Whether you want to find a gas station, hospital, or even a car mechanic near you, in such situations a directory site can come in really useful. You may think who would take the hassle of making a directory website now when Google is there. But that's not our topic of discussion today. When you are using WordPress and need to create a directory of your users, Google won't be able to help! So, what would you do in that situation?
Well, no need to worry! Now, manage your own user directory within a WordPress site using WP User Frontend fast and easily.
With proper utilization, any directory site can become super popular in no time. And why won't it be, when you can quickly find links to several types of services, assistance and get to the desired user pages. Starting from finding a restaurant, hospital, gas station to finding a plumber for your house, you can find every useful link that might come in handy within just a few clicks. But with WP User Frontend you can create and manage a user directory really quicker to view it in the frontend.
So if you are thinking it is tough managing the user directory using WP User Frontend then you should definitely read this post to find out how wrong you are. In this post, we will take you through the process of demonstrating how effortlessly you can manage the user directory using the WP User Frontend.
Types Of Directory You Can Build
Before getting into the details of how you can manage your user directory using WP User Frontend, let's find out the types of the directory that are there.
Business Directories:- These directories include different industries like lawyers, vehicle repair shops, plumbers, computer repair shops, etc.
Site Directories:- This is similar to the business directories but its main focus is on websites. This may include blogging sites, educational sites, Social sites, scientific sites, etc.
Dealerships and Real Estate-related directories:- It normally deals with selling real estate and dealerships so it includes all inventory-related directories.
Deals & Offer Directories:- This is a popular example of directories that includes special coupons, specific stores, daily/monthly deals, etc.
Job-Related Directories:- This focuses on job board websites creating job boards of different cities and industries.
Activating User Directory in WP User Frontend
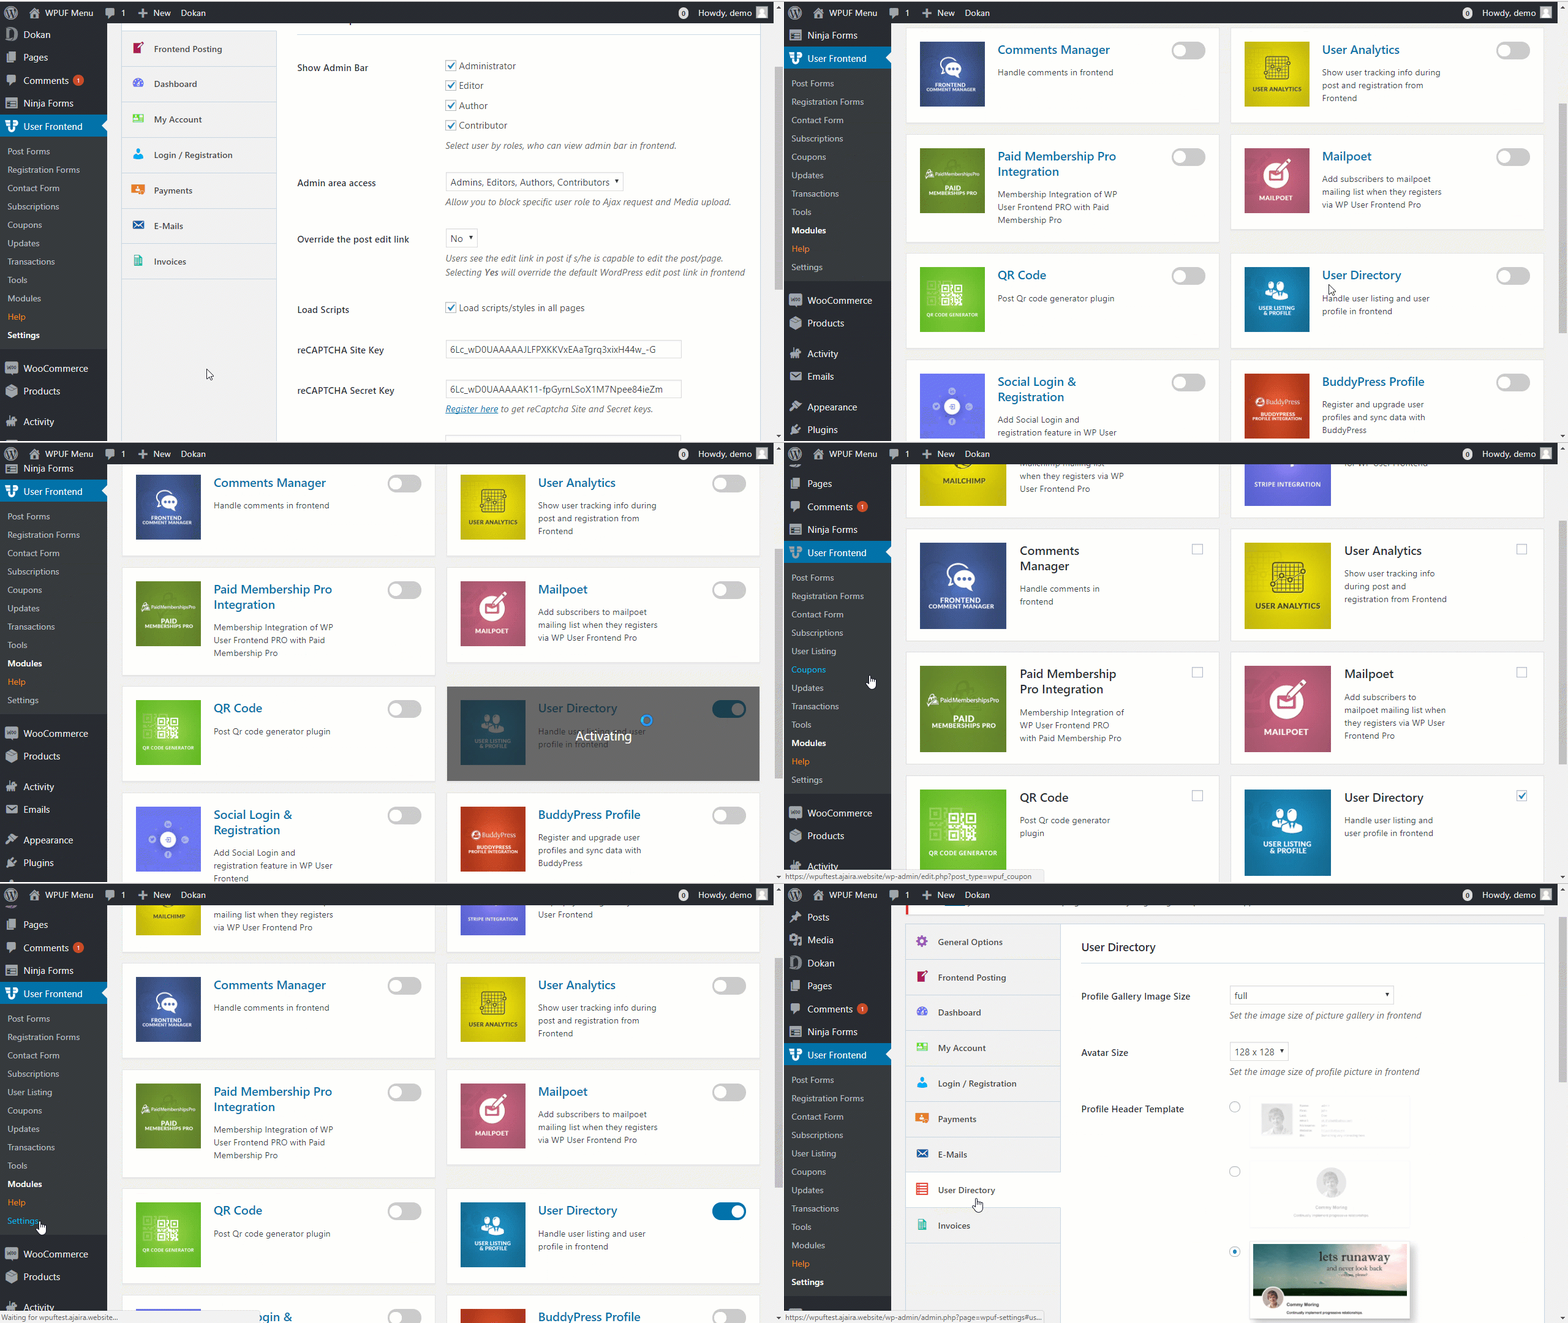
You can very easily activate the User Directory in WP User Frontend. Simply go to the modules menu of WP User Frontend and find the User Directory from the list of modules. Then click on the toggle button at the top right corner of the User Directory to activate it. It is as simple as that. For a live demo of how to activate the User Directory take a look at the video above. After activation, you get a brand new icon naming User Listing in the menu & User Directory in the settings.
What's in User Listing
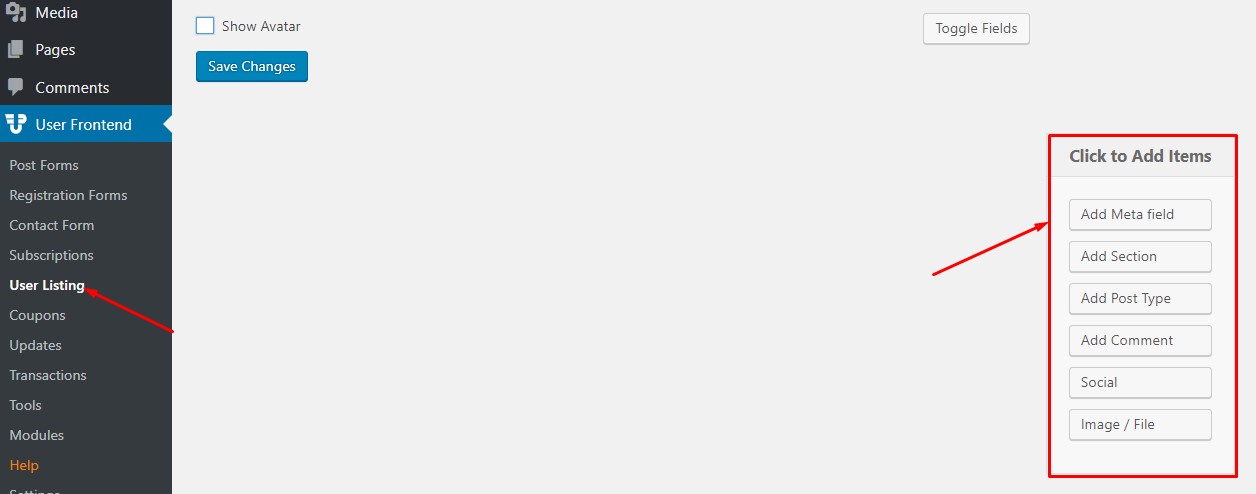
After getting to User Listing, this is how the page looks like. The menu of user listing consists of some items that you can add to manage your user directory. Add Meta Field, Add Section, Add Post Type, Add Comment, Social, Image/file are the attributes present. You can add these items accordingly but to manage user directory, you will only require the ‘Add Meta Field' option.
Let's find out how it works
Video Preview of the User Listing settings (Backend to Frontend)
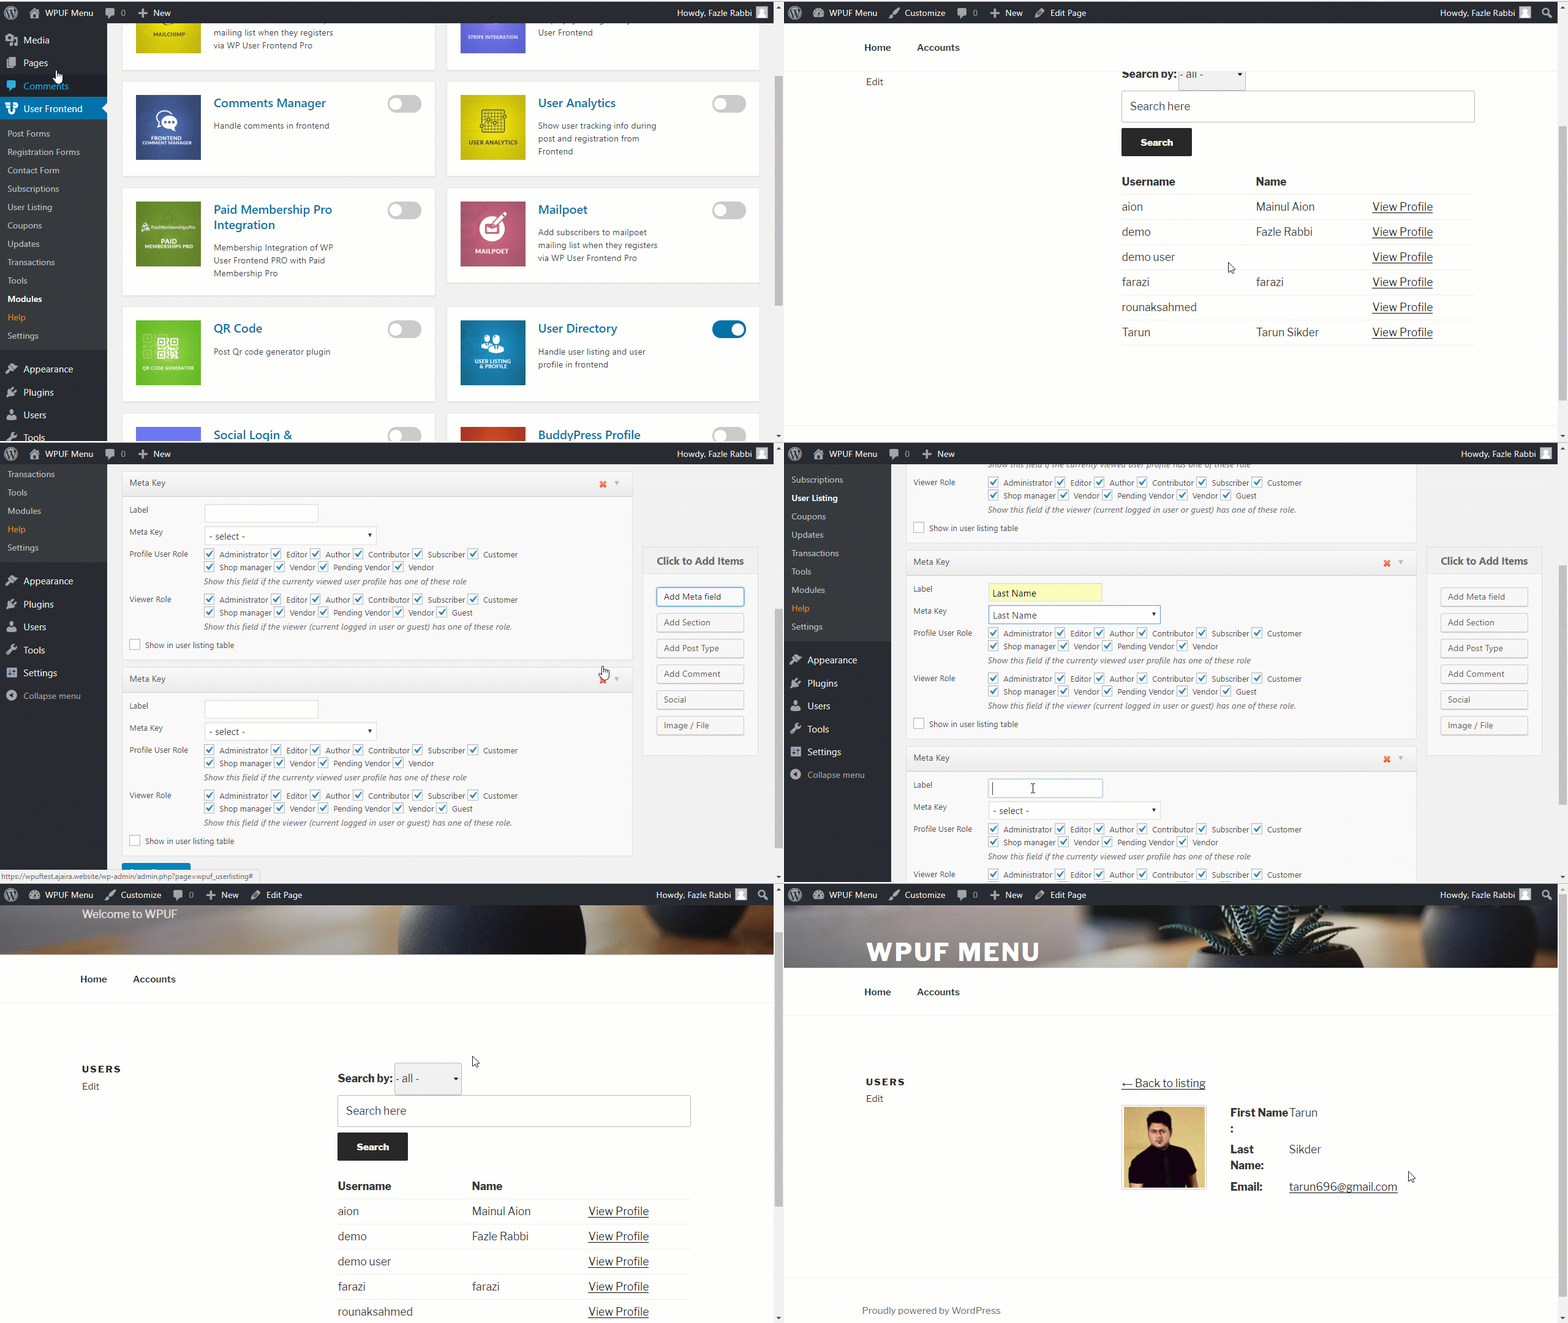
The video above illustrates the User Listing settings of the user directory that are taking place from the backend to the frontend. Firstly, you will need to click on ‘Add Meta Field' from the user listing menu items. Add meta fields accordingly depending on the number of meta items you want to view in your user directory in the frontend. It is currently showing 3 meta fields First Name, Last Name, and E-mail. All these three meta key items are displayed in the frontend when you list all the users. More details on this user and search directory settings are explained below.
User Listing and Search Directory settings
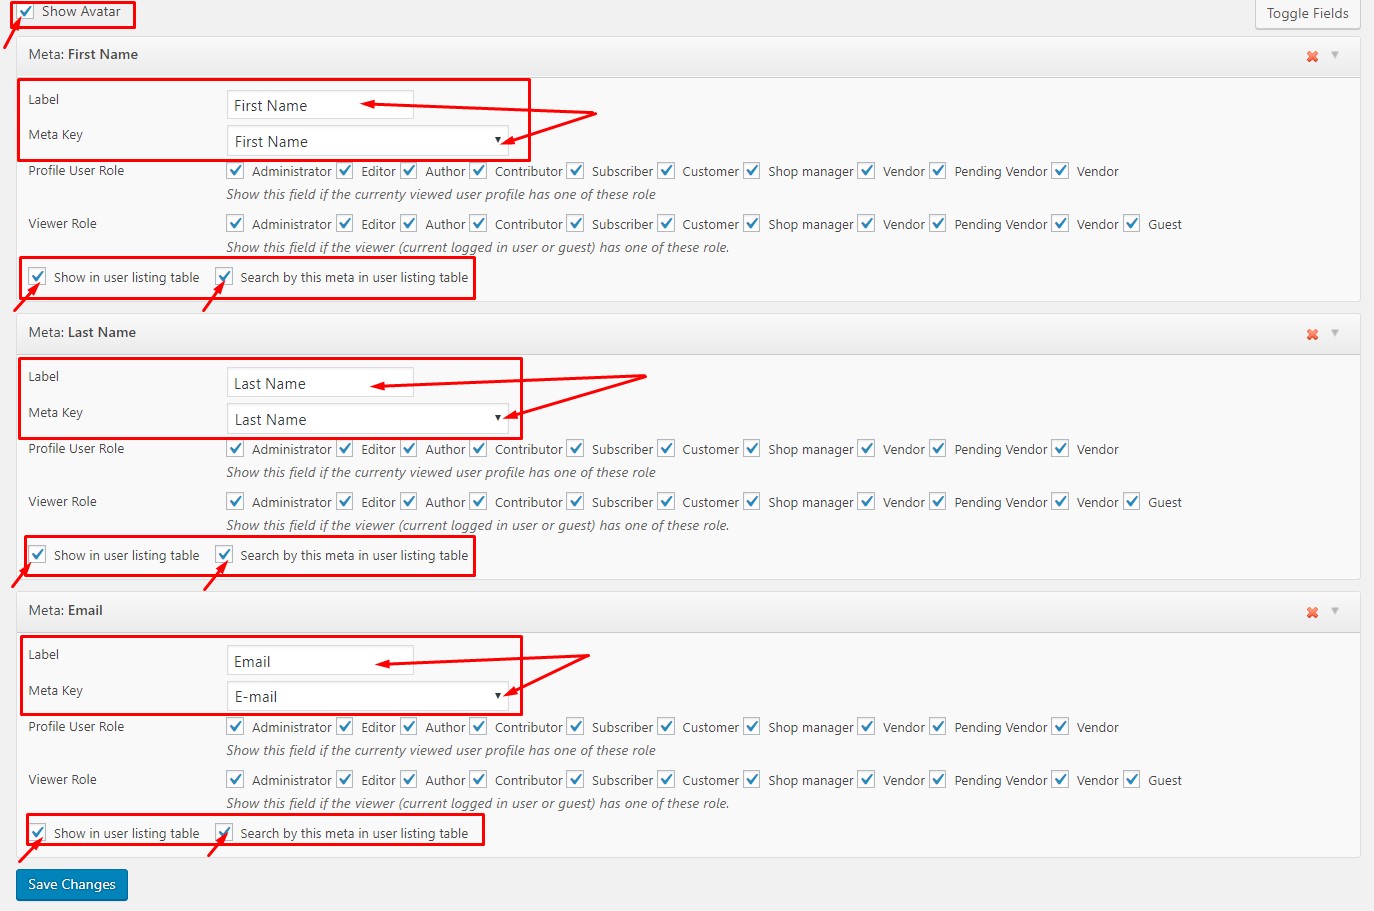
Firstly check the ‘Show Avatar' box at the top left corner if you want to view your user's image. Then add the meta field by clicking on ‘Add Meta Field' as shown in the video above. In this case, there were 3 meta fields that were used. The first one is labeled as the First Name with the meta key First Name selected from the drop-down option, the second one is labeled as the Last Name with meta the Last name chosen from the drop-down menu. Similarly for the third one also Email is chosen for both Label and Meta Key fields.
Now check the box ‘Show in user listing table' and ‘Search by this meta in user listing table' of each meta key field added if you want any of those meta fields to be shown or searched in the user listing table.
User Profile & Listing style settings
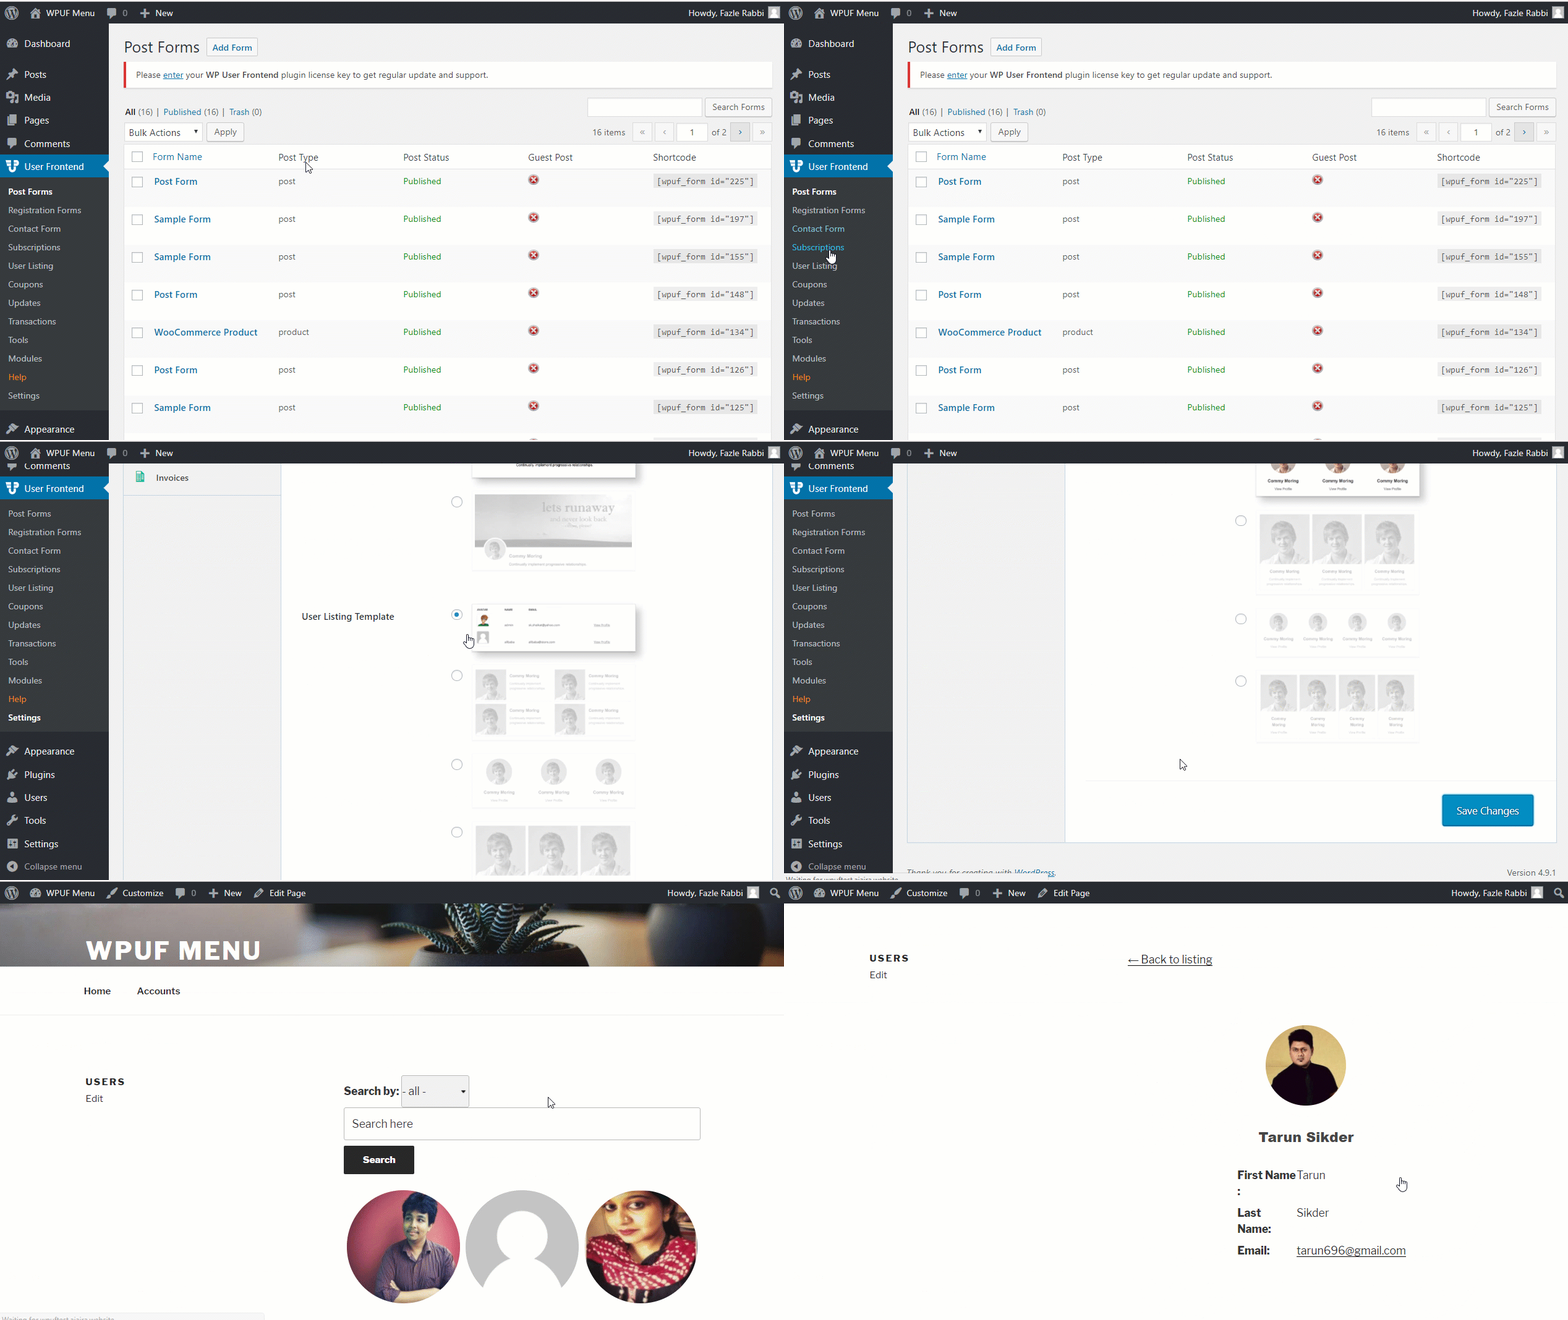
As the title suggests this setting allows you to change the user profile and listing style from the pre-installed templates. The video demonstration above shows how you can very easily change the user listing and profile style. Just simply get to the setting menu of WP User Frontend and find and click on the tab named User Directory. In the User Directory tab, there are a number of available profile headers and user listing templates. Simply choose from any of those listed templates and make sure to save the changes. It will change the profile and listing style right away with your chosen template.
Final Thoughts
We hope this detailed post about the settings of the user directory and its features in WP User Frontend will come into good use. We have tried to keep the user directory settings as simple and user-friendly as possible. Yet if you feel there are ways we can make it better or easy, do let us know in the comments below.
If you haven't tried WP User Frontend yet, do give it a shot or try its demo today.
Hope this post was helpful to all of you. And also if you are a WordPress enthusiast and want to know more about our products and services then do pay a visit to our blogs that we publish regularly just for you.