
How To Build Interactive Forms For Your Website With Free WordPress Form Maker
Whether your site's purpose is about traveling, entertainment, informing, persuading, or marketing, you must have to interact with your website visitors to know their stance and draw their attention so as to drive them to the action that you want them to do.
If you want to interact with your website visitors efficiently, website forms come first to the spot. With web forms, you can get subscribers, user opinions, get object data (like profile pictures, documents, etc.) of your users, and many more.
However, if you don't have any coding know-how, creating web forms will be really difficult for you. Not to worry! Today in this tutorial we will show you how you can easily create web forms with WordPress. Now, let's dive in!
Points to Remember When Using a WordPress Form Maker
While creating a form with a WordPress Form Plugin users should consider the following best practices:
- Never include too many fields on a form. Research suggests that forms with fewer fields have more conversion rates.
- Never use redundant or any irrelevant fields on the form.
- The design of the form should be clean, uncluttered, and visually appealing.
- Use thank you page or a confirmation page when a user submits a form.
- You can use the reCaptcha field on your form to prevent spamming.
- If you have to embellish your form with a lot of consequential fields, you can use multistep forms. But, keep the steps within two or three so that you can have more conversions.
- Use the help text where it is necessary. Meaning that some fields may seem very technical and using help-text will make it understandable for your visitors who do not have any technical knowledge.
- The labels should be correctly aligned and precise.
- Check if the form is mobile responsive.
- If any information entered by the user is wrong then show him an error message with details.
- You can always do the A/B test to see which type of form design is more effective.
4 Easy Steps to Create a Form with a WordPress Form Builder
This in-depth tutorial will help you create web forms for free using a WordPress form plugin.
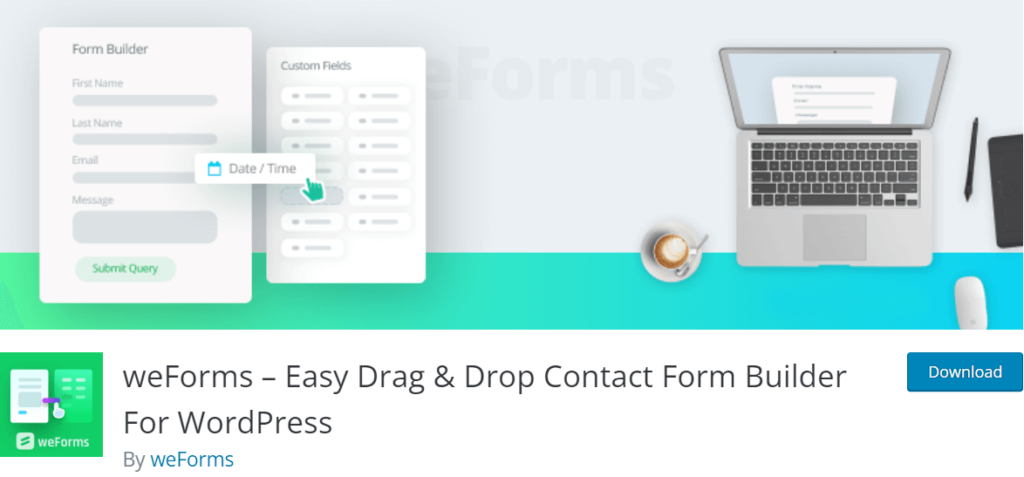
weForms is a free, easy-to-use, mobile responsive WordPress form builder plugin that is suitable for beginners as well as advanced users.
Currently, the plugin has 5000+ active installs with an impressive five-star rating. This WordPress form plugin can be used to create any type of form for your WordPress site.
Here's how you can create interactive forms using weForms.
Step 1: Install the plugin “weForms”
Navigate to your WP Admin Dashboard → Plugins → Add New.
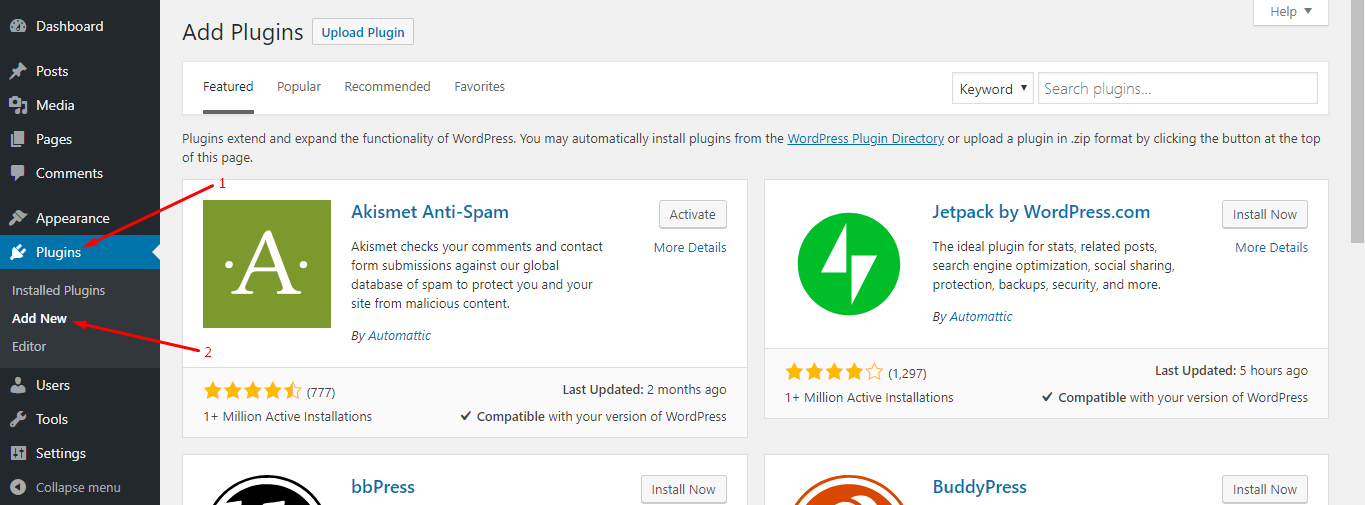
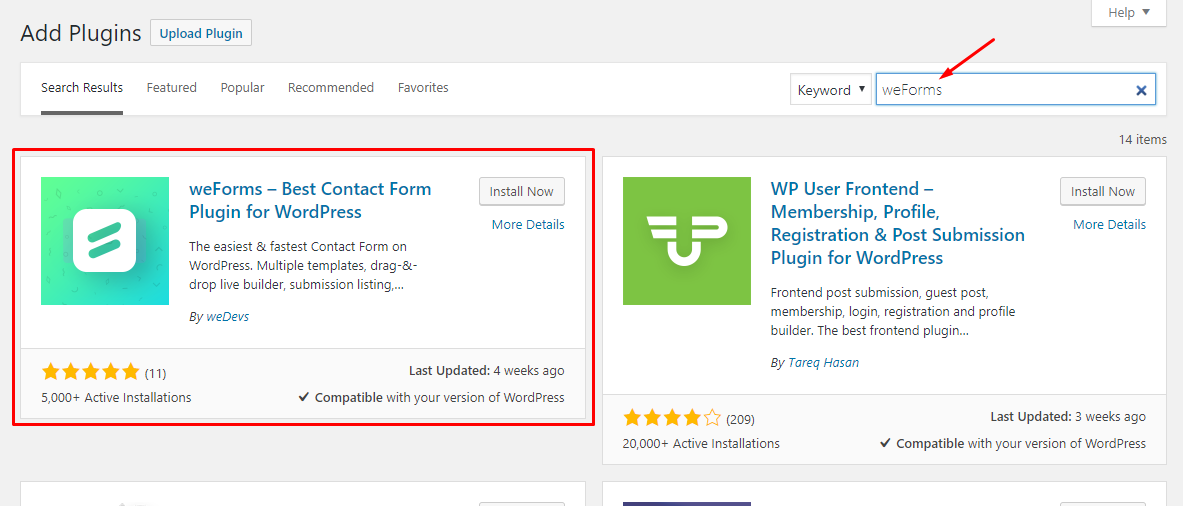
Next, type in “weForms” in the search bar. After that you will find the plugin in the search results:
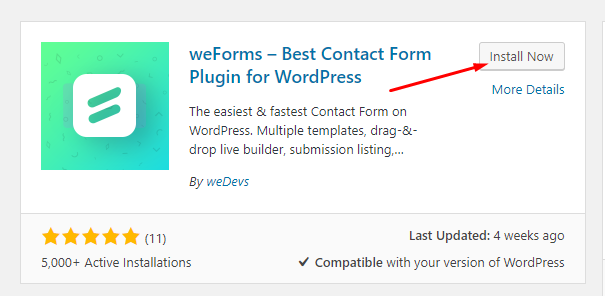
Click on the “Install Now” button to install the plugin.
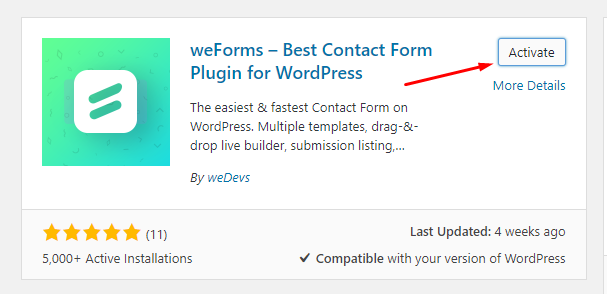
After installing the plugin, hit the “Activate” button to make the plugin up and running:
Step 2: Select a template
Navigate to WP Admin Dashboard → weForms → Add Form.

After clicking on the “Add Form” button, you will get a bunch of predefined templates which will help you create forms faster:
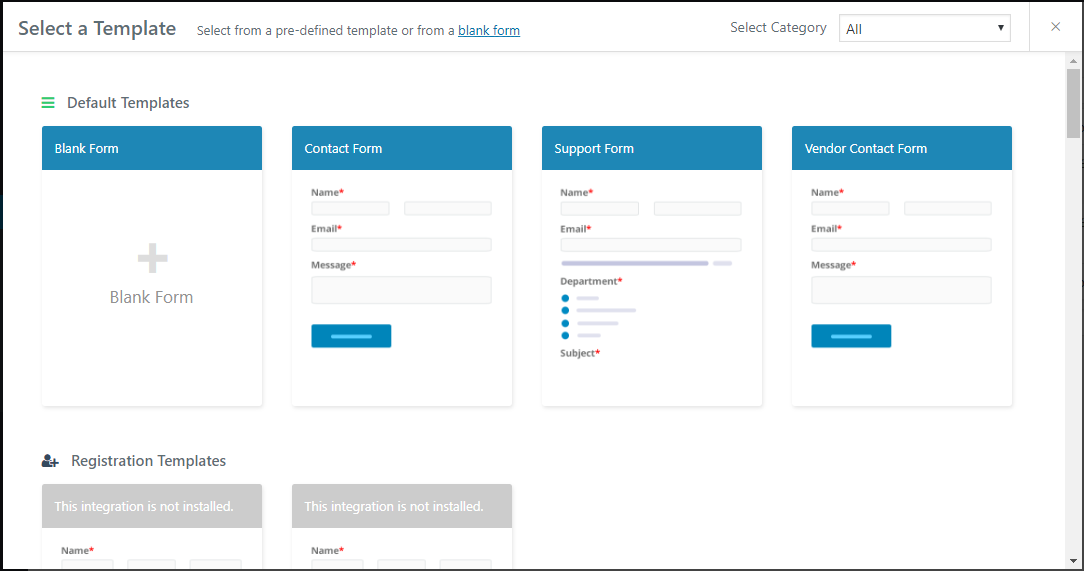
If you want to create forms from scratch then use the Blank Form template otherwise choose a template that suits your need.
Step 3: Create a form using the form maker
If you hover your mouse on the Blank Form template then you will find a “Create Form” button.
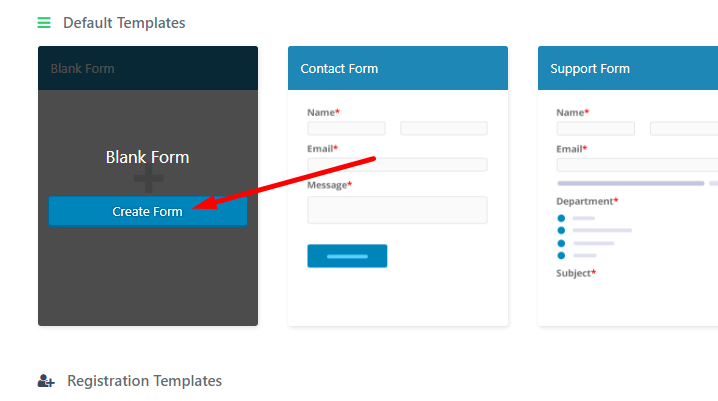
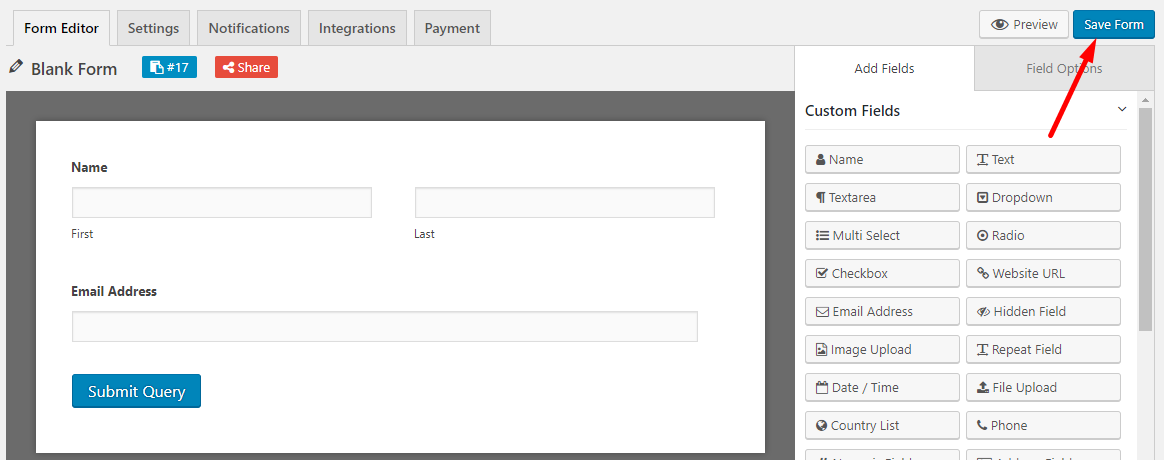
Clicking on the button will take you to the form editor:

Assume that you want to create a subscription form for your subscribers and you want to include the following fields in the form:
- Name: To enter this field, simply click on the “Name” field right from the Add Fields options of the form editor.

- Email: Use the “Email Address” field to include this option in the form you want to create.
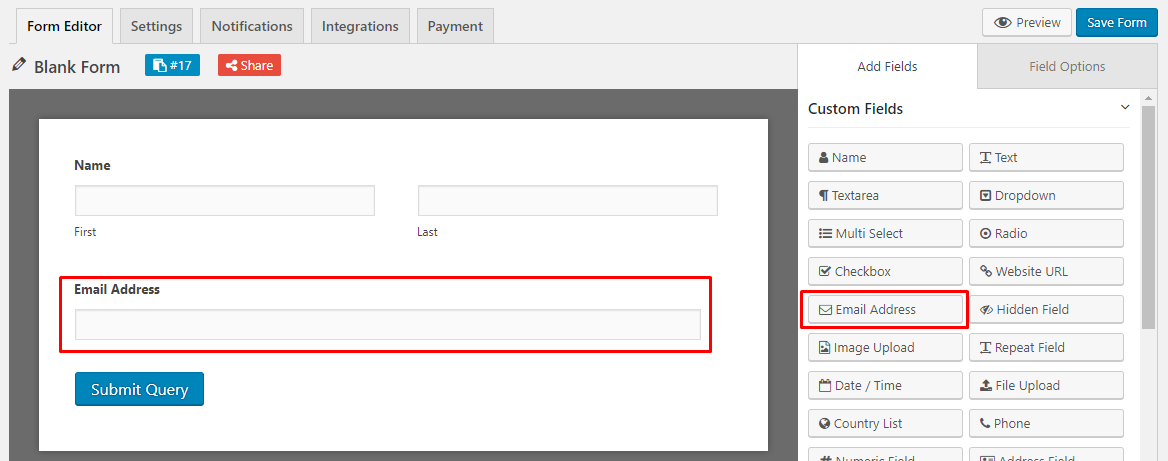
Now, click on the “Save Form” button to save the form data that you have entered just now.
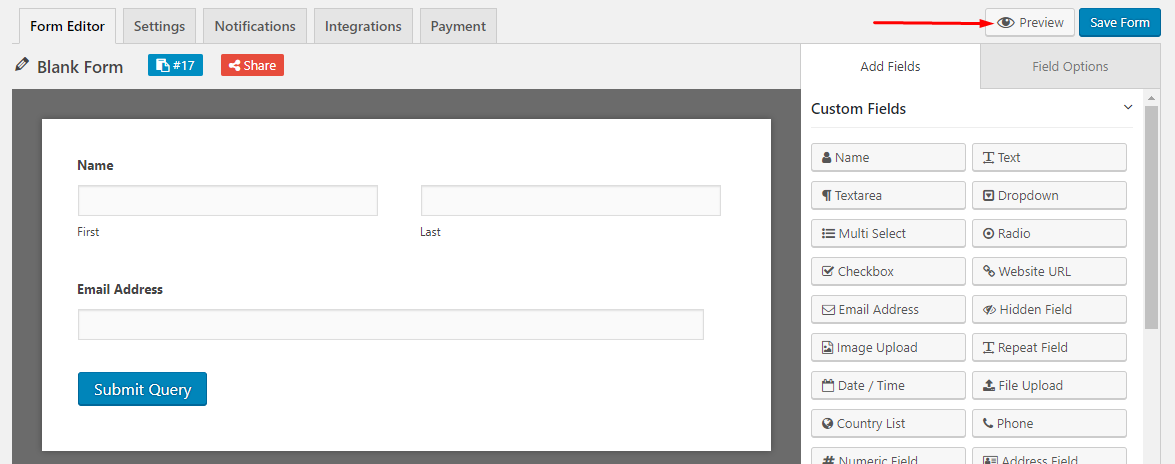
What's more interesting is that you can also preview the newly created form from the frontend by using the “Preview ” button. Click on the “Preview” button to see how the form looks from frontend:
Step 4: Publish the form
There are two methods of publishing a form. One is using the shortcode method and the other is using the “Add Contact Form” button method.
Method 1: Using the shortcode
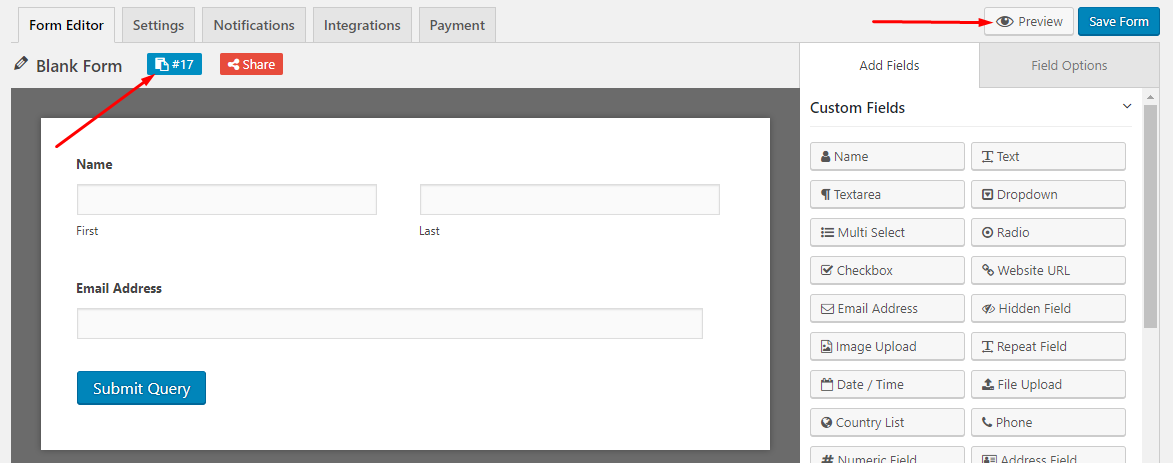
Next, you have to copy the shortcode and paste the code to a page or post. If you click on the shortcode, the code will automatically be copied to the clipboard:
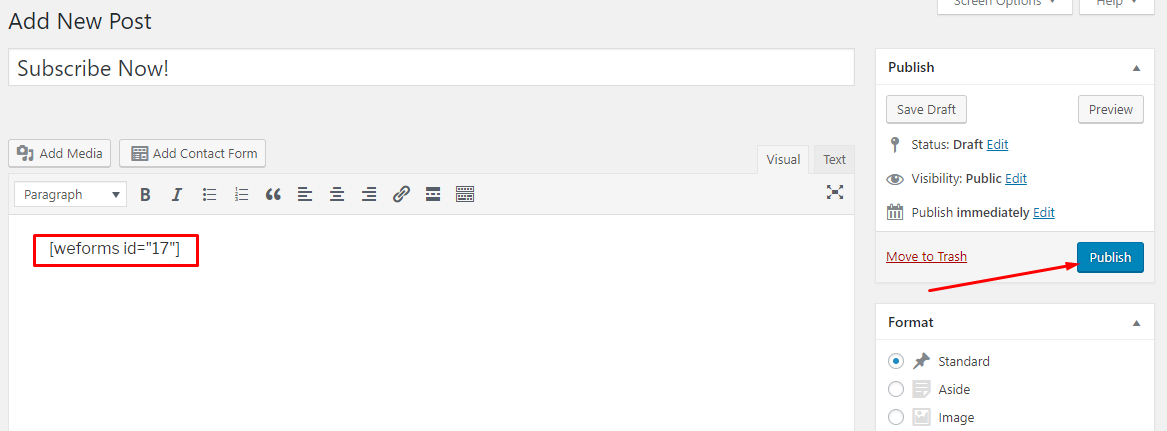
In order to publish the form, create a new post or a new page and paste the shortcode over there. Here, we are creating a new post:

Next, paste the shortcode and hit the “Publish” button:
Now, you are done with creating a simple “Subscription” form for your visitors. Here is a preview from frontend:

Method 2: Using the “Add Contact Form” button
This method is much easier than Method 1, as you can directly select the form without having to copy the shortcode.
Go to WP Admin Dashboard → Pages → Add New → Click on the “Add Contact Form” button:

Now, you can select any form from a drop-down menu:
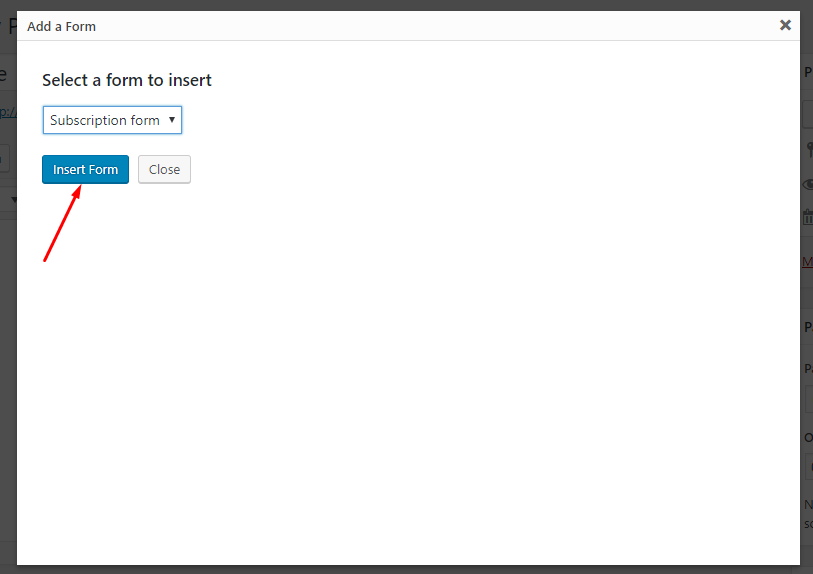
Use the “Insert Form” button to finalize the selection. You will see that the shortcode has automatically been pasted there:

Finally, hit the “Publish” button to publish the form.

Bonus Tips: Use the “Share” Button to Share Your WordPress Forms with Others
You can simply click on the “Share” button to use the link to view the form to any person and get a response from that person. To do so, simply click on the “Share” button:
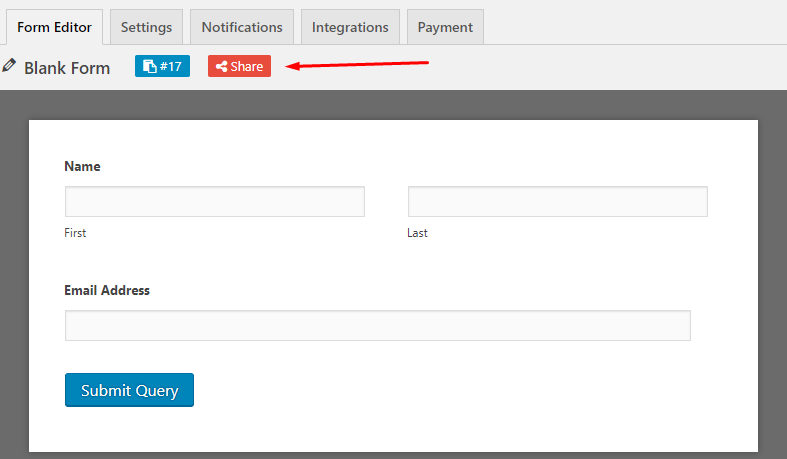
Next, hit the”Enable” button:
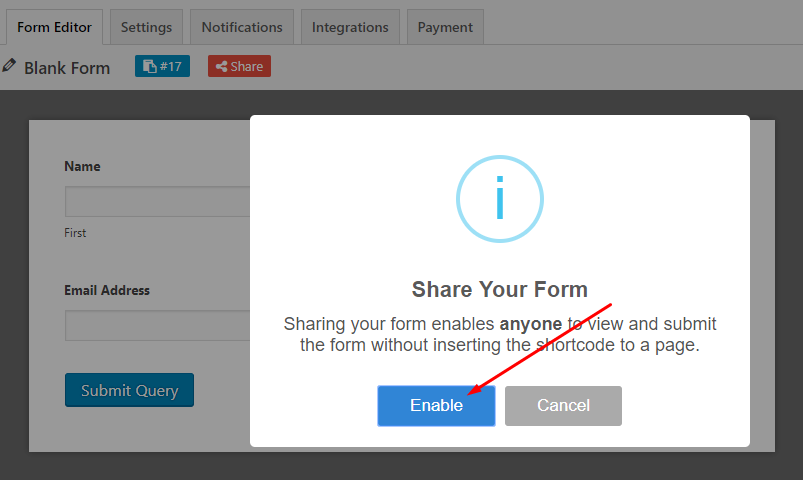
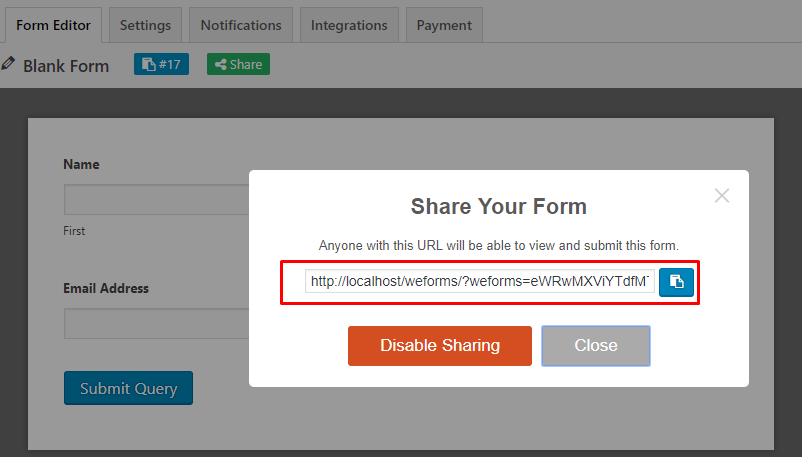
Now, you will get the URL of the form:
Build An Interactive Form with WordPress Form Maker
Form building with weForms will give you a seamless experience because it supports almost all of the cutting-edge fields like reCaptcha, multistep functionality, mobile usability, google maps, and so on.
Though the premium version includes all the advanced functionalities, the free version can also be sufficient if you're just starting off with forms for your WordPress site. Follow the link below to get the free version now!